Starting your first cannabis grow can feel exciting, but it can also feel like a lot to manage at once. New growers often have many questions before they even begin. They want to know what equipment they need, how much space to use, what kind of plant to choose, how often to water, and how long the full process will take. That is why a first-time cannabis grow checklist can be so helpful. It gives you a clear starting point and helps you move through each stage in a simple way.
A checklist does more than give you a list of supplies. It helps you prepare for the whole grow from start to finish. Instead of guessing what to do next, you can follow a plan. This makes the process easier to understand and easier to manage. A good checklist helps you stay focused on the basics, which is important when you are new. Many early problems happen because beginners skip simple steps or try to do too much too fast. A checklist helps prevent that.
For a first grow, the goal is not to make everything perfect. The goal is to build a smooth and steady process. That starts with planning. Before a seed is planted or a clone is placed in a pot, it helps to know what kind of setup you want, how much time you can give the plants, and what kind of growing method makes the most sense for your space. Some people grow indoors because they want more control over light, temperature, and privacy. Others grow outdoors because they have the right climate and want a lower-cost setup. Both options can work, but each one has different needs. A checklist helps you compare those needs before you begin.
It also helps to think about plant choice early. Not all cannabis plants grow the same way. Some stay smaller. Some grow taller and take more time. Some are easier for beginners because they are more forgiving. Others need closer attention. A first-time grower does better when the plant matches the grow space, the budget, and the skill level. That is why choosing the right genetics is one of the first parts of a smooth start. The wrong plant in the wrong space can create stress before the grow really begins.
Another reason a checklist matters is that cannabis changes as it grows. A new grower needs to understand that the plant does not stay the same from week to week. It moves through stages. It starts with germination, then becomes a seedling, then enters vegetative growth, and later moves into flowering. Each stage has its own needs. The amount of light, water, nutrients, and care can change over time. When you know these stages ahead of time, the process feels less confusing. You can prepare for what comes next instead of reacting at the last minute.
Many first-time growers also run into avoidable mistakes. They water too often, give too many nutrients, use the wrong light, or try to grow too many plants at once. These mistakes are common because beginners are often eager to help the plant, but too much care can be just as harmful as too little care. A checklist brings attention back to the basics. It reminds you to watch the environment, keep your setup clean, check water needs, and stay patient. In many cases, simple habits lead to better results than expensive gear or complicated methods.
A smooth start also depends on having the right tools ready before problems happen. This does not mean you need the most advanced equipment. It means you should understand what each tool is for. A light supports plant growth. A timer keeps the light schedule steady. A fan helps with airflow. A thermometer and hygrometer help you track temperature and humidity. Containers, growing medium, nutrients, and pH tools all play a role as well. When you know what these items do, you are less likely to buy things you do not need and more likely to build a setup that works.
This article is designed to guide first-time growers through that early learning curve. It will explain what to know before starting, what supplies belong on a beginner checklist, and how to choose between indoor and outdoor growing. It will also cover seeds and clones, strain types, lighting, watering, nutrients, growing stages, timeline, common mistakes, and harvest basics. Each section is meant to answer the kinds of questions beginners often ask when they want a clear and manageable way to begin.
The main idea is simple. A successful first grow usually starts with preparation, not guesswork. You do not need to know everything on day one, but you do need a clear path. A first-time cannabis grow checklist gives you that path. It helps you stay organized, understand the process, and make better decisions from the beginning. When you start with a plan, the whole grow becomes easier to follow, easier to learn from, and more likely to stay on track.
What Should You Know Before You Start Growing Cannabis for the First Time?
Starting your first cannabis grow can feel exciting, but it can also feel like a lot at once. Many beginners focus right away on seeds, lights, or soil. Those things matter, but it is smarter to begin with the basics. Before you grow anything, you need to understand what kind of project you are taking on. A first grow usually goes better when you plan ahead, keep things simple, and know what your plant will need from the start.
This early stage is where many new growers either set themselves up for success or make the process harder than it needs to be. Before you buy equipment or plant a seed, take time to think about the legal side, the cost, the space you have, and the amount of time you can give each day. These simple questions can help you avoid common beginner problems later.
Check Your Local Laws First
Before anything else, make sure growing cannabis is allowed where you live. This step is very important. Cannabis laws are not the same everywhere. In some places, home growing is allowed for adults. In other places, it may still be restricted or fully illegal. Some areas allow only a certain number of plants. Some have rules about where the plants can be kept, such as out of public view or inside a locked space.
Even if cannabis is legal in your area, that does not always mean every form of growing is allowed. There may be limits on plant count, home storage, or the type of property where you can grow. Renters may also have extra rules from landlords or property managers. A person may live in a place where state law allows home growing, but a lease may still ban it.
Checking the rules before you start can save you from wasting money or creating legal problems for yourself. It also helps you make better choices about your setup. For example, if the law says your plants must stay out of sight, that may affect whether you grow indoors or outdoors. If there is a plant limit, that tells you how many seeds or clones to buy.
Set a Budget Before You Buy Anything
A first-time grow does not need to be very expensive, but it does cost money. That is why it helps to set a budget before you start shopping. Many beginners spend too much at the start because they buy equipment they do not really need. Others spend too little on the wrong things and then struggle with weak plants, poor lighting, or bad airflow.
Think of your grow budget in two parts. The first part is the setup cost. This can include seeds, pots, soil or another growing medium, lights, fans, timers, and simple tools like a thermometer or pH meter. The second part is the ongoing cost. This can include water, nutrients, electricity, replacement items, and other small supplies you may need as the plants grow.
Your budget should match your goal. If you are only growing one or two plants for the first time, you do not need a large or advanced setup. A small, clean, easy-to-manage space is often better for beginners. Starting with a basic setup also gives you a chance to learn before you spend more money later.
A clear budget keeps you focused. It helps you spend money on the most important items first. In most cases, beginners should put more of their budget into quality lighting, proper airflow, and a good growing medium. Fancy tools and extra add-ons can wait.
Know How Much Space You Really Have
Space is one of the biggest factors in planning a first grow. Before you choose seeds, pots, or equipment, look at the space you can truly use. This includes not only the size of the area, but also how private, safe, and easy it is to manage.
Some people have a spare room, a closet, a grow tent, a balcony, or a backyard. Each option comes with limits. Indoor spaces may offer more control, but they may also have less room. Outdoor spaces may give plants more room to grow, but weather, privacy, and pests become bigger concerns.
When thinking about space, do not just picture the plant itself. You also need room for containers, lights, fans, and enough space to reach the plant for watering and care. A crowded grow area can make it hard to check leaves, spot problems, or adjust your setup. Poor spacing can also reduce airflow, which may raise the risk of mold or pests.
Plant size matters too. Some cannabis plants stay short and compact. Others can become very large, especially in the vegetative stage if they have room and time to grow. This is why your space should help guide your choice of strain and setup. A small space usually calls for a smaller, easier plant and a simple setup that is not hard to control.
Decide How Much Time You Can Give Each Day
Cannabis plants need regular care. They do not need constant attention every minute, but they do need steady care from start to finish. Before you begin, be honest about how much time you can give each day or each week.
A first grow is easier when you can check your plants daily. These checks do not have to take long. You may only need a few minutes to look at the leaves, feel the soil, check the temperature, and make sure your light and fan are working. Still, those few minutes matter. Small problems can grow fast if you do not notice them early.
Think about your normal routine. Do you travel often? Do you work long hours? Will you be able to water your plants on time and respond if something goes wrong? These questions are important because plants are living things. They cannot be left alone for long periods without planning.
The more simple your setup is, the easier it will be to fit into your daily life. That is one reason many first-time growers do better when they start with fewer plants and fewer variables. It is better to care for one or two plants well than to take on too much and fall behind.
Start Small and Keep It Simple
One of the most helpful things a beginner can do is start small. Many people get excited and want to grow several plants right away. That may sound like a good idea, but it often creates more work, more cost, and more chances for mistakes.
A small grow is easier to watch, easier to manage, and easier to fix when something goes wrong. It also gives you a better chance to learn what healthy growth looks like. When you only have one or two plants, it is easier to notice changes in color, leaf shape, growth speed, or watering needs.
Keeping things simple also means avoiding too many advanced methods at the start. You do not need to try every training method, nutrient line, or growing system on your first run. A simple grow with basic tools, a stable environment, and a manageable number of plants is often the best way to learn.
Starting small does not mean thinking small. It means building a strong base. Once you understand the basics, you can always grow more plants or try more advanced methods later. The goal of a first grow is not perfection. The goal is to learn the process, avoid major mistakes, and finish with a better understanding of how cannabis grows.
Before you start growing cannabis for the first time, focus on the basics that matter most. Make sure you understand the laws in your area, set a budget you can manage, look closely at the space you have, and be honest about how much time you can give your plants. Most of all, start small and keep your setup simple. A smooth first grow usually begins with good planning, not expensive gear or big ideas. When you take the time to prepare, you give yourself a much better chance of a healthy and successful start.
What Do You Need on a First Time Cannabis Grow Checklist?
Starting your first cannabis grow can feel like a lot at first. There are many tools, supplies, and choices to think about. The good news is that you do not need to buy everything at once or build a complex setup. A beginner grow works best when it stays simple, clean, and easy to manage. The goal is not to have the most advanced equipment. The goal is to give your plant the basics it needs to grow well from start to finish.
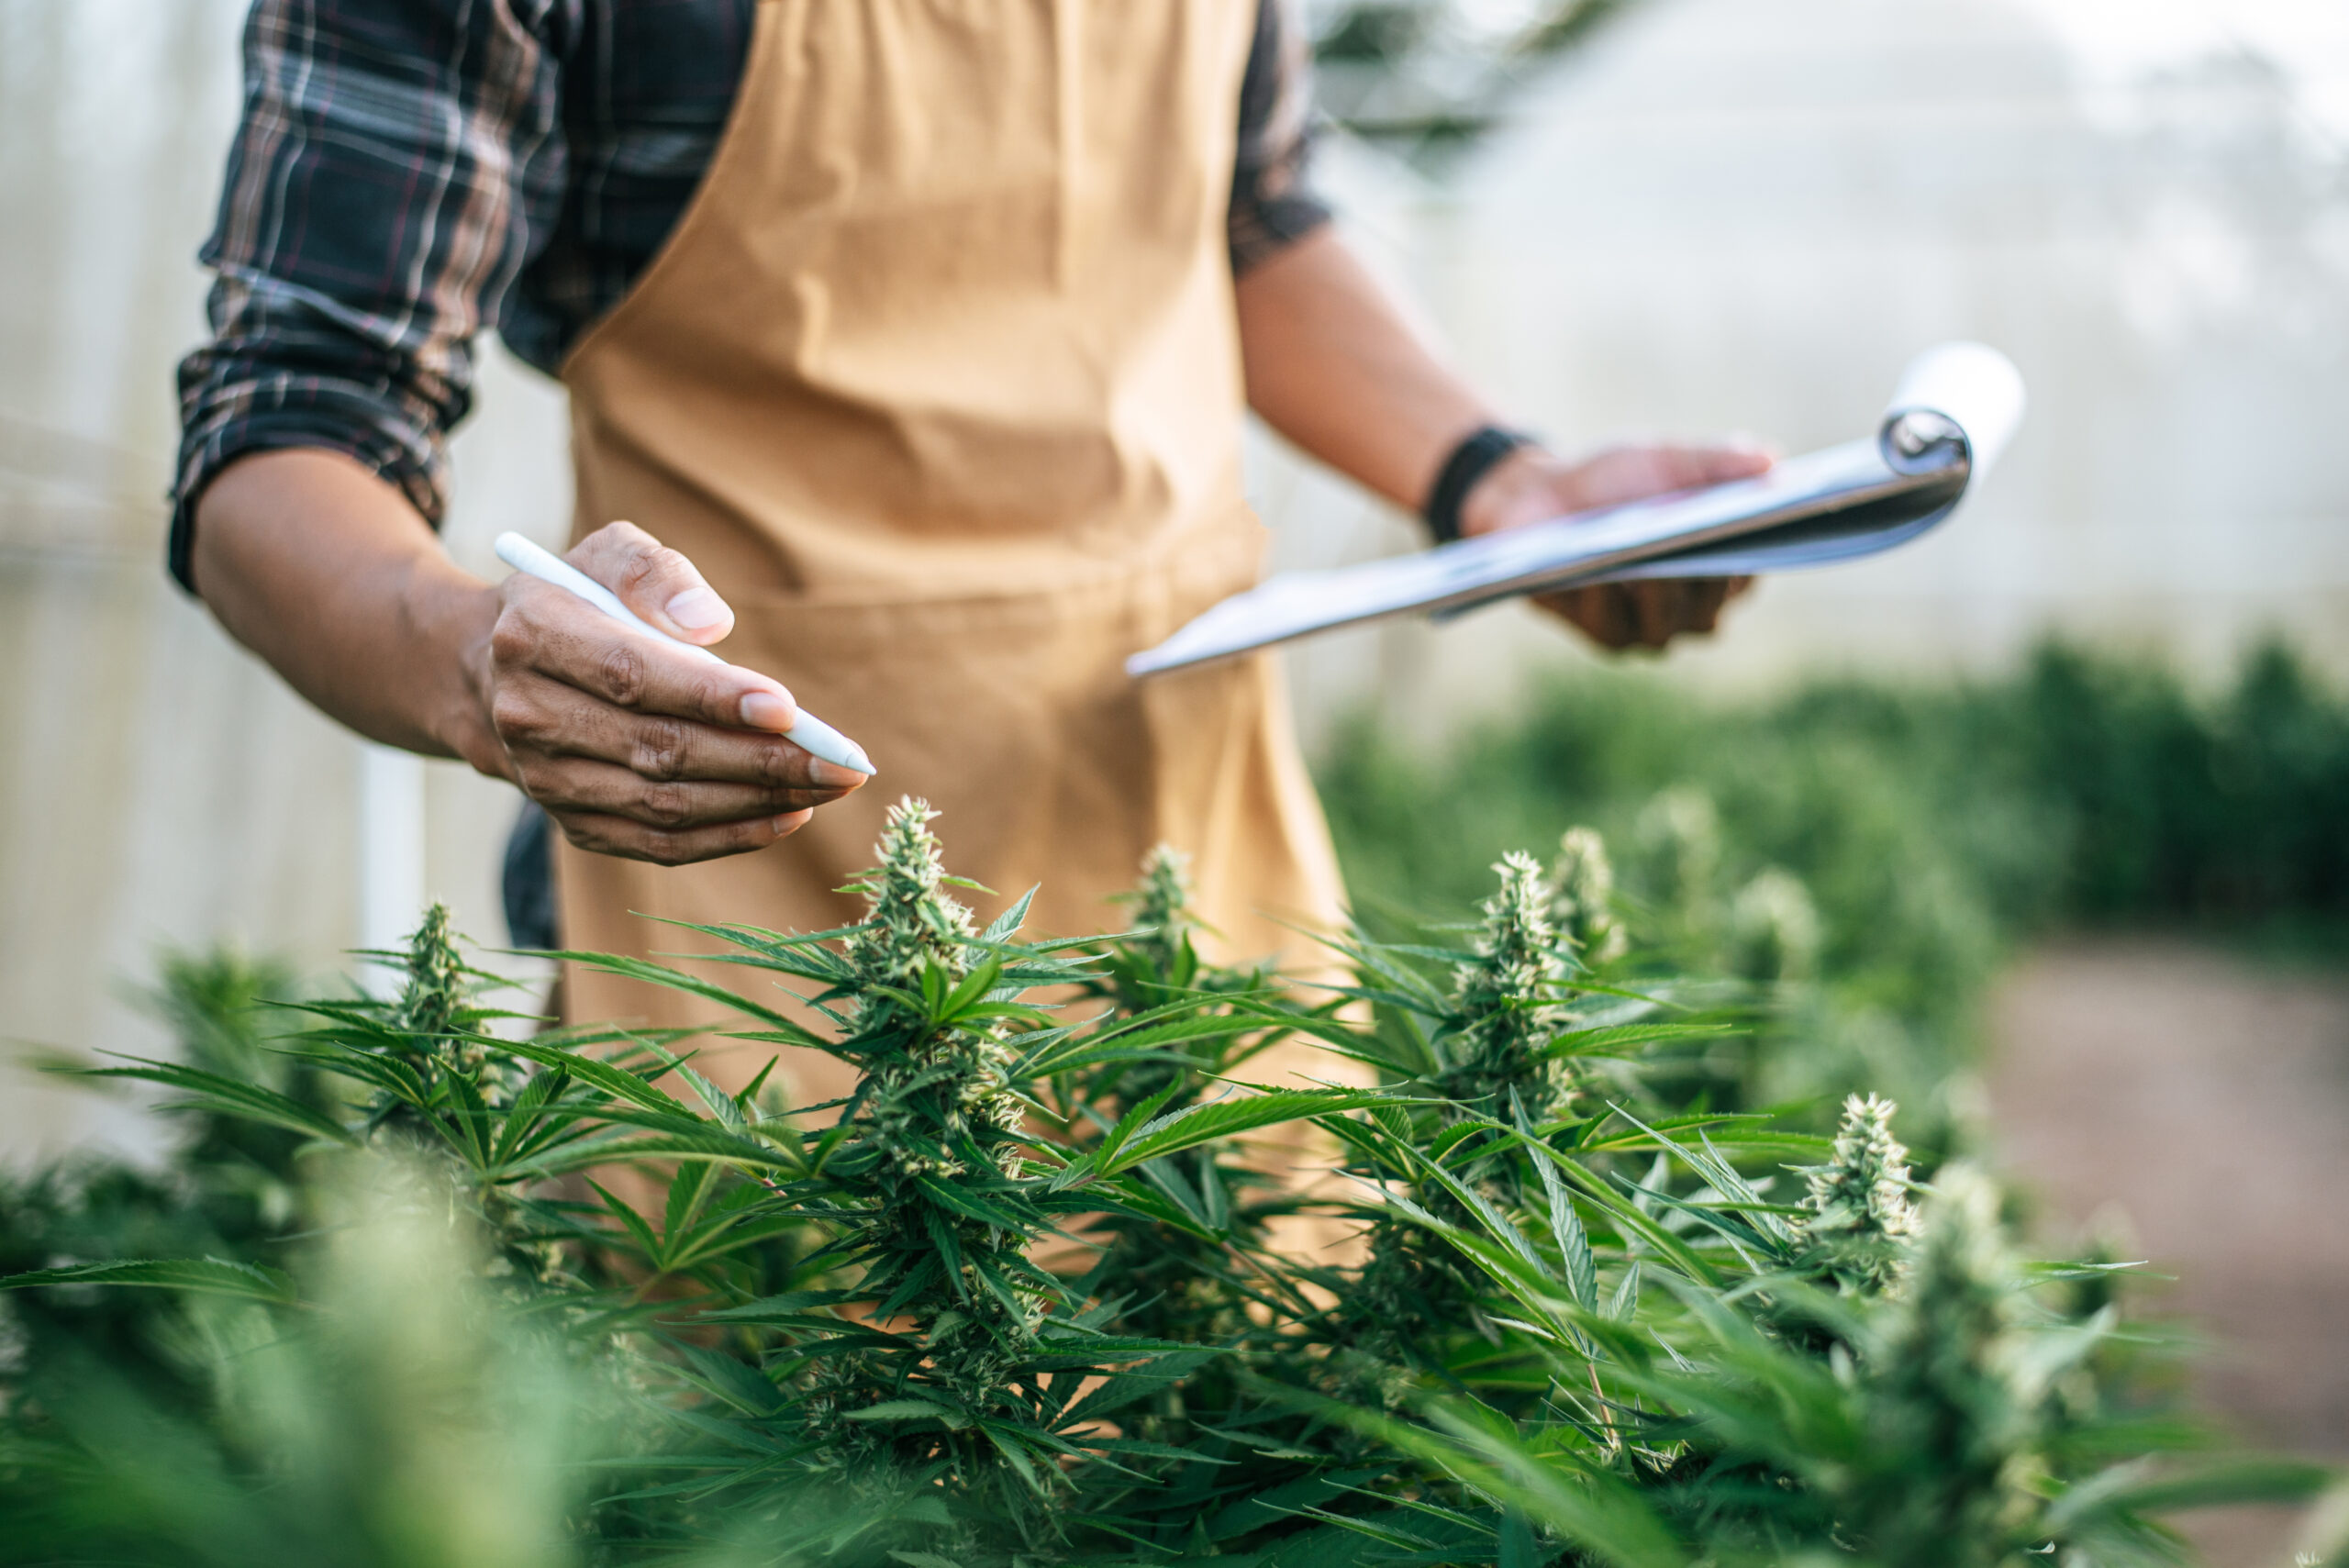
A first time cannabis grow checklist should cover the main things every plant needs. These include genetics, light, air, water, a good growing medium, the right container, basic nutrients, and simple tools to track the environment. Each item on the checklist has a purpose. When you understand what each one does, it becomes much easier to make smart choices and avoid beginner mistakes.
Seeds or Clones
The first thing on the checklist is the plant itself. Most beginners start with seeds or clones. Seeds are a common choice because they are easy to buy in different strains and types. Many first-time growers choose feminized seeds because these are more likely to grow into female plants, which are the ones that produce buds. This makes the process easier because the grower does not have to deal with male plants as often.
Clones are cuttings taken from a live plant. They are already growing and can save time because they skip the seed stage. Still, clones may be harder for beginners to find, and they can sometimes carry pests or disease if they come from an unreliable source. For many new growers, seeds are the more practical starting point because they are simple, clean, and easy to understand.
Grow Space
Every cannabis plant needs a place to grow. This can be a grow tent, a small room, a closet, or an outdoor area if local laws allow it. The space does not need to be huge, but it does need to be stable and clean. A good grow space gives the plant enough room for light, airflow, and healthy growth.
For indoor growing, a grow tent is often a smart choice for beginners. It helps control light, temperature, and humidity in one small area. It also keeps the grow organized. A small tent is often enough for a first grow, especially if you are only growing one or two plants. Starting small helps you learn the process without feeling overwhelmed.
Lighting
Light is one of the most important parts of the whole setup. Cannabis plants need strong light to grow healthy stems, leaves, and buds. Without enough light, plants may stretch, become weak, and produce poor results. For indoor growers, the grow light is one of the main items on the checklist.
Many beginners choose LED grow lights because they are easy to use, energy efficient, and give off less heat than some older light types. A good light should match the size of the grow space. It should not be too weak, but it should also not be too strong for young plants. Light placement matters too. If the light is too close, it can stress or burn the plant. If it is too far away, the plant may not grow well.
Containers
Cannabis plants need containers that give roots enough room to grow. Small plants can start in small pots, but they often need larger ones later if they are being transplanted. Some growers start in the final container right away, especially with autoflower plants, because this can reduce stress.
The container should have good drainage. This is very important. If water sits at the bottom for too long, roots can suffer and the plant may develop problems. Fabric pots are popular because they allow good airflow around the roots, but plastic pots can also work well if they drain properly. The best container is one that fits the plant size and helps keep the root zone healthy.
Growing Medium
The growing medium is the material where the roots live. It holds water, air, and nutrients around the plant. Soil is one of the easiest choices for beginners because it is simple to use and more forgiving than some other options. Good soil can help reduce stress for a first-time grower because it usually holds moisture well and supports steady growth.
Other options include coco coir and hydroponic systems. These can produce strong results, but they often need more close attention. A beginner may find it easier to start with quality soil and learn the basics first. A simple setup is often the best setup for a first grow.
Water Source
Water seems simple, but it matters a lot. Cannabis plants need clean water on a regular schedule. Poor water quality can lead to nutrient issues, pH problems, or slow growth. Many beginners use tap water, but it is still a good idea to know what is in it. In some places, tap water may be fine. In others, it may contain minerals or chemicals that affect plant health.
The key is not just having water. It is knowing when and how much to give. Overwatering is one of the most common beginner mistakes. A plant does not need constant wet soil. The roots also need air. This is why watering should be done carefully, with attention to how dry or moist the medium feels.
Nutrients
Cannabis plants need nutrients to grow well, especially during longer grows. These nutrients support leaf growth, root growth, and flower production. Many beginner nutrient lines come with simple feeding schedules that show what to use during each stage. That can make the process much easier.
Still, more nutrients do not always mean better growth. Too much feeding can cause nutrient burn, leaf damage, and stress. This is why beginners often do better when they start light and follow a simple schedule. It is also helpful to choose nutrients made for the type of medium you are using, such as soil or coco.
Airflow
Fresh air is another key part of the checklist. Plants need airflow to stay strong and healthy. In an indoor setup, stale air, trapped heat, and high humidity can all create problems. Weak airflow can also raise the risk of mold and pests.
A simple fan can help move air around the grow space. This helps strengthen stems and prevents hot or humid spots from building up around the plant. In larger indoor grows, an exhaust system may also be needed to move old air out and bring fresh air in. Even a small setup should not ignore airflow because it affects the whole environment.
Timer
A timer is a small tool, but it makes a big difference. Cannabis plants need a steady light schedule, especially photoperiod strains. Turning lights on and off at the same time each day helps the plant grow in a stable way. A timer removes the need to do this by hand and helps prevent mistakes.
For beginners, this is one of the easiest ways to make the grow more consistent. It also saves time and reduces stress. A timer is not expensive, but it can protect the plant from problems caused by irregular lighting.
Thermometer and Hygrometer
The grow space should not just look good. It should also stay within a healthy range for temperature and humidity. A thermometer shows the temperature, and a hygrometer shows the humidity. Many devices measure both in one small unit.
These tools help the grower spot problems early. If the space is too hot, too cold, too dry, or too humid, the plant may struggle. Seedlings, vegetative plants, and flowering plants may all do best in slightly different conditions. Without these tools, a grower is guessing. With them, the grower can make better decisions and keep the environment more stable.
pH Tools
pH is one of the most overlooked parts of a beginner grow, but it matters a lot. pH affects how well the plant can take in nutrients. Even if the grower is using good nutrients, the plant may still show problems if the pH is too high or too low.
A simple pH meter or pH test kit can help check water and nutrient solution before feeding. This helps avoid nutrient lockout and supports healthy growth. For a first grow, pH tools may seem like an extra step, but they can prevent many common issues and save time later.
Why a Simple Checklist Matters
A first grow does not have to be perfect. It just needs to be prepared. When a beginner has the basic tools ready before planting, the whole process becomes smoother. There is less rushing, less guessing, and less stress. Each item on the checklist supports a different part of the plant’s life. Together, they create a setup that is easier to manage and more likely to succeed.
The main things you need are seeds or clones, a clean grow space, strong light, proper containers, a good growing medium, clean water, basic nutrients, airflow, a timer, and tools to track temperature, humidity, and pH. These are the building blocks of a healthy first grow. When these basics are in place, a new grower can focus more on learning the plant and less on fixing preventable problems.
Should Beginners Grow Cannabis Indoors or Outdoors?
One of the first choices a new grower has to make is whether to grow cannabis indoors or outdoors. This choice shapes almost everything else, from cost and daily care to plant size and harvest timing. There is no single answer that works for everyone. The better option depends on your space, budget, climate, privacy, and how much control you want over the growing process.
For many first-time growers, this question can feel bigger than it really is. Both indoor and outdoor growing can work well. Both have benefits and both have challenges. The key is to understand how each setup works before you buy supplies or start seeds. When beginners choose the right setup for their situation, the whole process becomes easier to manage.
Indoor Growing Gives You More Control
Indoor growing means raising cannabis plants inside a controlled space. This can be a grow tent, a spare room, a closet, or another indoor area that can support lights, airflow, and stable conditions. Many beginners choose indoor growing because it gives them more control over the plant’s environment.
Light is one of the biggest reasons people grow indoors. Instead of depending on the sun, indoor growers use grow lights. This means you can decide how many hours of light the plants get each day. That is very helpful because cannabis needs different light schedules during different stages of growth. With indoor growing, you do not have to depend on weather, seasons, or changing daylight hours.
Temperature and humidity are also easier to manage indoors. If the room gets too warm, you can improve airflow or adjust the light setup. If the air is too dry or too humid, you can make changes more quickly than you could outside. This matters because cannabis plants can become stressed when the environment changes too much. Stable conditions usually lead to healthier growth.
Indoor growing also gives more protection from strong wind, heavy rain, sudden cold, and many outdoor pests. That does not mean indoor plants never have problems, but it does mean you have more power to prevent them. For a first-time grower, that control can make the learning process less stressful.
Indoor Growing Usually Costs More
The main downside of indoor growing is cost. A basic indoor setup often needs a grow light, timer, fan, containers, growing medium, and simple tools to check temperature and humidity. Some growers also add an exhaust fan, carbon filter, and pH tools. Even a small setup can cost more than an outdoor grow at the start.
Electricity is another factor. Grow lights and fans add to the power bill. New growers should think about both the startup cost and the monthly cost. A small indoor grow can still be manageable, but it is not as low-cost as putting a plant outside in the sun.
Indoor growing also requires more setup work. You need to place the lights at the right height, keep air moving, and watch the environment closely. That may sound like a lot, but many beginners like this style because it feels organized and easier to track. If you enjoy hands-on care and want a more controlled process, indoor growing may be a good fit.
Outdoor Growing Can Be Simpler and Less Expensive
Outdoor growing uses natural sunlight and fresh air instead of indoor equipment. This is often the cheaper option because the sun provides the light for free. You may still need containers, soil, water, and nutrients, but you do not usually need grow lights or as much equipment. For beginners on a tight budget, that can make outdoor growing more appealing.
Another benefit is space. Outdoor plants often have more room to spread out and grow large, especially if they are planted in the ground or in large containers. Bigger root space can support bigger plants, which may lead to a larger harvest. This is one reason some growers like outdoor growing.
Outdoor growing can also feel more natural and less technical. The sun rises and sets on its own. Air moves more freely. In some cases, there is less equipment to manage every day. For a beginner who has a safe outdoor space and good weather, this can be a simple place to start.
Outdoor Growing Depends More on Climate and Season
The biggest challenge with outdoor growing is that you cannot control the weather. Rain, heat, wind, humidity, and cold nights can all affect plant health. If your area has a short warm season, very high humidity, or sudden storms, growing outdoors may be harder for a beginner.
Timing is also important outdoors. You usually need to start at the right time of year so the plants get enough warm weather and sunlight. If you start too late or live in a place with an early cold season, your plants may not finish well. Outdoor growers must pay close attention to the local climate and the natural growing season.
Pests can also be a bigger issue outside. Insects, animals, and mold are all more common risks in outdoor gardens. A strong healthy plant can still do well outdoors, but a new grower needs to be ready to inspect plants often and act early if there is a problem.
Privacy and Security Matter in Both Setups
Privacy is an important part of choosing between indoor and outdoor growing. Indoor grows are usually easier to keep out of sight. A tent or room inside the home gives more privacy than a backyard or open outdoor area. This can be important for personal comfort, local rules, and general security.
Outdoor growing may be harder to hide, especially if plants become tall or produce a strong smell later in the season. Some growers have fenced yards or private spaces that work well, but not everyone has that option. Before choosing outdoor growing, a beginner should think carefully about visibility, smell, and the chance of unwanted attention.
Indoor growing can also have smell issues, especially during flowering, but odor control tools can help reduce that problem. Outdoor growers have fewer ways to control smell because the plants are in open air.
Which Option Fits Your Space and Daily Routine?
Your space and daily routine should guide your decision. Indoor growing is often better for people who do not have a private yard or who want to grow in a small, controlled area. It also works well for people who want to monitor the plant closely and make changes when needed.
Outdoor growing may be better for people who have a secure outdoor space, warm weather, and a smaller budget. It can also work well for people who want to use sunlight instead of paying for indoor lighting. Still, outdoor growing requires patience and flexibility because nature does not always cooperate.
It is also important to think about how much time you can give the plants. Indoor grows may need more regular checks because the whole environment depends on you. Outdoor plants still need care, but the sun and outdoor airflow do part of the work. Neither option is fully hands-off, but they ask for different kinds of attention.
A Good Beginner Choice Depends on Your Situation
Many first-time growers assume outdoor growing is always easier because it seems more natural. Others assume indoor growing is always better because it gives more control. In truth, the best beginner setup is the one that matches your real conditions.
A person with no yard, a need for privacy, and a willingness to buy basic equipment may do better indoors. A person with a secure outdoor area, good climate, and a limited budget may do better outdoors. The wrong setup can make growing feel harder than it needs to be. The right setup can make the learning process smoother and more rewarding.
Beginners can succeed with either indoor or outdoor cannabis growing, but each option comes with trade-offs. Indoor growing gives more control over light, temperature, humidity, and privacy, but it usually costs more and needs more equipment. Outdoor growing often costs less and gives plants more natural space, but it depends heavily on weather, season, and security. The best choice is the one that fits your budget, space, climate, and daily routine. When you choose the setup that matches your situation, your first grow is more likely to start smoothly and stay on track.
Should First Time Growers Use Seeds or Clones?
Choosing between seeds and clones is one of the first big steps in a cannabis grow. Both can work well, but they are not the same. A first-time grower should understand how each one works before making a choice. The right option depends on your goals, your budget, your setup, and how simple you want the process to be.
Seeds are the starting point of a cannabis plant. A seed grows into a new plant from the very beginning. A clone is a cutting taken from a healthy “mother” plant. That cutting is rooted and grown into a new plant. In simple terms, seeds are like starting from scratch, while clones are like making a copy of an existing plant.
What Are Cannabis Seeds?
Cannabis seeds are small, hard shells that contain the early form of a plant. When the seed is placed in the right conditions, it can sprout and begin growing. This process is called germination. Seeds are widely used by both new and experienced growers because they are easy to buy from many sources and give growers more strain choices.
Seeds can be a good fit for first-time growers because they are simple to store and easy to start with basic tools. You do not need a mother plant to use seeds. You only need the seed, a proper growing medium, water, warmth, and light at the right stage.
One thing to remember is that seeds take more time at the start. You must wait for the seed to sprout, develop roots, and grow into a seedling. That means there is a longer path from the start to harvest compared to clones. Still, many beginners are willing to accept that because seeds are easy to access and offer more variety.
What Are Cannabis Clones?
A clone is a cutting from a cannabis plant that has already been grown. Since it comes from a living plant, the clone has the same genetics as the mother plant. That means the clone should grow in a very similar way and produce similar results if cared for well.
Clones can save time because they skip the seed stage. They are already alive and already have the same traits as the plant they came from. This can help a grower know more about what to expect. If the mother plant is known to be healthy, strong, and female, the clone should share those same traits.
This may sound easier, but clones can also bring some challenges. They are often more delicate during the early stage. A clone may go through stress after being cut and moved. It may also carry pests or disease if it comes from an unhealthy source. For a beginner, that can create problems before the grow even gets going.
Seeds vs. Clones for a First Grow
Seeds and clones both have strong points, but they give beginners different experiences. Seeds give you a fresh start. They are usually cleaner because they are less likely to carry pests or plant disease. They also let you choose from many strain types and seed categories.
Clones can be more predictable because they come from a known plant. They can also shorten the grow timeline since the plant has already passed the seed stage. That sounds helpful, but clones depend a lot on quality. If the clone is weak or unhealthy, the grow may start with trouble.
For many first-time growers, seeds are the easier choice overall. They are easier to buy, easier to transport, and often easier to trust if they come from a reliable source. Clones can work well too, but they usually require more confidence in the source and more care right away.
Understanding Feminized Seeds
Feminized seeds are seeds that are bred to produce female plants most of the time. This matters because female cannabis plants are the ones that grow the buds most home growers want. Male plants do not produce the same bud yield. Instead, they produce pollen. If a male plant pollinates a female plant, the female may stop focusing on bud growth and start making seeds.
For a beginner, feminized seeds can make the process much easier. There is less worry about removing male plants later. This saves space, time, and effort. It also lowers the chance of accidental pollination, which can hurt the quality of the final harvest.
That is why many new growers start with feminized seeds. They make the garden more predictable and reduce one major problem that beginners may not know how to spot early.
Understanding Autoflower Seeds
Autoflower seeds grow into plants that begin flowering based on age, not changes in light schedule. This is different from photoperiod plants, which need longer nights to begin flowering. Autoflowers usually move from seed to harvest more quickly than many photoperiod plants.
This can be helpful for beginners who want a faster grow and a simpler light routine. Autoflowers are often smaller, which may also help people growing in tight spaces. They can be a good fit for small grow tents, balconies, or simple home setups.
At the same time, autoflowers have less room for error in some cases. Since they begin flowering on their own, they have less time to recover from stress. A mistake early in life, such as overwatering or root damage, can affect the whole plant because the clock does not stop.
Understanding Photoperiod Seeds
Photoperiod seeds grow into plants that stay in the vegetative stage until the light cycle changes. Indoors, growers control this by changing the hours of light and darkness. Outdoors, the seasons guide this change naturally.
Photoperiod plants can be a smart option for beginners who want more control. If a plant has a slow start or runs into stress, the grower can keep it in the vegetative stage longer before flowering begins. That gives the plant more time to recover and grow stronger.
The tradeoff is that photoperiod plants need a more controlled setup. The grower must manage the light cycle carefully indoors. Even so, many beginners like photoperiod plants because they give more flexibility and more time to learn during the grow.
Why Plant Sex Matters
Plant sex is very important in cannabis growing. Female plants are the ones that produce the buds most people want to harvest. Male plants produce pollen sacs instead. If male plants stay near female plants, they can pollinate them. Once pollinated, female plants may produce more seeds and lower-quality buds.
This is why growers pay close attention to plant sex. Regular seeds can grow into either male or female plants. That means a beginner using regular seeds must watch for signs of sex as the plant grows. Then the male plants must be removed before they release pollen.
This extra step can make the grow more complex. Feminized seeds help avoid much of this issue, which is one more reason they are often recommended for first-time growers.
Which Option Is Best for Most Beginners?
For most first-time growers, feminized seeds are often the simplest choice. They are easy to start with, easy to find, and less likely to create problems with plant sex. They also give beginners a clean starting point without the added risk that can come with weak or unhealthy clones.
Autoflower seeds can be good for beginners who want speed and a smaller plant. Photoperiod feminized seeds can be good for beginners who want more control and more time to fix mistakes. Clones can still work well, but they are often better for growers who already trust their source and feel ready to handle a more fragile plant at the start.
Seeds and clones can both lead to a successful cannabis grow, but they offer different paths. Seeds give a fresh start and more choices. Clones save time and can be more predictable if they come from a healthy mother plant. Feminized seeds are often the easiest option for first-time growers because they lower the risk of male plants. Autoflower seeds offer speed, while photoperiod seeds offer more control. In the end, the best choice for a beginner is usually the one that keeps the process simple, stable, and easier to manage from day one.
Which Cannabis Strain Type Is Best for a First Grow?
Choosing the right strain type is one of the most important parts of a first cannabis grow. Many beginners spend a lot of time thinking about lights, pots, and nutrients, but the plant itself also matters a lot. Some strains are easier to manage than others. Some stay small and simple, while others grow fast, stretch tall, or react badly to small mistakes. That is why picking the right type from the start can make the whole process smoother.
For a first grow, the best strain type is usually one that is easy to control, strong enough to handle minor errors, and not too demanding. A beginner-friendly plant should give the grower a fair chance to learn without becoming too stressful. The goal of a first grow should not be to chase the biggest yield or the highest THC. The better goal is to finish the grow, learn the basics, and avoid major problems.
Why strain choice matters for beginners
Not all cannabis plants grow the same way. Some grow short and bushy. Others grow tall and wide. Some finish quickly, while others take much longer to flower. There are also strains that need very steady conditions and careful feeding. For a new grower, that can be hard to manage.
A good first strain helps reduce risk. It can make watering easier, training easier, and harvest timing less confusing. A harder strain may still be possible for a beginner, but it often leaves less room for mistakes. If the plant is too sensitive, even small issues with light, temperature, or nutrients can slow growth or hurt the final result.
This is why first-time growers should look for strain types with simple growing patterns. A plant that stays healthy under normal care is often better than one that promises huge buds but needs expert-level skill.
Look for a strain with a manageable size
Plant size is a big part of strain choice. Many beginners grow in small spaces such as closets, tents, or spare corners of a room. A strain that grows too tall can quickly become hard to manage. It may grow too close to the light, block airflow, or outgrow the tent before flowering is even finished.
Shorter and more compact plants are often easier for beginners. They fit better in small indoor spaces and usually need less training. A plant with a manageable shape is also easier to inspect for watering needs, pests, and leaf problems. When the plant stays under control, the grower can focus more on learning the basics instead of trying to fix space problems.
This does not mean large plants are bad. It just means they may not be the best choice for a first grow. Starting with a smaller strain type often leads to fewer problems and less stress.
Faster flowering can make the process easier
Flowering time is another important factor. Some cannabis strains finish faster than others. For a beginner, a shorter flowering period can be helpful because it means less waiting and fewer weeks for something to go wrong. A faster plant may also lower power costs for indoor growers and reduce the time spent adjusting the environment.
Long-flowering plants can still be rewarding, but they ask for more patience. A beginner may feel unsure during a long grow and may start making too many changes. That can lead to mistakes. New growers often do better when they can follow a shorter and more direct path from planting to harvest.
A strain with a reasonable finish time helps beginners stay focused. It also gives them a full grow cycle sooner, which means they can learn from the experience and improve more quickly on the next round.
Hardiness is a major plus for first-time growers
A hardy strain is one that can handle less-than-perfect conditions better than a sensitive one. This matters a lot for beginners because the first grow rarely goes exactly as planned. There may be small watering errors, slight temperature swings, or feeding issues. A hardy plant can often recover from these problems without major damage.
This kind of strength gives the new grower more confidence. It also creates a better learning environment. Instead of losing the plant after one mistake, the beginner gets a chance to correct the problem and keep going. That is valuable during the first grow because most of the learning comes from watching the plant respond over time.
When choosing a strain type, beginners should think about stability and resilience. A strong and forgiving plant often teaches more than a sensitive one that struggles at every small change.
Autoflower strains for beginners
Autoflower strains are often recommended to first-time growers because they can be simple in some ways. These plants begin flowering based on age, not on changes in light schedule. That means the grower does not need to switch from long light hours to a 12 and 12 cycle to trigger flowering. This can make the process feel easier, especially for someone growing indoors for the first time.
Autoflowers also tend to finish faster than many photoperiod plants. For a beginner who wants a quicker grow, that can be very appealing. Some autoflower plants also stay smaller, which helps in tight spaces.
Still, autoflowers are not perfect for every new grower. Their fast timeline can be a challenge. Because they move quickly from seedling to flowering, there is less time to recover from stress. If a beginner overwaters, damages roots, or causes early stunting, the plant may not have enough time to bounce back before flowering starts. In that way, autoflowers can be simple but less forgiving.
They can be a good choice for beginners who want speed, a smaller plant, and a simpler light setup. They may be less ideal for beginners who want more time to fix mistakes along the way.
Photoperiod strains for beginners
Photoperiod strains flower when the light schedule changes. Indoors, that usually means keeping the plant in vegetative growth under longer light hours, then switching to a 12 hours on and 12 hours off schedule to begin flowering. This gives the grower more control over timing.
For many beginners, this extra control is a big advantage. If the plant grows slowly at first or runs into a problem, the grower can keep it in the vegetative stage longer. That gives the plant time to recover and get stronger before flowering begins. This can make photoperiod strains more forgiving in some cases.
The downside is that they require more planning. The grower has to manage the light cycle correctly and make sure dark periods stay dark. Even so, many first-time growers do well with photoperiod plants because of the longer learning window. A beginner who wants more room to correct mistakes may prefer this strain type.
Feminized seeds are often the easiest starting point
When beginners choose seeds, feminized seeds are often the easiest option. These seeds are bred to produce female plants, which are the ones growers usually want for bud production. This reduces the chance of ending up with male plants that do not produce the same harvest and can pollinate females.
For a first grow, feminized seeds help simplify the process. The beginner does not have to spend as much time learning how to identify and remove male plants. That makes planning easier and lowers the chance of mistakes later in the grow.
Whether the grower chooses autoflower or photoperiod plants, feminized seeds are often a smart choice for a smooth start.
What beginners should focus on most
The best first strain type is usually not the most famous or most powerful one. It is the one that fits the grow space, finishes in a reasonable time, and handles basic beginner mistakes well. A plant that is too large, too slow, or too sensitive can make the first grow harder than it needs to be.
New growers should focus on simple traits. Look for a manageable plant size, a fair flowering time, and a reputation for hardiness. Then think about whether autoflower or photoperiod fits the grower’s style. One offers speed and a simpler light process. The other offers more control and more recovery time.
For a first grow, the best cannabis strain type is one that is easy to manage and forgiving. Beginners usually do best with strains that stay smaller, flower in a reasonable time, and can handle minor mistakes. Autoflower strains may work well for growers who want a faster and simpler setup. Photoperiod strains may be better for growers who want more control and more time to fix problems. Feminized seeds are also a smart choice because they make the grow easier to manage. In the end, a smooth first grow usually starts with a simple strain choice, not a difficult one.
How Do You Set Up the Grow Space the Right Way?
A good grow space can make a big difference in your first cannabis grow. Even strong seeds can struggle in a poor setup. A well-planned space helps your plants get the light, air, and steady conditions they need. It also helps you avoid common problems like weak growth, mold, heat stress, and pests. For first-time growers, the goal is not to build a perfect room. The goal is to build a simple, clean, and stable space that is easy to manage every day.
Start With a Clean Grow Area
Before you place a single pot or light, clean the whole space. This step matters more than many beginners think. Dust, dirt, old plant matter, and clutter can all create problems later. A dirty area can attract insects and raise the chance of mold and mildew. It can also make it harder to spot issues when your plants start growing.
Wipe down the walls, floor, shelves, and any tools you plan to use. Remove anything that does not need to be in the grow space. Keep cords neat and keep the floor as clear as possible. A clean area is easier to check, easier to water in, and safer to move around in.
The space should also be easy to access. You should be able to reach your plants without bumping into them or moving too many things. Plants need regular care, so your setup should make daily checks simple.
Place Your Grow Lights Carefully
Light placement is one of the most important parts of a beginner grow setup. Cannabis plants need enough light to grow well, but lights that are too close can damage leaves and stress the plant. Lights that are too far away can lead to weak stems and slow growth.
When you set up your light, place it at a safe distance based on the type and strength of the fixture. Many beginners use LED grow lights because they are efficient and easier to manage than some older light types. Even so, LEDs can still give off enough intensity to harm plants if placed too close.
Try to hang the light so it spreads evenly across the whole plant area. A poor light layout can leave one side of the plant strong and the other side weak. As the plants grow taller, you may need to raise the light to keep the distance safe and steady.
It also helps to use a timer. A timer keeps the light cycle regular, which is very important for healthy growth. Plants do best when their light schedule stays consistent from day to day.
Keep Air Moving in the Space
Fresh air and steady airflow are key parts of a healthy grow area. Plants use carbon dioxide from the air, and they do better when air keeps moving around them. Stale air can raise humidity, trap heat, and make it easier for mold or pests to spread.
A simple fan can help move air around the room or tent. The breeze should be gentle, not strong enough to bend or dry out the plants. Light movement helps strengthen stems and reduces damp spots where mold may form.
Airflow is not just about the plants themselves. It also helps control the room as a whole. Good air movement can keep temperature and humidity more even across the space. This makes the grow area more stable and easier to manage.
Use Exhaust and Intake to Control the Environment
A beginner grow space needs a way to remove warm, stale air and bring in fresher air. This is where exhaust and intake come in. Exhaust pulls old air out of the grow area. Intake brings new air in. Together, they help control heat, humidity, and air quality.
In a small setup, an exhaust fan is often one of the most useful tools. It helps remove hot air made by the lights and keeps the space from becoming too humid. Intake can be passive in some cases, which means fresh air enters through vents or open areas as the exhaust fan pulls air out.
Without this air exchange, the room can become hot and damp very fast. That can slow plant growth and raise the risk of mildew and bud rot later in the grow. Even a simple system is better than no system at all.
Think About Odor Control Early
Many first-time growers forget about odor until the plants start to flower. That can be a mistake. Cannabis plants can produce a strong smell, especially in the flowering stage. If privacy matters to you, it is smart to plan for odor control from the start.
A common way to handle smell is with a carbon filter connected to the exhaust system. This can help reduce the scent before the air leaves the grow space. Even if the smell does not seem important at first, it can become much stronger later. It is easier to prepare early than to fix the issue after the plants are already producing a strong odor.
Keep Temperature in a Safe Range
Cannabis plants do best in a stable temperature range. If the grow space gets too hot, leaves may curl, dry out, or show signs of stress. If it gets too cold, growth may slow down, and the plant may struggle to stay healthy.
The exact temperature can vary a bit based on the stage of growth and the light cycle, but the main goal is to avoid major swings. A room that is hot in the day and cold at night can stress the plants. Stable conditions are better than constant changes.
Use a thermometer to check the grow area often. Place it near plant level, not just near the floor or door. This gives you a more accurate reading of what your plants are actually dealing with each day.
Watch Humidity From the Start
Humidity is another part of the setup that many beginners overlook. Young plants often do well with a bit more moisture in the air, while flowering plants usually need lower humidity. If humidity gets too high, mold and mildew can become a real problem. If it gets too low, plants can dry out and become stressed.
A hygrometer helps you track humidity. This small tool can tell you whether the air is too damp or too dry. Once you know the level, you can adjust the room with better airflow, added ventilation, or a humidifier or dehumidifier if needed.
You do not need to make the room perfect every hour of the day. You just need to keep it in a healthy range and avoid extreme conditions.
Do Not Ignore Electrical Safety
Grow lights, fans, timers, and exhaust systems all need power. That means electrical safety should be taken seriously. A messy setup with overloaded outlets, loose cords, or unsafe power strips can create fire risks and other hazards.
Keep cords off the floor when possible. Do not let plugs sit near water. Use equipment that is in good condition and made for indoor use. Spread out power use in a safe way and avoid plugging too many devices into one outlet.
Water and electricity are a bad mix, so plan the layout with care. Keep your watering area tidy and make sure drips or spills do not reach plugs or extension cords. A safe grow space is not only better for the plants. It is better for you and your home.
Why Stability Matters More Than Fancy Equipment
Many beginners think they need expensive gear to get good results. In most cases, that is not true. A simple space with steady light, moving air, safe temperatures, and clean conditions can do very well. Plants respond better to stable care than to constant changes.
A poor setup can cause many problems at once. Weak light can slow growth. Bad airflow can trap heat and moisture. High humidity can invite mold. Dirty conditions can attract pests. These problems often connect with each other, which is why the setup stage matters so much.
When your space is stable from the start, it becomes easier to water on time, spot leaf changes, adjust the light, and fix small problems before they turn into big ones.
Setting up the grow space the right way is one of the most important steps in a first cannabis grow. Start with a clean area and keep it simple. Place your lights with care so plants get even coverage without burning. Keep air moving with fans, and use exhaust and intake to control heat, humidity, and fresh air. Plan for odor control before flowering begins. Track temperature and humidity with basic tools so the space stays steady. Most of all, keep the setup safe by paying close attention to cords, outlets, and water.
A smooth first grow often starts with a stable room, not fancy gear. When the grow space is clean, balanced, and easy to manage, your plants have a much better chance to grow strong from the very beginning.
What Growing Medium and Containers Should Beginners Choose?
Choosing the right growing medium and container is one of the first big steps in a cannabis grow. For beginners, this choice can shape how easy or hard the whole process feels. A good medium helps roots stay healthy, gives the plant support, and holds the right amount of water and air. A good container gives roots enough room to grow and lets extra water drain out. When both are chosen well, plants have a much better chance of growing strong from the start.
Many first-time growers feel confused because there are many options. Some see soil, coco coir, and hydroponics and are not sure where to begin. Others wonder what size pot to buy or whether they will need to move the plant into a larger container later. The good news is that beginners do not need the most advanced setup. In most cases, a simple choice works best.
Soil as a Beginner-Friendly Option
For many first-time growers, soil is the easiest growing medium to use. It is simple, familiar, and more forgiving than other options. Soil can hold water and nutrients well, which helps protect beginners from small mistakes. If watering is a little off or feeding is not perfect, soil often gives the plant some room to recover.
Good potting soil for cannabis should feel light and loose, not packed and heavy. Roots need both water and air. If soil stays too wet and dense, roots can struggle. That can lead to slow growth, drooping leaves, and root problems. A light soil mix gives roots more space to spread and breathe.
Many growers choose soil because it does not require a lot of extra tools or technical knowledge. It is easier to manage than some other systems, and it fits well with a slow, careful learning process. For someone growing cannabis for the first time, soil can make the whole experience feel less stressful.
Still, not all soil is the same. Some soils are made for flowers or houseplants and may be too rich or too heavy for young cannabis plants. Some contain slow-release fertilizers that can make feeding harder to control. That is why beginners should choose a quality potting mix that drains well and is suitable for container gardening.
Understanding Coco Coir
Coco coir is another popular medium. It is made from coconut husk fiber and is known for holding both water and air very well. Many growers like coco because it supports fast root growth and can lead to strong plant development. It is cleaner and lighter than many soil mixes, and it drains very well.
Even so, coco coir usually needs more attention than soil. Plants in coco often need more regular watering and more careful nutrient management. Since coco does not work the same way as soil, growers need to feed their plants in a more controlled way. This can be a good choice for growers who want more control, but it may feel like a lot for a first grow.
A beginner can grow in coco, but it often works best for someone who is ready to check plants often and learn a little more about feeding and watering. A person who wants the easiest path may still find soil to be the better starting point.
Why Hydroponics Can Be Harder for Beginners
Hydroponics is a method of growing plants without traditional soil. In this system, roots are fed through water and nutrients. This method can produce fast growth, but it usually requires more equipment and more skill. The grower needs to watch water levels, nutrient balance, and plant response closely.
Hydroponics can be very effective, but it is often less forgiving than soil. Small mistakes can affect plants quickly. If the nutrient mix is wrong or the water system has a problem, the plant may show stress fast. This is one reason many first-time growers do not start with hydroponics.
There is nothing wrong with learning hydroponics later. It can be a great method once a grower understands the basics of cannabis care. But for a smooth start, many beginners do better with a simpler medium first.
Choosing the Right Container Size
The size of the container matters because roots need space to grow. Healthy roots support healthy stems, leaves, and flowers. If a pot is too small, roots can become crowded. When that happens, the plant may stop growing well, dry out too fast, or become easier to stress.
A small container may work at the seedling stage, but the plant will usually need more room later. This is why some growers start seedlings in small pots and move them into larger ones as the plants grow. Others choose one final container and grow the plant in that pot from the start. Both methods can work, but each one has a different purpose.
Smaller pots are easier to manage early on because young plants do not need much water. Large pots can stay wet for too long when the plant is still small. That can make overwatering more likely. On the other hand, a final pot gives roots plenty of room and can reduce the need for transplanting.
For beginners, the best choice often depends on the type of plant and the grow plan. A grower using photoperiod plants may feel more comfortable transplanting as the plant gets bigger. A grower using autoflowers may choose the final pot early because autoflowers have a shorter life cycle and may not enjoy extra stress from transplanting.
The Importance of Drainage
Drainage is one of the most important parts of container growing. Every container should allow extra water to leave the pot. If water collects at the bottom and stays there, the roots can suffer. Wet roots with little air can lead to poor growth and disease.
A good container has drainage holes at the bottom. A saucer or tray under the pot can catch runoff, but the pot should not sit in standing water for long. The goal is to let water move through the medium and out of the container while keeping enough moisture for the roots.
Drainage also works together with the growing medium. Even the best container will not help much if the medium is too dense. In the same way, a great soil mix can still cause trouble in a pot with no drainage holes. Both pieces need to work together.
Planning for Transplanting
Transplanting means moving a plant from one container to a larger one. This is often done when the plant outgrows its current pot. A successful transplant gives roots more room and helps the plant keep growing without becoming root-bound.
A root-bound plant has roots that circle around the inside of the pot because there is no more room to spread. This can slow growth and make watering harder. Transplanting at the right time can prevent that problem.
Still, transplanting needs care. Rough handling can stress the plant or damage roots. Beginners should only transplant when the plant is healthy and when the new container is ready. The new medium should be prepared before the move, and the plant should be handled gently.
Some growers like transplanting because it lets them match container size to plant size. Others want to avoid it to keep things simple. There is no single rule for every grow, but beginners should understand why transplanting is done and when it may help.
Why Root Space Affects Plant Health and Yield
The roots are the base of the whole plant. They take in water, nutrients, and oxygen. When roots have enough room, they can spread out and support stronger growth above the surface. When roots are crowded, the plant may struggle in many ways.
Limited root space can lead to small plants, weak growth, faster drying, and reduced flower production. A cramped root zone can also make feeding and watering less stable. The plant may become more sensitive to stress because the roots do not have enough room to support recovery.
This is why container choice is not just about what fits in the grow space. It is also about giving the plant a healthy base. Even with good light and nutrients, a plant may not reach its potential if the roots are trapped in a small pot for too long.
A Simple Choice for First-Time Growers
For most beginners, a light, well-draining soil in a container with proper drainage is one of the safest and simplest ways to start. It offers a good balance of ease and control. It also gives new growers time to learn the basics of watering, feeding, and plant care without dealing with too much complexity at once.
Coco coir can work well, but it usually calls for closer attention. Hydroponics can be powerful, but it is often better saved for later. A first grow usually goes more smoothly when the setup is simple enough to manage with confidence.
The best growing medium and container are the ones that match the grower’s skill level, plant type, and daily routine. Beginners do not need the most advanced system. They need a setup that helps them learn, avoid common mistakes, and keep the plant healthy from start to finish.
How Much Light Does Cannabis Need and What Kind of Grow Light Is Best?
Light is one of the biggest parts of a healthy cannabis grow. A plant can have water, air, and nutrients, but it still will not grow well without the right amount of light. For first-time growers, this part can feel confusing at first because there are many light types, different schedules, and many claims about what works best. The good news is that beginners do not need the most advanced setup to get started. What matters most is giving the plant steady, proper light from start to finish.
Why Light Matters So Much
Cannabis uses light to make energy. That energy supports leaf growth, stem growth, root growth, and flower development. When the light is too weak, the plant may stretch upward as it tries to get closer to the source. This can make it tall, thin, and weak. When the light is too strong or too close, the leaves may curl, bleach, or burn. That is why the goal is not just to give more light. The goal is to give the right amount of light in the right way.
A strong light setup helps the plant stay compact, healthy, and productive. It also helps the plant move through each growth stage in a more stable way. For a first grow, stable light matters more than chasing perfect numbers.
How Much Light Cannabis Plants Need
Cannabis does not need the same amount of light during every stage of growth. Seedlings need less intense light than older plants. In the early stage, too much light can stress a young plant. A gentle but steady light source helps seedlings build strength without damage.
During the vegetative stage, cannabis needs more light because this is when it grows stems, leaves, and branches. This is the stage where the plant builds the structure that will later support buds. A healthy vegetative stage often leads to a better flowering stage.
During flowering, cannabis still needs strong light. At this point, the plant uses that light to form buds and develop resin. If the flowering stage does not get enough light, the buds may stay small and loose.
So, the amount of light needed changes as the plant grows. Young plants need softer light. Bigger plants need stronger light. The grower must adjust as the plant changes.
Understanding Light Schedules
For beginners, the light schedule is just as important as the light itself. Cannabis plants respond to hours of light and darkness, but the schedule depends on the type of plant.
Photoperiod cannabis plants need long days during the vegetative stage. Many growers use 18 hours of light and 6 hours of darkness. This tells the plant to keep growing instead of flowering. When the grower is ready for flowering, the schedule is usually changed to 12 hours of light and 12 hours of darkness. That change signals the plant to begin making buds.
Autoflower cannabis plants are different. They do not rely on the same light change to begin flowering. They move into flowering based more on age than on the light cycle. Because of that, many growers keep autoflowers under longer light periods through most or all of the grow. This can make autoflowers easier for some beginners because the schedule stays simple.
No matter which type a grower picks, the schedule should stay consistent. Turning lights on and off at random times can stress the plant. A timer is a smart tool because it keeps the cycle steady every day.
Common Types of Grow Lights
There are a few main kinds of grow lights, but many beginners now start with LED lights. LEDs are popular because they use less power, run cooler than some older light types, and can work well for both vegetative growth and flowering. They are often simple to use, which makes them a strong choice for first-time growers.
Older light types like HID lights have been used for many years and can still grow cannabis well. These include metal halide and high pressure sodium lights. They can produce strong results, but they often create more heat and may need more cooling. For a beginner, that can make the grow space harder to manage.
Fluorescent lights are sometimes used for seedlings or clones. They are softer and less intense, so they may work for very young plants. Still, they usually are not the top choice for growing a full cannabis plant from start to finish if the goal is strong bud development.
For most new growers, a good quality LED light is often the most practical option because it is simple, efficient, and easier to manage in a small grow space.
Light Distance and Placement
Even a good light can cause problems if it is placed the wrong way. If the light hangs too far above the plant, the cannabis may stretch and grow weak. If the light sits too close, it can stress the leaves and damage the top of the plant.
The right distance depends on the type of light, its strength, and the age of the plant. Seedlings usually need the light placed farther away than mature plants under the same lamp. As the plant grows, the grower can slowly adjust the height.
A helpful rule for beginners is to watch the plant closely. If the plant looks stretched and thin, the light may be too far away. If the top leaves look stressed, pale, or curled, the light may be too close or too intense. The plant often shows signs before serious damage happens.
Signs of Too Little or Too Much Light
When cannabis does not get enough light, it may grow slowly and look weak. The stems may become long and thin. The spaces between leaves may get larger. The plant may lean toward the light source.
When cannabis gets too much light, the leaves may show stress. The tops may bleach or look faded. Leaf edges may curl upward. Heat from the light can make this worse. In some cases, strong light and high heat happen together, so the grower needs to look at both issues.
This is why balance matters. More light is not always better. The plant needs enough light to grow well, but not so much that it becomes stressed.
Choosing the Best Grow Light for a First Grow
For a first grow, the best light is usually one that is easy to use, fits the size of the grow space, and does not create too much heat. A beginner does not need the biggest or most costly light on the market. It is better to choose one that matches the number of plants and the space available.
A small grow tent, closet, or corner grow space often does well with a properly sized LED light. The grower should also think about airflow, heat, and power use before buying anything. A light that is too powerful for a tiny space can create more problems than it solves.
It also helps to remember that one strong, reliable light is usually better than a poor-quality light that makes big promises. Stable light output and steady performance are more helpful than flashy marketing.
Light plays a major role in every step of cannabis growth. Seedlings need gentle light, growing plants need stronger light, and flowering plants need the right schedule and intensity to form healthy buds. Photoperiod plants usually need one schedule for vegetative growth and another for flowering, while autoflowers often stay on a longer light cycle throughout the grow. For most beginners, LED grow lights are a simple and practical choice because they are easier to manage and often produce less heat. The key is to keep the light schedule steady, place the light at the right distance, and watch the plant for signs of stress. A good lighting setup does not need to be complicated. It just needs to be consistent and well matched to the grow space.
How Often Should You Water and Feed Cannabis Plants?
Watering and feeding are two of the most important parts of growing cannabis. They also cause many beginner mistakes. New growers often think more water and more nutrients will help plants grow faster. In many cases, the opposite is true. Cannabis plants do best when they get the right amount, not the most.
A good watering and feeding routine helps roots stay healthy, leaves stay green, and flowers develop well later on. It also lowers the risk of slow growth, yellow leaves, drooping, root problems, and nutrient damage. For a first grow, the best approach is to keep things simple and pay close attention to how the plant reacts.
Why watering matters so much
Water does more than stop the plant from drying out. It helps carry nutrients through the growing medium and into the roots. It also supports almost every part of plant growth. When a cannabis plant does not get enough water, it can wilt, slow down, and become weak. When it gets too much water, the roots may struggle to get oxygen, and that can lead to poor growth or root disease.
This is why watering is not just about giving water on a fixed schedule. It is about knowing when the plant actually needs it. A beginner may want to water every day, but that is not always the right choice. Some plants need water more often than others. Size, light strength, pot size, temperature, humidity, and growing medium all affect how quickly the water gets used.
Overwatering and underwatering
Overwatering is one of the most common mistakes first-time growers make. Many people think overwatering means giving too much water at one time. In most cases, it means watering too often. When the medium stays wet for too long, the roots do not get enough air. Roots need oxygen just like the rest of the plant needs water. If the roots stay in soggy conditions, the plant may droop, grow slowly, or show signs that look like other problems.
A plant with overwatering issues may have heavy, droopy leaves and a weak look overall. The soil may stay wet for too long, and the pot may still feel heavy day after day. Growth may slow because the roots are stressed.
Underwatering is the opposite problem. This happens when the medium dries out too much and the plant cannot take in enough moisture. Leaves may droop in a thinner, limp way, and the pot may feel very light. In dry conditions, the plant may stop growing well and can become stressed.
The key is to learn the difference between wet and dry conditions in the pot. Many beginners do best when they check the growing medium before watering again instead of watering on habit.
How often should you water
There is no single answer that works for every plant. Some growers water every two days. Others may water every three to five days. Small seedlings need less water than large plants in the vegetative or flowering stage. Plants in small pots dry out faster than plants in large pots. Warm grow rooms and strong lights also make water disappear faster.
A simple way to judge is to feel the top layer of the growing medium and lift the pot. If the top feels dry and the pot feels much lighter than before, it may be time to water. If the pot still feels heavy and the medium is still wet, it is better to wait.
Seedlings need extra care. Their roots are small, so they do not use much water yet. A beginner may drown a seedling by watering the whole container too often. At this stage, it is better to water lightly and avoid soaking the entire pot again and again.
As the plant grows larger, it will drink more. During vegetative growth and flowering, water use often increases. Still, the goal stays the same. Water when needed, not just because the calendar says so.
Why roots need oxygen
Many beginners focus only on what is happening above the soil. The roots matter just as much. Healthy roots need both moisture and air. When roots sit in wet medium for too long, oxygen levels drop. That can weaken the roots and make it harder for the plant to take in water and nutrients.
This is one reason drainage matters. Pots should allow extra water to leave the container. The growing medium should also not stay packed and soaked all the time. A healthy root zone gives the plant a stronger base for every stage of growth.
How feeding works
Cannabis plants also need nutrients to grow well. These nutrients support leaf growth, stem strength, root health, and flower development. Many beginner growers use bottled nutrient products, but it is important not to overdo them.
Young seedlings usually need very little feeding at first, especially if they are growing in a quality soil that already contains nutrients. Starting nutrients too early or too heavily can stress the plant. In many cases, less is better at the beginning.
As the plant gets older, it may need more support. During vegetative growth, cannabis usually needs nutrients that support leaf and stem growth. During flowering, its needs change as it focuses more on bud production. Even so, first-time growers should keep feeding simple and follow a light schedule rather than using too many products at once.
Keep the feeding schedule simple
A simple feeding plan is often best for a first grow. Many nutrient problems happen because beginners add too many products or use full strength too soon. A safer approach is to begin with a lower amount than the bottle suggests and watch how the plant responds.
If the leaves stay healthy and growth looks steady, the plant is likely getting enough. If leaf tips burn, leaves turn very dark, or the plant looks stressed after feeding, that may be a sign of too many nutrients. This is often called nutrient burn.
A feeding routine should support the plant, not push it too hard. Cannabis can recover from a little hunger more easily than from severe overfeeding. For that reason, many new growers do better when they feed lightly and adjust slowly.
Why pH matters
pH is one of the most overlooked parts of watering and feeding. It affects how well the plant can take in nutrients. Even if nutrients are present, the roots may not absorb them well if the pH is too high or too low. This can lead to signs that look like nutrient deficiency, even when the plant is being fed.
For beginners, pH may seem confusing at first, but the basic idea is simple. The root zone needs to stay in a range where nutrients remain available to the plant. If the pH drifts too far out of range, the plant can begin to show yellowing, spots, weak growth, or other problems.
Using a basic pH tool can help a grower avoid many early issues. It does not have to be complex. It just needs to be part of the routine.
Water quality and nutrient balance
The water source also matters. Some water contains extra minerals or other elements that affect the plant and the pH. This is why two growers can use the same nutrient line and still get different results. What starts out in the water can change what the plant receives.
Nutrient balance matters from seedling to flower. Too little can slow growth. Too much can damage roots and leaves. Poor balance can also cause the plant to absorb some nutrients but not others. This is why steady, moderate care usually works better than sudden changes.
A healthy plant often comes from small, consistent choices. Good water, proper pH, light feeding, and careful observation all work together.
Watering and feeding cannabis plants is not about doing more. It is about doing the right amount at the right time. Overwatering, underwatering, and overfeeding are common beginner mistakes, but they can be avoided with patience and simple habits. Check the pot before watering, start nutrients slowly, and pay attention to pH and water quality. When roots stay healthy and nutrient levels stay balanced, the plant has a much better chance of growing strong from seedling to flower.
What Are the Main Stages of Cannabis Growth?
Knowing the main stages of cannabis growth can make the whole process feel much less confusing. A first-time grower does not need to guess what the plant needs each week. Each stage has its own job, its own look, and its own care routine. When you understand how the plant changes over time, it becomes easier to give the right amount of light, water, and attention.
Cannabis usually moves through four main stages. These are germination, seedling, vegetative growth, and flowering. Some growers also talk about harvest, drying, and curing as later parts of the full grow cycle, but the plant’s main life stages happen before that. Each one matters because problems in one stage can affect the rest of the grow.
Germination
Germination is the very first stage of growth. This is when the seed wakes up and begins to sprout. A healthy seed will crack open and send out a small white root. That root is often called the taproot. It is the first sign that the plant is alive and starting to grow.
This stage usually takes a few days, though some seeds may take a little longer. During germination, the goal is simple. The seed needs moisture, warmth, and a gentle environment. It does not need strong light or nutrients yet. Too much water can stop the seed from getting enough air. Too little water can dry it out before it sprouts. That is why many beginners fail at this stage. They try to do too much.
Once the root appears, the seed is ready to go into its growing medium. This may be soil, coco coir, or another medium. The root should face downward so it can grow into the medium more easily. The seed should not be planted too deep. If it is buried too far down, the young sprout may struggle to reach the surface.
A grower should be gentle during this stage. The new root is very soft and easy to damage. Clean hands and careful handling matter a lot here. Germination may seem small, but it sets the tone for the rest of the grow.
Seedling Stage
After the seed sprouts and breaks through the surface, the plant enters the seedling stage. This is when the plant begins to grow its first small leaves. At first, it shows two rounded leaves called cotyledons. These are not the full cannabis leaves yet. Soon after, the first true leaves appear, and these start to show the classic cannabis leaf shape.
This stage usually lasts about two to three weeks, depending on the plant and the growing conditions. Seedlings are still very fragile. They have small roots, thin stems, and limited strength. Because of this, they need gentle care. Too much water, too much light, too many nutrients, or sudden swings in temperature can all cause problems.
At this stage, the plant needs light, but not extreme light. It also needs a stable temperature and some humidity to help it stay healthy. The growing medium should stay lightly moist, not soaked. One of the biggest mistakes first-time growers make is overwatering seedlings. Since the plant is still small, it does not use much water yet. Wet roots can quickly lead to poor growth or root problems.
A healthy seedling should look upright and green. It should slowly grow new leaves and begin building a stronger root system. If the seedling looks pale, droopy, stretched, or weak, that often means something in the environment needs to be fixed. Many stretched seedlings are reaching for light because the light source is too weak or too far away.
The seedling stage is all about building a strong base. Even though growth may seem slow, important work is happening. The roots are developing, the stem is getting stronger, and the plant is preparing for faster growth later.
Vegetative Growth
The vegetative stage is when the cannabis plant starts growing fast. This is often the most exciting stage for beginners because the plant becomes larger, fuller, and stronger. It starts producing more leaves, more branches, and a much bigger root system. The plant is no longer delicate like a seedling. It is now focused on growing as much healthy green structure as possible.
This stage can last a few weeks or much longer. The length depends on the type of plant and the grower’s plan. Autoflower plants usually move through this stage on their own and do not stay in it for very long. Photoperiod plants stay in the vegetative stage as long as they get long periods of light each day. This gives the grower more control over plant size before flowering begins.
During the vegetative stage, the plant needs more light, more water, and often more nutrients than before. Nitrogen becomes especially important because it supports leaf and stem growth. Still, it is better for beginners to feed lightly than to overfeed. Too many nutrients can burn the plant and create stress.
This is also the stage where the plant’s shape becomes more important. Growers often pay attention to spacing, airflow, and training. A strong vegetative stage can lead to better flowering later because the plant has more healthy branches that can support buds. Poor vegetative growth often leads to small yields and weaker plants.
The environment still matters a lot here. The plant needs good air movement, enough room to expand, and steady care. A healthy vegetative plant usually has rich green leaves, strong stems, and visible new growth every few days. If growth seems slow or leaves start changing color, that is a sign to check the basics like water, pH, light distance, and feeding levels.
This stage is where the plant builds its body. The stronger it gets here, the better chance it has during flowering.
Flowering Stage
The flowering stage is when the plant begins making buds. This is the stage most growers look forward to because it is when the final product starts to form. The plant shifts its energy away from growing more stems and leaves and puts that energy into flower production.
For photoperiod plants, flowering usually begins when the light schedule changes to give the plant longer nights. For autoflower plants, flowering begins automatically based on age. Once this stage starts, the plant’s needs begin to change again.
During flowering, the plant may stretch at first. This means it can grow taller quickly during the early part of the stage. After that, bud sites become more visible, and the flowers begin to thicken over time. White hairs called pistils often appear first. Later, the buds grow denser and more resin forms on the flowers and nearby leaves.
At this stage, the plant still needs strong light, but it also needs careful control of temperature and humidity. Good airflow is very important because dense buds can trap moisture. Too much humidity during flowering can raise the risk of mold. This is a serious problem because mold can ruin the crop.
Feeding also changes during flowering. Many growers reduce nitrogen and focus more on nutrients that support flower development. Watering still matters, but it should stay balanced. Too much water can stress the roots, while inconsistent care can affect bud quality.
A grower should also watch closely for signs that flowering is progressing well. Healthy flowering plants usually show steady bud growth, strong smell, and sticky resin production as harvest gets closer. This stage can last several weeks, depending on the strain and type of plant.
Patience matters most during flowering. Many beginners want to harvest too early, but the plant needs time to fully mature. Letting the plant finish this stage properly can make a big difference in the final result.
The four main stages of cannabis growth are germination, seedling, vegetative growth, and flowering. Each stage has a different purpose. Germination starts the plant’s life. The seedling stage helps it form early leaves and roots. The vegetative stage builds size, strength, and structure. The flowering stage produces the buds.
For a first-time grower, learning these stages can make the whole process easier to follow. You do not have to know everything at once. You just need to know what the plant is doing right now and what it needs at that moment. When you match your care to the stage of growth, you give the plant a better chance to stay healthy from start to finish.
How Long Does It Take to Grow Cannabis From Start to Harvest?
One of the first questions new growers ask is how long the full process takes. This is a smart question because cannabis does not grow overnight. A healthy grow takes time, daily care, and patience. The exact timeline depends on the type of plant you choose, the way you grow it, and how well the plant responds to its environment.
For most beginners, the full growing process includes more than just the time the plant spends in a pot. It starts with germination, moves through the seedling stage, then the vegetative stage, and then the flowering stage. After harvest, there is still drying and curing. That means the full timeline is longer than many first-time growers expect.
The Full Timeline at a Glance
In simple terms, cannabis can take anywhere from about 8 weeks to 6 months from start to finish. Some fast autoflower plants finish on the shorter end of that range. Many photoperiod plants take much longer, especially if the grower gives them a long vegetative stage before flowering.
This is why it helps to think about cannabis growing in parts. Each stage has its own job. Each stage also takes a different amount of time. When you understand that, it becomes easier to plan your grow and avoid rushing the process.
Germination Usually Takes a Few Days
The first step is germination. This is when the seed cracks open and the first root starts to come out. In many cases, this takes about 1 to 7 days. Some seeds sprout faster, while others take a little longer. Fresh, healthy seeds often germinate more quickly than old or weak ones.
A beginner should know that germination is only the start. It may feel exciting when the seed opens, but that does not mean fast growth will happen right away. The plant is still very young and fragile at this stage.
The Seedling Stage Takes About 2 to 3 Weeks
After germination, the plant enters the seedling stage. This stage often lasts about 2 to 3 weeks. During this time, the plant stays small and begins to grow its first true leaves. It also starts building a root system that will support future growth.
This stage may look slow, and that is normal. New growers sometimes worry because the plant does not seem to get big very fast. In reality, the plant is laying the foundation for later stages. Good light, proper watering, and a stable environment matter a lot here.
The Vegetative Stage Can Be Short or Long
The vegetative stage is when the plant focuses on growing stems, branches, and leaves. This is the main growth stage before flowering begins. For many growers, this stage lasts around 3 to 8 weeks, but it can be longer.
The reason this stage varies so much is simple. The grower often controls it, especially with photoperiod plants. If the plant is grown indoors under the right light schedule, the grower can decide when to move it into the flowering stage. A short vegetative stage may lead to a smaller plant. A longer one may lead to a bigger plant with more bud sites.
For a beginner, a moderate vegetative stage is often the easiest choice. Going too short may reduce plant size. Going too long may create a plant that becomes hard to manage in a small grow space.
The Flowering Stage Often Lasts 8 to 10 Weeks
Once the plant starts flowering, it begins to focus on making buds. In many cases, the flowering stage lasts about 8 to 10 weeks. Some strains finish faster, while others take longer. This stage depends a lot on genetics.
During flowering, patience becomes very important. Many first-time growers get excited and want to harvest too soon. This is a common mistake. A plant may look close to ready, but it still needs time for buds to mature. Waiting until the right time can make a big difference in quality.
Autoflower Plants Usually Finish Faster
Autoflower cannabis plants are often the fastest option for beginners who want a shorter timeline. Many autoflowers go from seed to harvest in about 8 to 12 weeks total. That is much faster than many photoperiod plants.
This happens because autoflowers do not wait for a change in light schedule to start flowering. They move from one stage to the next based on age. This makes them simple in one way, since the grower does not need to manage a flowering light cycle indoors.
Still, faster does not always mean easier in every way. Autoflowers have a shorter life cycle, so they have less time to recover from mistakes. If a beginner overwaters, stunts growth, or causes stress early on, the plant may not have enough time to bounce back before flowering starts.
Photoperiod Plants Usually Take Longer
Photoperiod plants usually take more time from start to harvest. A common full timeline is around 3 to 5 months, though some grows may take longer. These plants stay in the vegetative stage until light exposure changes in a way that triggers flowering.
Many beginners still choose photoperiod plants because they offer more control. If the plant has a problem, the grower can often keep it in the vegetative stage longer and give it time to recover before flowering begins. This extra flexibility can be helpful during a first grow.
So while photoperiod plants take longer, they may be more forgiving in some situations. The tradeoff is that they need more planning and patience.
Drying and Curing Add More Time After Harvest
Many new growers think the process ends at harvest, but it does not. After the plant is cut down, the buds still need to dry and cure. Drying often takes about 7 to 14 days, depending on the size of the buds and the conditions in the drying space.
After drying comes curing. Curing helps improve smell, taste, and overall quality. A basic cure may take about 2 to 4 weeks, but some growers cure for longer. Even though the buds may be usable before the cure is complete, waiting can improve the final result.
This means the full process is not just about growing the plant. It also includes finishing the harvested buds the right way.
What Can Change the Timeline
Several factors can make a grow shorter or longer. Genetics is one of the biggest factors. Some strains are naturally fast, while others take more time. Grow conditions also matter. Poor light, temperature stress, nutrient issues, pests, or overwatering can slow growth and delay harvest.
The grower’s choices also affect timing. A person who keeps a photoperiod plant in the vegetative stage for a long time will have a longer grow. A person who starts with autoflowers will usually finish sooner. Training methods, transplant stress, and mistakes during early growth can also add time.
This is why there is no single answer that fits every grow. The timeline depends on both the plant and the person growing it.
Why Beginners Should Not Rush
A first grow often teaches one big lesson. Cannabis grows best when the grower stays patient. Trying to move too fast can lead to weak roots, small plants, low yields, or early harvest. In many cases, rushing causes more problems than waiting.
It helps to think of the grow as a process, not a race. Each stage matters. The seedling stage builds early strength. The vegetative stage builds size and structure. The flowering stage builds buds. Drying and curing help finish the job.
The time it takes to grow cannabis from start to harvest can vary a lot, but most grows take between about 2 and 5 months, with some taking longer. Autoflower plants are usually faster and may finish in 8 to 12 weeks total. Photoperiod plants often take more time, usually around 3 to 5 months, because the vegetative stage can be longer. After harvest, drying and curing add extra time that should not be ignored. For first-time growers, the best approach is to plan ahead, choose the right plant type, and stay patient through every stage. A smooth grow does not come from speed. It comes from steady care and good timing.
What Problems Do First-Time Growers Run Into Most Often?
Even a well-planned first grow can run into problems. That does not always mean the grow is failing. In many cases, beginner issues start small and can be fixed when caught early. The hard part is knowing what to look for and what may have caused it. Many first-time growers make the same mistakes because cannabis plants react strongly to changes in water, light, air, and feeding. A simple checklist helps, but it also helps to understand the warning signs before the problem gets worse.
Overwatering
Overwatering is one of the most common beginner mistakes. Many new growers think giving more water will help the plant grow faster. In reality, roots need both water and air. When the growing medium stays wet for too long, the roots do not get enough oxygen. This can slow growth and make the plant look weak.
A plant that is getting too much water may have droopy leaves that look heavy or swollen. The soil may stay wet for several days. The container may also feel heavy long after watering. New growers sometimes mistake this drooping for dryness and add even more water, which makes the problem worse.
A better approach is to water only when the plant needs it. Many growers check the top layer of soil and lift the pot to feel its weight. A light pot usually means it is closer to watering time. Good drainage also matters. If water cannot move out of the pot, the roots may stay too wet.
Poor Lighting
Light is one of the most important parts of a cannabis grow. Weak lighting often leads to weak plants. When light is not strong enough, plants may stretch too much. This means the stems grow long and thin as the plant tries to reach the light. The plant may look tall but weak, with large gaps between leaf sets.
Lighting problems can also happen when the grow light is too close. In that case, the leaves may curl, bleach, or show signs of heat stress. Some growers think more light is always better, but too much light can damage the plant just as much as too little.
The key is balance. The light should be strong enough for healthy growth, but placed at the proper distance. The grower should also use the right light schedule based on the plant type. If the light setup is poor from the start, the plant may never reach its full potential.
Wrong pH
Many beginners do not think about pH at first, but it has a big effect on plant health. Even if the grower uses good nutrients, the plant may not be able to take them in if the pH is out of range. This problem is called nutrient lockout.
When pH is off, the leaves may turn yellow, develop spots, or show strange color changes. The grower may think the plant needs more nutrients and add extra feed, but that does not solve the real issue. In some cases, it makes things worse.
Checking water and feed pH can save a lot of trouble. A steady pH helps the roots absorb what the plant needs. For beginners, this is one of the easiest ways to avoid confusing plant problems later in the grow.
Nutrient Burn
New growers often want to help their plants by feeding them more. This can lead to nutrient burn. Cannabis plants do need nutrients, but too much can stress the roots and damage the leaves.
The first sign of nutrient burn is often brown or burnt-looking leaf tips. The leaves may become dark green and curl downward. If feeding stays too strong, the damage can spread across more of the leaf.
This usually happens when a grower follows a full-strength feeding schedule too early or adds extra products without knowing if the plant needs them. Young plants are especially sensitive. It is usually safer to start with a light feeding plan and increase only when the plant shows it can handle more. A simple routine is often better than using too many bottles and boosters.
Weak Airflow
Airflow may seem like a small detail, but it plays a big role in plant health. Stale air can cause several problems at once. It can raise humidity, trap heat, and create the kind of environment pests and mold like.
Plants grown in still air may have weaker stems because they are not exposed to light movement. Poor airflow can also make the grow room feel damp and heavy. This becomes more serious during the flowering stage, when thick buds can hold moisture.
A beginner does not need a complex setup, but the grow space should have gentle air movement and a way to bring fresh air in and move warm air out. Good airflow supports stronger growth and lowers the risk of later problems.
Heat Stress
Cannabis plants do best in a stable environment. When the grow space gets too hot, plants can become stressed very quickly. Heat stress often shows up as leaves that curl upward at the edges, sometimes called tacoing. The leaves may also feel dry, look faded, or become thin and brittle.
High heat can slow growth and affect bud development. In severe cases, it can reduce quality and yield. Heat problems often come from lights that are too close, poor ventilation, or hot outdoor weather.
Beginners sometimes focus only on light and nutrients, but temperature matters just as much. A thermometer helps the grower catch heat problems early. It is much easier to keep a grow on track when the environment stays steady.
Pests
Pests are another common issue, especially in outdoor grows or indoor spaces that are not kept clean. Tiny insects can damage leaves, slow growth, and spread fast if they are ignored. Some pests hide under leaves, so the problem may be missed at first.
Common warning signs include holes in leaves, speckled damage, sticky residue, or very small moving insects. A plant may also start looking weak for no clear reason. New growers sometimes notice the plant looks sick but do not realize pests are the cause.
The best defense is regular inspection. Clean tools, a clean grow space, and careful checks under the leaves can help catch pests early. It is much easier to deal with a small pest problem than a large one.
Mold
Mold is a serious problem because it can ruin healthy plants, especially during flowering. It often appears when humidity is too high and air movement is poor. Thick buds can trap moisture inside, which makes them more likely to rot.
Signs of mold can include gray, white, or fuzzy growth, as well as dying areas inside buds. Some growers do not notice mold until harvest because the outside of the bud may still look normal. That is why daily checks are important in the later stages.
Mold prevention starts with airflow, humidity control, and not letting water sit on the plant for too long. A clean space also helps. Once mold spreads, it can be hard to stop, so prevention matters more than treatment.
Starting with Too Many Plants
Many first-time growers think more plants will mean better results. In many cases, it only creates more work and more chances for mistakes. Each plant needs water, light, space, and daily attention. When a beginner starts with too many plants, it becomes harder to notice problems early.
Crowded plants also block airflow and light. This can lead to weak lower growth, higher humidity, and a greater risk of pests and mold. A full grow room may look exciting at first, but it can become hard to manage very fast.
Starting with one to three plants is often easier for a first grow. This gives the grower time to learn the process without feeling overwhelmed. A smaller grow also makes it easier to fix problems before they spread.
Most first-time cannabis grow problems come from a few simple issues such as too much water, weak or harsh lighting, poor pH control, heavy feeding, weak airflow, high heat, pests, mold, and trying to manage too many plants at once. The good news is that these problems are common, which means they are also well known and often preventable. A beginner does not need to be perfect. What matters most is checking the plants every day, keeping the setup simple, and making small changes instead of guessing. A careful grower who watches for early warning signs has a much better chance of having a smooth and successful first harvest.
How Do You Know When Cannabis Is Ready to Harvest?
Harvest is one of the most important parts of a first grow. Many beginners spend weeks taking care of their plants, then rush this final step. That can lead to smaller yields, lower quality, and a less enjoyable result. A plant that looks big and healthy is not always ready to cut. The best time to harvest depends on several signs working together, not just one.
Learning what to look for can help you avoid picking too early or waiting too long. In this section, you will learn how pistils, trichomes, and the plant’s overall appearance can help you decide when the time is right. You will also learn why trimming, drying, and curing matter after harvest.
Watch the Pistils Carefully
Pistils are the small hair-like parts that grow from the buds. When the plant is still developing, these hairs are usually white and stand out clearly. As the plant gets closer to harvest, many of these white hairs start to darken. They may turn orange, brown, or red, depending on the strain and the plant’s stage of maturity.
For a beginner, pistils are often the first sign that the plant is getting close. When most of the pistils are still white and straight, the plant usually needs more time. When many of them have darkened and started to curl inward, the plant may be close to ready.
Still, pistils should not be the only sign you use. Some plants change pistil color earlier than others. Heat, light stress, or handling can also affect how pistils look. That means pistils are useful, but they do not always tell the full story. They can help you know when to start checking more closely, but they should not be your only reason to harvest.
Check the Trichomes for the Best Clue
Trichomes are tiny, crystal-like glands that cover the buds and nearby leaves. They hold many of the compounds growers care about, including cannabinoids and terpenes. These tiny glands are one of the clearest signs of harvest readiness.
At first, trichomes look clear. This usually means the plant is still too early. As the buds mature, the trichomes begin to look cloudy or milky. This stage often shows that the plant is reaching peak maturity. Later, some trichomes may turn amber. This can mean the plant is moving past peak ripeness and deeper into late maturity.
Many growers look for mostly cloudy trichomes with some amber ones mixed in. That often gives a balanced harvest window. If most trichomes are still clear, the plant likely needs more time. If many trichomes are amber, the plant may be past its best point for some growers.
Because trichomes are so small, it helps to use a magnifying tool. A jeweler’s loupe, small microscope, or phone lens attachment can make this much easier. Try to check the trichomes on the buds themselves, not just the sugar leaves. The small leaves can mature faster than the buds, which may give you the wrong idea.
Look at the Whole Plant, Not Just One Sign
A good harvest decision comes from looking at the whole plant. Along with pistils and trichomes, the plant’s general appearance can tell you a lot. Near harvest time, the plant often slows down its growth. Buds stop swelling as quickly, and the plant may begin to use up stored nutrients. Some fan leaves may fade, yellow, or dry out as the plant nears the end of its cycle.
This change in appearance does not always mean something is wrong. In many cases, it is part of the normal finish. The plant is putting its energy into the final stage of bud development. That said, leaf color alone does not prove the plant is ready. Problems like nutrient issues or poor watering can also cause yellowing, so it is important to compare this sign with trichomes and pistils.
The buds themselves should also look fuller and more mature than they did earlier in flowering. Many strains become denser near the end. The smell may also become stronger as the plant reaches harvest time.
Why Harvesting Too Early Can Be a Problem
Beginners often harvest too soon because they are excited or worried they will miss the right moment. Early harvest can lead to buds that are smaller, lighter, and less developed. The plant may not have finished building its full strength, smell, or flavor. In simple terms, you may get less from the same amount of work.
A plant that is cut too early may also have a less complete bud structure. The flowers can seem airy, and the final dried product may not be as satisfying. Waiting a little longer, when the plant truly needs it, often makes a big difference.
Why Harvesting Too Late Can Also Hurt Results
Waiting too long can also create problems. Once the plant moves past peak maturity, some trichomes begin turning amber and then break down further over time. The buds may lose part of the fresh quality they had at peak ripeness. In some cases, late harvest can also raise the risk of bud rot, mold, or pest trouble, especially if humidity is high.
Overripe buds may still be usable, but the final result may not match what the grower hoped for. This is why watching the plant closely during the last stage is so important. The harvest window is not always just one perfect day, but there is still a better range to aim for.
What Happens Right After Harvest
Cutting the plant is only the start of the final stage. After harvest, the buds still need to be trimmed, dried, and cured. These steps have a major effect on quality. Even a well-grown plant can lose much of its value if these parts are rushed.
Trimming means removing extra leaves from the buds. Some growers do a wet trim right after cutting, while others wait until the buds have dried. Either way, the goal is to clean up the buds and remove unwanted plant material.
Drying should happen slowly in a cool, dark place with gentle airflow. Buds that dry too fast can become harsh and lose some of their smell. Buds that dry too slowly may develop mold. A steady drying process helps preserve the work you put into the grow.
Curing comes after drying. This means placing the dried buds in sealed jars and opening them regularly at first to release extra moisture. Curing helps improve smell, flavor, and smoothness. It also gives the remaining moisture inside the buds time to balance out. Many beginners do not realize how much curing can improve the final result.
Take Your Time at the End
The last part of a cannabis grow asks for patience. It is easy to feel ready to cut as soon as the buds look good from a distance. But careful checking can lead to a much better outcome. Use pistils as an early clue, rely more on trichomes for a closer answer, and pay attention to the plant’s overall look as it finishes.
Knowing when cannabis is ready to harvest is about reading several signs together. Darkening pistils can show that the plant is getting close. Cloudy and partly amber trichomes give a stronger sign that the buds are mature. The plant’s overall appearance, including leaf fade and bud fullness, can also help confirm the timing. Harvesting too early can reduce quality and yield, while harvesting too late can lower freshness and raise the risk of problems. After cutting, trimming, drying, and curing are just as important as the grow itself. A careful finish can turn a decent first grow into a much better one.
First Time Cannabis Grow Checklist Step by Step
Starting your first cannabis grow can feel like a lot at first. There are many parts to think about, and it is easy to miss something if you do not have a clear plan. That is why a checklist matters. It helps you move in the right order and makes the whole process easier to follow. A good first grow does not depend on fancy gear or expert skills. It depends more on being prepared, staying consistent, and paying attention to the plant each day.
Start with a simple grow plan
Before you plant anything, take time to make a basic plan. Decide whether you will grow indoors or outdoors. Think about how much space you have and how much time you can give the plant each day. First-time growers usually do best when they keep things small. One or two plants are often easier to manage than a larger setup.
You should also decide what type of plant you want to grow. Many beginners choose feminized seeds because they are made to grow into bud-producing plants. This lowers the chance of ending up with male plants that do not give the results most home growers want. Some people also choose autoflower seeds because they grow on their own schedule and do not need light changes to start flowering. Others prefer photoperiod plants because they offer more time to fix mistakes during the early stages.
A simple grow plan should include your growing space, your plant type, your budget, and your daily care routine. When you make these choices early, the rest of the process becomes much smoother.
Gather your basic supplies
Once your plan is clear, the next step is to gather what you need. At the most basic level, you need seeds or clones, containers, a growing medium, water, light, airflow, and nutrients. You also need a way to check the environment around the plant.
For an indoor grow, most beginners need a grow light, a timer, a fan, a thermometer, and a hygrometer. These tools help you control light, air movement, temperature, and humidity. You will also need pots with drainage holes and a medium such as soil or coco coir. Many first-time growers choose soil because it is more forgiving and easier to understand.
You should also have a pH tool ready. Cannabis plants absorb nutrients best when the water and root zone stay in the right pH range. If the pH is off, the plant may struggle even when you are feeding it correctly. This is one of the small details that can make a big difference.
Try to set up everything before you start germination. That way, once the seed sprouts, you are ready to care for it right away.
Prepare the grow space before planting
A clean and stable grow space gives your plant a better start. If you are growing indoors, place your light at the proper distance above the plant area. Set up your fan so air moves gently through the space. Good airflow helps control heat, supports stronger stems, and lowers the risk of mold and pests.
Check the temperature and humidity in the room before you begin. Young plants usually do best in a warm, mild environment. If the space is too hot, too cold, too dry, or too damp, the plant may grow slowly or show signs of stress. You do not need a perfect room, but you do need one that stays fairly steady.
Make sure the area is easy to access. You will need to water, inspect, and adjust things often. A cramped or messy space can make even simple care more difficult. It also helps to keep the grow area clean from the start. Clean spaces are less likely to attract pests or develop mold problems later on.
Germinate the seed and handle seedlings with care
After the space is ready, you can start germination. This is the stage when the seed opens and begins to grow. Seeds need warmth, moisture, and gentle handling. Once the seed shows a small root, place it carefully into the growing medium with the root pointed down.
The seedling stage comes next. This is one of the most delicate parts of the whole grow. Seedlings are small and fragile, so they do not need intense light, heavy watering, or strong nutrients. Many beginners run into trouble here because they try to do too much too soon.
Keep the medium slightly moist, not soaked. Seedlings can suffer when the roots stay too wet. Give them enough light to grow strong, but do not place the light so close that it causes stress. At this stage, the goal is steady and healthy early growth, not fast growth at any cost.
Transplant and support vegetative growth
As the plant grows larger, it may need more root space. If you started in a small container, transplanting into a larger pot helps the roots spread and support stronger top growth. Make this move carefully so you do not damage the young root system.
During the vegetative stage, the plant focuses on growing stems, branches, and leaves. This is when it builds the structure that will support future buds. Good light, proper watering, steady airflow, and the right nutrients all matter during this stage.
Water the plant only when needed. A common beginner mistake is watering too often. The top layer of the medium may look dry, but the root area below may still be moist. Overwatering can slow growth and cause root problems. It is better to learn the weight of the pot and check moisture before adding more water.
This is also the stage when you should watch the plant closely for signs of stress. Yellow leaves, drooping, slow growth, or burnt leaf tips can point to problems with light, nutrients, watering, or pH. Catching small issues early is much easier than trying to fix a major problem later.
Feed carefully and keep the routine simple
Cannabis plants need nutrients, but more is not always better. Many first-time growers make the mistake of feeding too much too early. A simple feeding routine is usually best. Start light and increase only if the plant shows that it needs more.
The main thing is to stay consistent. Mix nutrients carefully, check pH, and avoid making too many changes at once. When something goes wrong, it is easier to find the cause if your routine is simple. If you change the light, water, nutrients, and environment all at the same time, it becomes much harder to know what affected the plant.
Think of feeding as support, not as a way to force fast results. Healthy growth usually comes from balance. The plant needs light, water, air, and nutrients working together.
Move into flowering and monitor the plant closely
When the plant enters the flowering stage, its needs begin to change. Autoflower plants move into this stage on their own. Photoperiod plants usually begin flowering after a change in the light cycle. This is the stage when the plant starts making buds.
During flowering, keep the environment as stable as possible. Strong light, fresh air, and proper watering still matter, but now you also need to watch humidity closely. Too much moisture in the air can raise the risk of mold, especially as buds get larger and denser.
This is also the time to stay patient. Buds take time to develop. Many first-time growers want to rush to harvest, but harvesting too early can lower quality and reduce results. Keep checking the plant, stay on schedule, and avoid major changes unless a real problem appears.
Harvest, dry, and cure the right way
Harvest is exciting, but it is not the final step. You need to know when the plant is truly ready. Many growers look at pistils and trichomes to judge ripeness. If you harvest too soon, the buds may not have reached their full potential. If you wait too long, the effect and quality may change.
After cutting the plant, drying comes next. This stage needs care and patience. Buds should dry slowly in a space with good airflow and controlled conditions. Drying too fast can hurt quality. Drying too slowly can invite mold.
After drying, curing helps improve the final result. This means storing the dried buds in containers and opening them from time to time so extra moisture can escape. Curing takes more time, but it can improve smell, taste, and overall quality. Many beginners focus only on growing and forget that drying and curing also shape the end result.
A smooth first cannabis grow usually comes down to doing the basics well. Start with a simple plan, gather the right supplies, prepare the grow space, and move through each stage with care. Do not rush germination, do not overwater seedlings, and do not overfeed during growth. Keep your routine simple, watch the plant closely, and make small corrections when needed.
The full checklist is not about making the grow complicated. It is about helping you stay organized from start to finish. When you plan ahead, stay patient, and give the plant steady care, your first grow is much more likely to go well.
Conclusion
A first cannabis grow usually goes better when you keep the process simple and stay organized from day one. That is the real value of a checklist. It helps you see the full job before you begin, and it keeps you from missing small details that can turn into big problems later. A new grower does not need to know everything at once, but it does help to understand the basic path from setup to harvest. When you know what to expect, it becomes easier to make smart choices and respond to problems early.
The best place to start is always with planning. Before you plant anything, you need to know where you will grow, what kind of setup you can manage, and what tools you need. A small indoor space with proper light, airflow, and containers can work well for many beginners. An outdoor grow may cost less at first, but it depends more on weather, season, and privacy. There is no single right answer for every person. The right choice depends on your space, your budget, and how much control you want over the growing conditions.
It also helps to choose beginner-friendly genetics. For a first grow, many people look for seeds or clones that are easier to manage and less likely to cause trouble. Feminized seeds are often a simple option because they are made to produce female plants, which are the ones that grow buds. Autoflower plants can be faster and easier in some ways, while photoperiod plants may give you more time to recover from mistakes. The best starting point is usually a plant type that matches your skill level and your grow space, not one that sounds the most impressive.
Your grow space matters just as much as the plant you pick. Cannabis grows best in a stable environment. That means clean air, good light, proper temperature, and steady humidity. It also means thinking about basic safety. Timers, fans, pH tools, and simple monitoring devices may not look exciting, but they play a big role in helping the plant grow well. A good setup does not have to be expensive, but it should be planned with care. When the environment is stable, the plant has a better chance to stay healthy through each stage.
The growing medium and container choice also shape the whole experience. Many first-time growers start with soil because it is easier to understand and often more forgiving. Good drainage is important, and the container should give the roots enough room to grow. Healthy roots support healthy leaves, stems, and flowers. When roots struggle, the whole plant struggles. That is why simple choices like pot size and medium type matter more than many beginners first realize.
Light, water, and nutrients are some of the most common areas where first-time growers run into trouble. Light is the plant’s energy source, so weak lighting can lead to poor growth. Too much light or poor placement can also stress the plant. Watering is another big one. Many beginners give too much water because they want to help the plant, but too much water can hurt the roots by cutting off oxygen. Feeding can cause problems too when nutrients are added too early or in amounts that are too strong. In many cases, success comes from doing a little less, not a little more. Careful observation and patience often work better than constant changes.
Understanding the main growth stages helps the whole process feel less confusing. Germination is when the seed first sprouts. The seedling stage is when the young plant is small and delicate. The vegetative stage is when the plant focuses on growing bigger and stronger. The flowering stage is when buds begin to form and mature. Each stage has different needs, and knowing these stages helps you adjust your care at the right time. It also helps you understand that cannabis growth is a process, not something that happens overnight.
Time is another part of the checklist that beginners should take seriously. A grow takes patience. Depending on the type of plant and the grow style, it may take weeks or months to reach harvest. Then there is still drying and curing, which also matter for the final result. Many new growers focus only on the day they cut the plant down, but harvest is not really the end. Drying and curing help improve quality, smell, feel, and overall use. A rushed finish can weaken the result of months of work.
It is also important to know that mistakes are common in a first grow. Overwatering, poor airflow, nutrient burn, heat stress, pests, and wrong pH are all common issues. These problems do not always mean the grow is ruined. In many cases, they can be fixed if you spot them early. This is another reason a checklist helps so much. It gives you a clear way to review your setup and your routine. Instead of guessing, you can go step by step and find what may be wrong.
In the end, a smooth first grow comes down to preparation, consistency, and simple choices. You do not need the biggest setup or the most advanced tools to get started. You need a clear plan, a manageable grow space, the right basic supplies, and the patience to learn as the plant grows. When you follow a checklist and take the process one stage at a time, the first grow feels less overwhelming and more rewarding. A good start is not about being perfect. It is about being prepared, paying attention, and giving the plant steady care from beginning to end.
Research Citations
Trancoso, I., de Souza, G. A. R., dos Santos, P. R., dos Santos, K. D., de Miranda, R. M. d. S. N., da Silva, A. L. P. M., Santos, D. Z., García-Tejero, I. F., & Campostrini, E. (2022). Cannabis sativa L.: Crop management and abiotic factors that affect phytocannabinoid production. Agronomy, 12(7), 1492.
Eichhorn Bilodeau, S., Wu, B.-S., Rufyikiri, A.-S., MacPherson, S., & Lefsrud, M. (2019). An update on plant photobiology and implications for cannabis production. Frontiers in Plant Science, 10, 296.
Kpai, P. Y., Adaramola, O., Addo, P. W., MacPherson, S., & Lefsrud, M. (2024). Mineral nutrition for Cannabis sativa in the vegetative stage using response surface analysis. Frontiers in Plant Science, 15, 1501484.
Danziger, N., & Bernstein, N. (2021). Light matters: Effect of light spectra on cannabinoid profile and plant development of medical cannabis (Cannabis sativa L.). Industrial Crops and Products, 164, 113351.
Morello, V., Brousseau, V. D., Wu, N., Wu, B.-S., MacPherson, S., & Lefsrud, M. (2022). Light quality impacts vertical growth rate, phytochemical yield and cannabinoid production efficiency in Cannabis sativa. Plants, 11(21), 2982.
Danziger, N., & Bernstein, N. (2022). Too dense or not too dense: Higher planting density reduces cannabinoid uniformity but increases yield/area in drug-type medical cannabis. Frontiers in Plant Science, 13, 713481.
Buirs, L., & Punja, Z. K. (2024). Integrated management of pathogens and microbes in Cannabis sativa L. (Cannabis) under greenhouse conditions. Plants, 13(6), 786.
Sirangelo, T. M. (2024). NLR- and mlo-based resistance mechanisms against powdery mildew in Cannabis sativa. Plants, 13(1), 105.
AL Ubeed, H. M. S., Wills, R. B. H., & Chandrapala, J. (2022). Post-harvest operations to generate high-quality medicinal cannabis products: A systemic review. Molecules, 27(5), 1719.
Corredor-Perilla, I. C., Kwon, T.-H., & Park, S.-H. (2025). Elevated relative humidity significantly decreases cannabinoid concentrations while delaying flowering development in Cannabis sativa L. Frontiers in Plant Science, 16, 1678142.
Questions and Answers
Q1: What should be on a first time cannabis grow checklist?
A first time cannabis grow checklist should include seeds or clones, grow lights, pots, soil or growing medium, nutrients, water source, timer, fan, thermometer, hygrometer, pH meter, and pruning tools. It should also include a plan for lighting, temperature, humidity, and harvest time.
Q2: What is the best setup for a first time cannabis grow?
A simple indoor setup is often easiest for beginners. Many first time growers use a small grow tent, one quality grow light, a fan for airflow, fabric pots, and good soil. This setup gives more control over light, air, and temperature.
Q3: Should beginners start with seeds or clones?
Many beginners start with seeds because they are easier to buy and store. Feminized seeds are often the best choice because they are more likely to grow into female plants. Clones can save time, but they may be harder to find and can bring pests or disease.
Q4: What kind of cannabis seeds are best for first time growers?
Feminized photoperiod seeds or feminized autoflower seeds are common beginner choices. Feminized seeds help reduce the chance of male plants. Autoflower seeds are often easier because they flower on their own, but photoperiod plants give more control over training and timing.
Q5: How much light does a beginner cannabis plant need?
During the vegetative stage, cannabis plants usually need about 18 hours of light and 6 hours of darkness each day. During the flowering stage, photoperiod plants usually need 12 hours of light and 12 hours of darkness. Autoflower plants can grow well under longer light hours from start to finish.
Q6: What temperature and humidity levels should be on a beginner grow checklist?
A beginner should aim for warm but not hot temperatures, usually around 70 to 85 degrees Fahrenheit during the day. Humidity should be higher for seedlings and lower during flowering. Keeping temperature and humidity in a safe range helps plants grow well and lowers the risk of mold and stress.
Q7: How often should a beginner water cannabis plants?
A beginner should water only when the growing medium starts to dry out. Overwatering is a common mistake. It is usually better to water deeply and then wait until the top layer feels dry before watering again.
Q8: What nutrients do first time cannabis growers need?
Cannabis plants need basic nutrients such as nitrogen, phosphorus, and potassium, along with smaller amounts of calcium, magnesium, and trace minerals. Seedlings need very light feeding, while larger plants need more support. Many beginners do best with a simple nutrient line and by following a reduced feeding schedule at first.
Q9: What are the most common mistakes on a first time cannabis grow?
Common mistakes include overwatering, giving too many nutrients, using weak lighting, ignoring pH, poor airflow, and harvesting too early. Many beginners also make the mistake of changing too many things at once instead of keeping the setup simple.
Q10: When is cannabis ready to harvest for a first time grower?
Cannabis is usually ready to harvest when the buds look full and the trichomes change from clear to mostly cloudy, with some turning amber. The pistils also darken and curl in. Checking the plant closely near the end of flowering helps a beginner harvest at the right time.