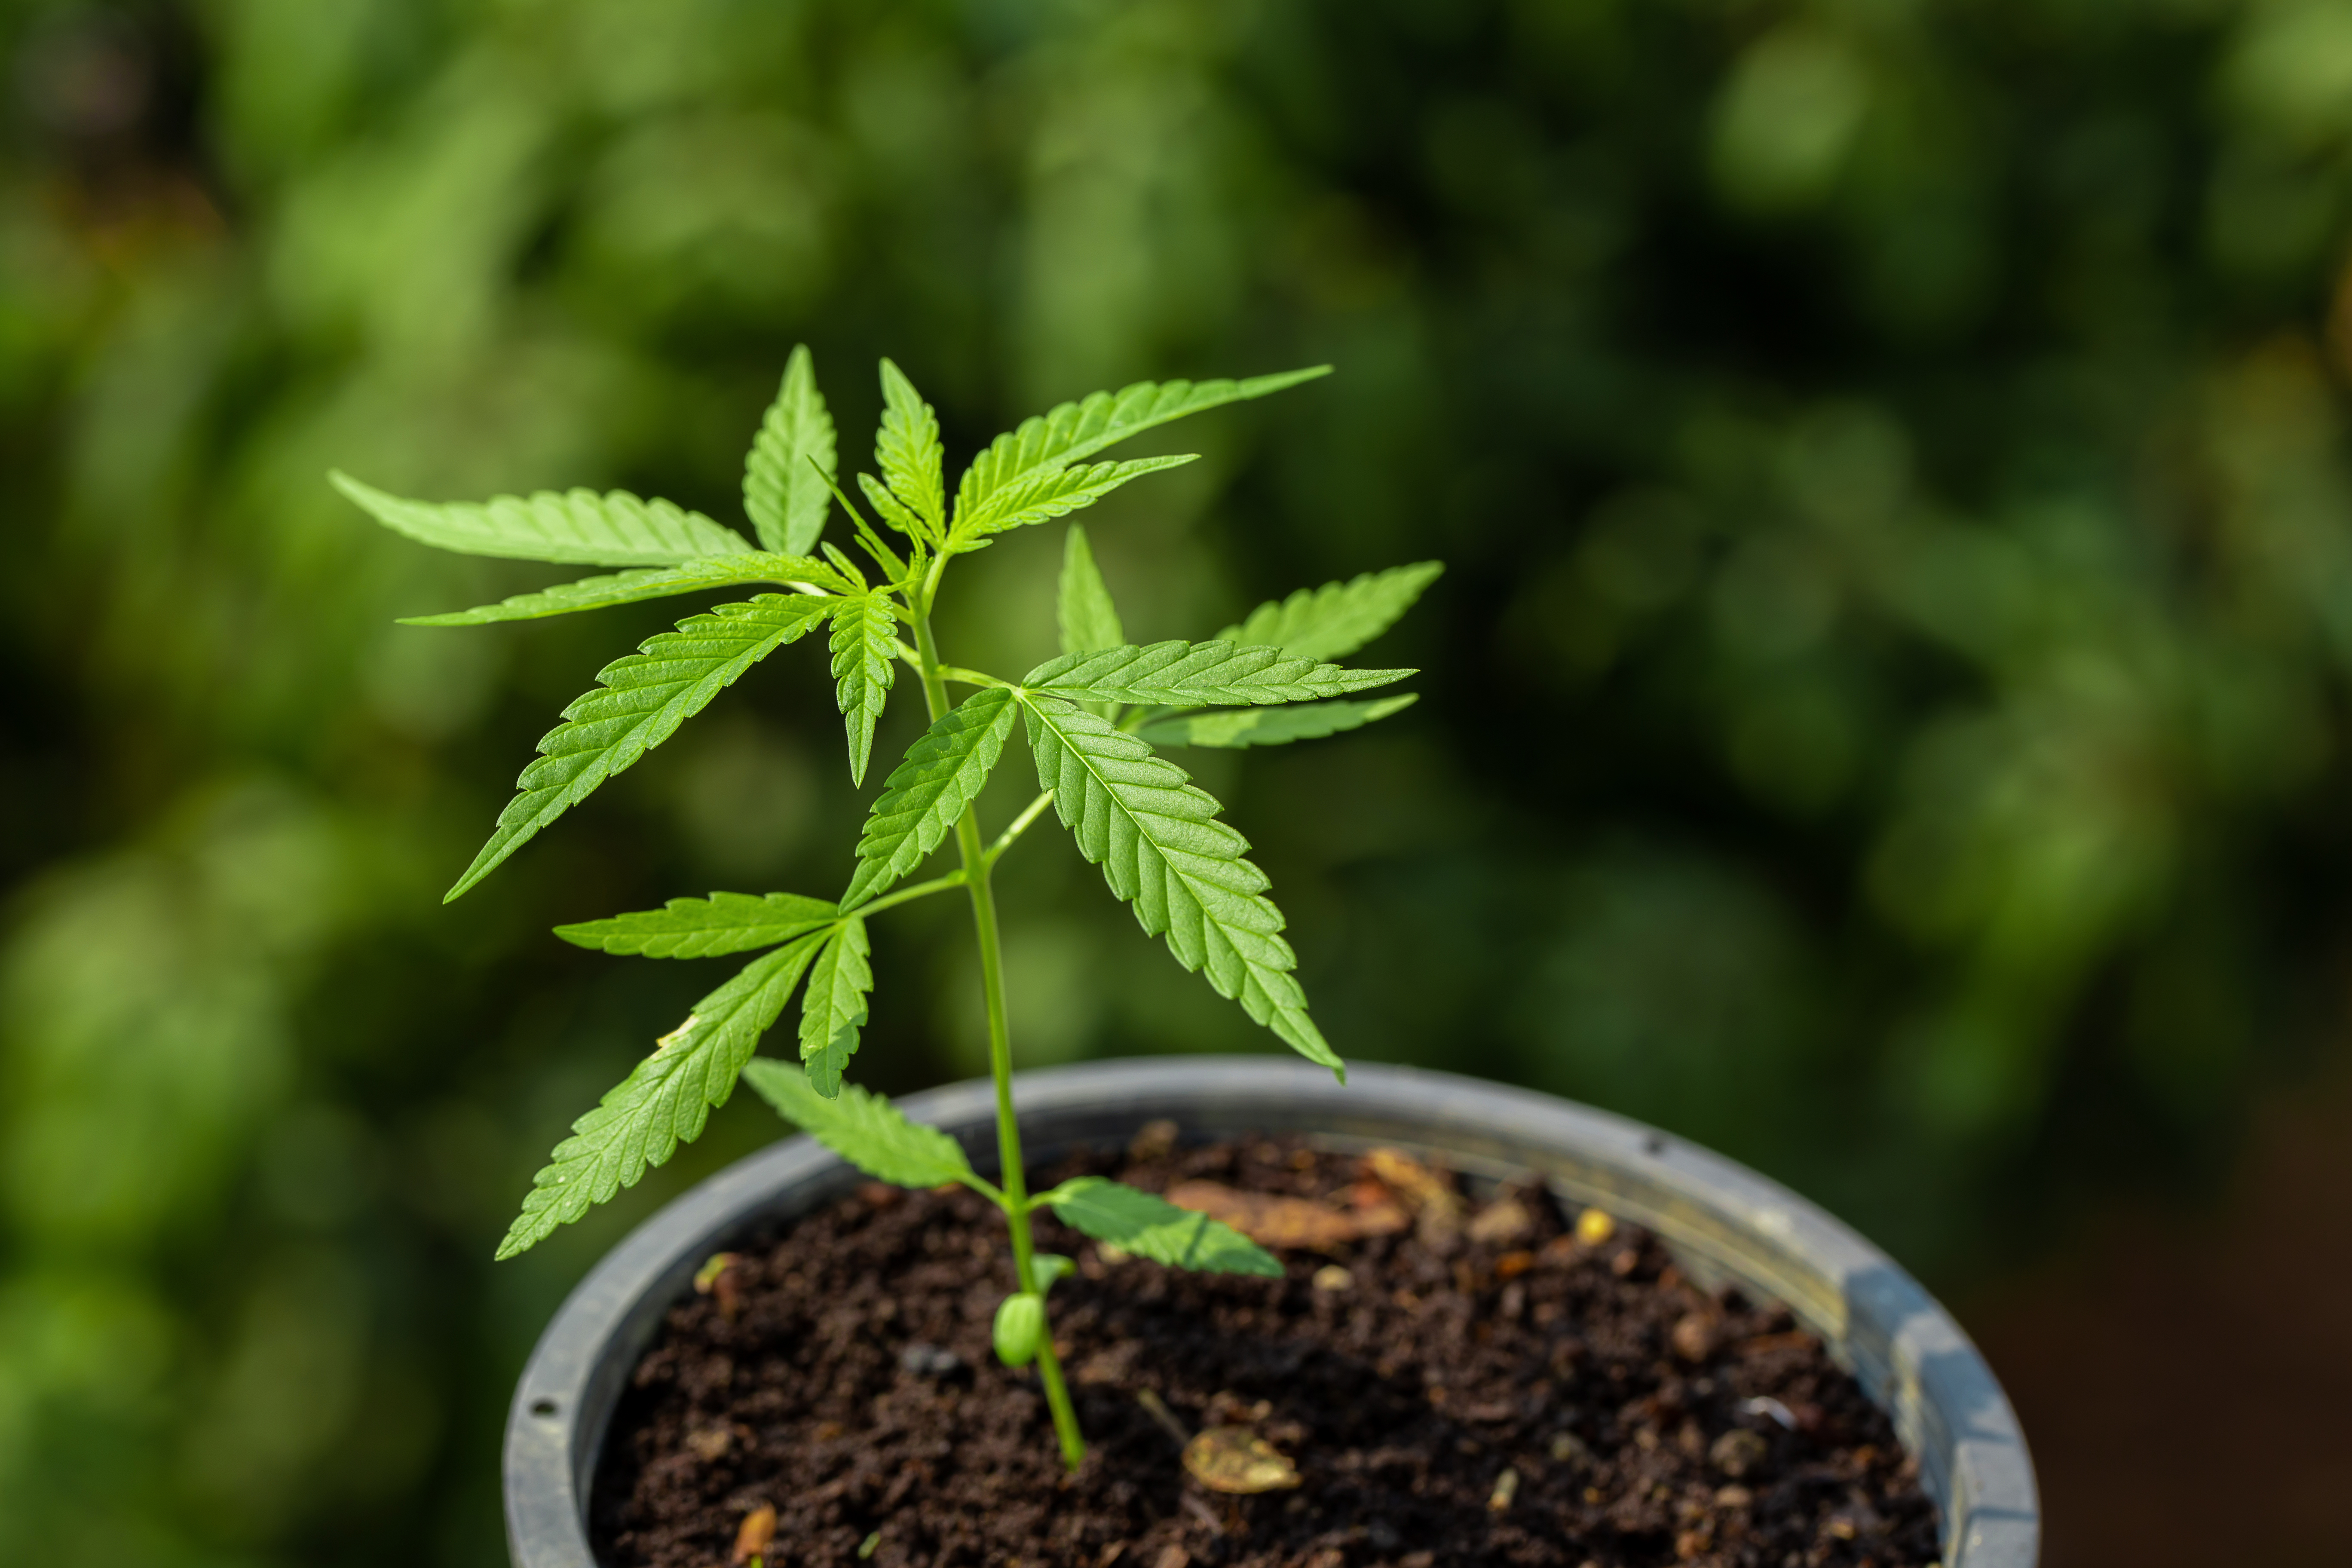


Marijuana seed germination is the first stage in the life of a cannabis plant. It begins when a dry seed absorbs water and starts to grow. The hard outer shell slowly opens, and a small white root appears. This first root is called the taproot. It grows downward into the soil or growing medium and begins to take in water and nutrients. Soon after, a small shoot grows upward and forms the first leaves. When this process happens correctly, the seed can develop into a healthy seedling.
Germination may look simple, but it is an important stage. A seed is small and fragile when it first becomes active. It cannot handle large changes in temperature, too much water, or rough treatment. Poor conditions during this stage may slow growth, damage the root, or stop the seed from sprouting. Strong early care gives the young plant a better chance to build a healthy root system and continue through the later growth stages.
Several factors affect whether marijuana seeds germinate. The most important are moisture, warmth, oxygen, cleanliness, and seed quality. A seed needs enough moisture to soften its outer shell and activate the living tissue inside. However, it should not remain in waterlogged conditions. Too much water may block oxygen from reaching the seed. This can cause the seed to rot before it has a chance to open.
Warmth also plays an important role. Marijuana seeds usually germinate best in a stable, warm environment. Cold conditions may slow the process, while very high heat may damage the seed or increase the risk of mold. Sudden changes in temperature may also reduce the chance of success. The goal is to provide steady warmth instead of strong heat.
Oxygen is often overlooked during germination. Even though the seed has not formed leaves, it still needs air. The seed uses oxygen as it begins to release stored energy and grow. This is why dense, soaked soil can become a problem. Water can fill the small air spaces in the growing medium and leave the seed without enough oxygen. A light and well-draining medium helps prevent this issue.
Cleanliness matters because warm and moist conditions can also support mold and harmful bacteria. Dirty containers, unwashed hands, old paper towels, or contaminated water may introduce problems. Clean tools and materials reduce the risk of infection. Seeds should also be handled as little as possible, especially after the taproot appears. The taproot is delicate and may break, bend, or dry out when touched too often.
Seed quality is another major part of germination. Mature seeds are often dark brown, gray, or mottled. They usually have a firm shell and do not crush easily under light pressure. Pale green or soft seeds may be immature and less likely to sprout. Still, color alone does not prove whether a seed is healthy. Age, genetics, storage conditions, and damage can also affect germination.
There are several common methods used to germinate marijuana seeds. The paper towel method places seeds between damp paper towels so the grower can watch for the taproot. Direct planting places the seed into soil or another growing medium from the start. Water soaking helps hydrate the shell before the seed is moved into another medium. Starter plugs and cubes provide a small, controlled space where moisture and air can be managed more easily.
Each method has benefits and possible problems. The paper towel method makes it easy to see whether the seed has opened, but the taproot can be damaged during transfer. Direct planting avoids moving an exposed root, but it is harder to see what is happening below the surface. Water soaking may help older or hard-shelled seeds, but leaving seeds underwater for too long can cause rot. Starter plugs can support steady moisture, but they may stay too wet when they are not prepared correctly.
Germination time can also vary. Some marijuana seeds open within one or two days, while others may take several days longer. Older seeds, seeds with thick shells, or seeds kept in poor storage may need more time. A slow seed is not always a dead seed. Constant checking, squeezing, digging, or changing methods may cause more harm than waiting.
The early seedling stage begins after the taproot develops and the shoot rises above the growing medium. At this point, the plant needs gentle light, stable moisture, and enough air around the roots. Strong fertilizer is usually not needed right away because the seed contains stored energy for early growth. Too much feeding during this stage may harm the young roots.
This article explains the main marijuana seed germination methods, how long the process may take, and the conditions that support healthy growth. It also covers common mistakes such as overwatering, drying out the seed, using the wrong temperature, planting too deeply, and handling the taproot too much. Understanding these basic points can make the germination process easier to manage and help reduce avoidable problems.
Cannabis laws differ between countries, states, and local areas. Some places allow home cultivation under certain limits, while others ban it completely. Legal rules may also cover seed possession, plant numbers, growing locations, and age requirements. Local laws should be checked before any marijuana seeds are germinated or planted.
How Marijuana Seeds Germinate
Marijuana seed germination is the first active stage in the life of a cannabis plant. It begins when a dry seed receives the right amount of moisture, warmth, and oxygen. These conditions wake the seed from its resting state and allow growth to begin. During germination, the seed uses the food stored inside it to produce its first root and shoot.
A seed may look inactive from the outside, but it contains a small plant embryo. It also contains stored nutrients that support early development. The seed does not need fertilizer during this stage because it already has enough energy to begin growing. The main goal during germination is to create a stable environment without drowning, drying, overheating, or damaging the seed.
Germination is a sensitive process. Small changes in moisture or temperature can affect the speed and success of sprouting. Seeds may germinate at different rates, even when they come from the same group. Some seeds may open quickly, while others may need several more days. Careful monitoring is important, but seeds should not be handled or disturbed too often.
What Happens Inside the Seed
The germination process starts when the seed absorbs water through its outer shell. This process is sometimes called water uptake. As the seed takes in moisture, it begins to swell. The shell slowly becomes softer, and the inactive cells inside the seed begin working again.
Water activates natural enzymes inside the seed. These enzymes help break down stored food into simple forms that the embryo can use. The stored food provides energy for cell division and early growth. This allows the small plant inside the seed to begin developing before it can make energy from light.
The first major structure to appear is the taproot. The taproot is the main root that grows out of the cracked seed shell. It is often white or cream in color and may look very thin. Its job is to grow downward into the growing medium and begin absorbing water. It also helps anchor the young plant in place.
After the taproot appears, smaller root structures begin developing. At the same time, the young shoot starts growing upward. The shoot carries the seed shell or the first small leaves toward the surface. These first leaves are called cotyledons. They are usually smooth and rounded, unlike the pointed leaves that appear later.
The taproot and shoot naturally grow in different directions. Gravity guides the root downward, while the shoot moves toward the surface and light. The seed can often correct its position even if it is not planted perfectly. However, gentle placement may reduce stress and make early growth easier.
Once the shoot reaches the surface, the seedling begins using light to produce energy. This marks the change from germination to the seedling stage. At this point, the young plant becomes more dependent on light, air, water, and the growing medium.
What Marijuana Seeds Need to Sprout
Moisture is one of the most important parts of germination. The seed must absorb enough water to soften its shell and activate internal growth. However, too much water can cause serious problems. Seeds need oxygen as well as moisture. If the seed is fully surrounded by water for too long, it may not receive enough oxygen. This may slow growth or cause the seed to rot.
The germination material should remain evenly moist but not dripping wet. A paper towel should feel damp rather than soaked. Soil or starter plugs should feel moist without becoming muddy. The right balance allows the seed to absorb water while still receiving air.
Warmth also supports germination. Stable temperatures help the seed’s internal processes work at a steady rate. Cold conditions may slow water absorption and root growth. Very high temperatures may damage the embryo or increase the risk of mold. Sudden temperature changes may also place stress on the seed.
Oxygen is needed because the seed is alive and carries out respiration. Respiration allows the seed to release energy from its stored food. A loose growing medium, clean paper towel, or properly prepared starter plug gives the seed access to air. Compacted soil and standing water can limit oxygen around the seed.
Cleanliness helps reduce the risk of mold and harmful bacteria. Hands, tweezers, containers, and work surfaces should be clean before handling seeds. Dirty tools or reused materials may carry fungal spores. These organisms can grow quickly in warm and wet conditions.
Seeds also need gentle handling. The taproot is soft and easy to damage. It should not be touched, squeezed, bent, or left in dry air for long periods. Too much checking can also disturb the moisture level and expose the seed to changes in temperature.
Light is not required for the seed to open. Germination can happen in darkness or low light. Strong direct light may dry the setup or raise the temperature. Once the seedling rises above the growing medium, suitable light becomes important for healthy development.
How to Recognize a Germinated Seed
A marijuana seed is usually considered germinated when the shell opens and a small taproot becomes visible. The root often begins as a tiny white point. It may then grow longer over the next several hours or days.
A healthy taproot usually looks white, cream, or pale in color. It should appear firm and clean. It may curve slightly as it grows. A slight curve is normal and does not mean the seed is damaged.
The outer shell may remain partly attached after the root appears. This is also normal. The shell often protects the young leaves until the shoot reaches the surface. It should not be pulled off by force because this may damage the seedling.
Certain signs may suggest that a seed is unhealthy. A dark, brown, or black root may indicate damage or decay. A soft seed shell, unpleasant smell, or slimy surface may be a sign of rot. White fuzzy growth around the seed may be mold, although some fine white root hairs can also appear after the root develops. Root hairs usually grow directly from the root in an even pattern, while mold may spread across the seed or nearby material.
A seed that has swollen but not opened may still be developing. Germination time can vary because of seed age, genetics, storage, and environmental conditions. The seed should not be opened by hand. Breaking or cutting the shell can damage the embryo inside.
Once the taproot appears, the seed should be moved carefully into its growing medium if it is not already there. Waiting too long may allow the root to become very long, tangled, or attached to the germination material. A longer root is harder to transfer without injury.
Marijuana seed germination begins when a seed absorbs moisture and becomes active. Water softens the shell and activates enzymes that turn stored food into energy. The taproot appears first and grows downward, while the shoot later moves upward toward the surface.
Successful germination depends on balanced moisture, steady warmth, oxygen, cleanliness, and careful handling. The seed should stay damp but not waterlogged. It should also be protected from extreme temperatures and repeated disturbance. A visible white taproot is the clearest sign that germination has started successfully. Once the root appears, the seed is ready to continue developing in a suitable growing medium.
How to Choose Healthy Marijuana Seeds
The quality of a marijuana seed can affect how well it germinates and develops into a healthy seedling. Strong seeds are more likely to open, form a taproot, and survive the first stage of growth. Weak, damaged, or immature seeds may take longer to germinate or may not sprout at all. However, appearance does not provide a perfect answer. A seed may look healthy but fail to open, while an older or lighter seed may still germinate under good conditions.
Seed health is affected by maturity, genetics, age, storage, and handling. Each factor plays a role in whether the seed remains alive. Checking the outside of the seed can help identify clear problems before germination begins. It can also prevent time and growing materials from being used on seeds that show signs of serious damage.
Signs of a Mature Seed
Mature marijuana seeds are often brown, dark gray, or tan. Some have spots, stripes, or a pattern that looks similar to a tiger’s skin. The exact color and pattern can vary because different cannabis varieties produce seeds with different appearances. A seed does not need to have dark stripes to be healthy. Some mature seeds have a plain surface with little or no pattern.
A healthy mature seed usually has a firm outer shell. The shell protects the living plant tissue inside the seed from moisture loss, impact, and changes in temperature. When gentle pressure is placed on the seed, it should not break, crack, or collapse. Too much pressure should never be used because even a healthy seed can be damaged.
The surface may feel smooth, hard, or slightly waxy. A light shine is common on some seeds. This hard coating helps control how water enters the seed during germination. Once the seed absorbs enough moisture, the shell begins to soften and open.
Healthy seeds should be dry before germination begins. Seeds that feel wet, sticky, or unusually soft may have been exposed to poor storage conditions. Moisture during storage can cause mold or begin the germination process too early. A seed that starts absorbing water and then dries out may lose its ability to germinate.
Visible damage should also be checked. Cracks, deep dents, holes, and broken shells can expose the inside of the seed. Damage may occur during harvesting, cleaning, shipping, or handling. A small mark on the shell may not cause failure, but a large crack can allow disease organisms to enter. It can also cause the seed to lose moisture.
Mold is another warning sign. It may appear as white, gray, green, or black growth on the surface. Moldy seeds should be separated from healthy seeds because fungal growth can spread. A bad smell may also suggest that the seed has started to rot.
Seed size is less useful for judging quality. Marijuana seeds may be small, medium, or large, depending on their genetics. A small seed can be fully mature, while a large seed can still be weak. Color, firmness, storage history, and shell condition are more important than size alone.
Can Pale or Green Seeds Germinate?
Pale green, white, or very light seeds are often considered immature. These seeds may have been collected before they completed their natural development. An immature seed may have a soft shell and may be easy to crush. The plant tissue inside may not contain enough stored energy to support germination and early seedling growth.
Green seeds often have lower germination rates than mature brown or gray seeds. They may absorb water but fail to produce a taproot. Some may crack open and then stop growing. Others may form weak seedlings that struggle to become established.
However, color alone cannot confirm whether a seed is alive. Some cannabis varieties naturally produce lighter seeds. A pale seed with a hard, complete shell may still germinate. A dark seed may also fail if it was stored badly, damaged by heat, or kept for too long.
The float test is sometimes used to check seed quality, but it is not fully reliable. During this test, seeds are placed in water to see whether they float or sink. Some people believe that sinking seeds are healthy and floating seeds are weak. In reality, trapped air, shell thickness, and water absorption can affect whether a seed floats. A floating seed may still germinate, and a sinking seed may still fail.
Pressing the seed is also not a perfect test. A very weak seed may crack under light pressure, which suggests poor quality. However, applying pressure can damage a viable seed. Visual inspection is safer than repeated handling.
The only clear way to learn whether a pale seed is viable is to place it under proper germination conditions. Warmth, moisture, oxygen, and patience give the seed the best chance to open. Pale or green seeds should be kept separate from stronger-looking seeds so their progress can be monitored without disturbing the others.
Extra care may be needed because immature-looking seeds can rot quickly. The growing material should remain moist but not soaked. Excess water can fill the air spaces around the seed and reduce oxygen. A weak seed may be less able to survive this stress than a fully mature seed.
How Seed Age and Storage Affect Germination
Marijuana seeds are living materials, even while they appear dry and inactive. They remain in a resting state until moisture and suitable temperatures start germination. During storage, the living cells inside the seed slowly lose strength. Proper storage can slow this process and protect the seed for a longer period.
Heat is one of the main causes of seed damage. High temperatures increase chemical activity inside the seed and can shorten its useful life. Seeds stored near heaters, windows, appliances, or direct sunlight may lose viability faster. Sudden changes between hot and cold conditions can also create moisture inside the storage container.
Light may also reduce seed quality over time. Direct light can warm the seeds and affect the natural resting state. Seeds should be kept in a dark place, such as a closed container, cabinet, or suitable storage area.
Moisture is a serious storage risk. When seeds absorb moisture, they may begin the first stages of germination. If the environment does not provide enough water, warmth, or oxygen to complete the process, the seeds may become damaged. Moist conditions also support mold, bacteria, and rot.
Air exposure can slowly affect seed quality as well. A sealed container helps protect seeds from humidity, pests, dust, and changes in the surrounding environment. The container should be clean and completely dry before seeds are placed inside it.
Old marijuana seeds can still germinate, but their success rate may decrease with age. They may take longer to absorb water and open because the shell can become hard. Older seeds may also produce weaker taproots or seedlings. Some remain viable for years when kept in stable, cool, dark, and dry conditions. Others lose their ability to germinate much sooner because of poor storage.
Older seeds should not be discarded only because of their age. They can be tested using a gentle germination method. The paper towel method may make it easier to observe whether the shell opens. Water soaking may help hydrate a hard shell, but long soaking periods should be avoided because seeds also need oxygen.
Repeated movement and handling can damage stored seeds. They should not be shaken, dropped, or exposed to pressure. Labels can be added to the container to show the seed variety and storage date. This makes it easier to track age without opening the container often.
Healthy marijuana seeds are usually dry, firm, and free from cracks, holes, mold, and soft areas. Mature seeds are often brown, gray, tan, or patterned, but appearance can vary between cannabis varieties. Pale or green seeds may be immature and less likely to germinate, although color alone cannot prove whether a seed is viable.
Age and storage conditions are just as important as appearance. Heat, moisture, light, air exposure, and rough handling can lower germination rates. Seeds kept in a cool, dark, dry, and stable place have a better chance of remaining viable. Careful inspection can help identify obvious problems, but germination under proper conditions is the most reliable test of seed health.
The Paper Towel Method
The paper towel method is one of the most common ways to germinate marijuana seeds. It gives the grower a clear view of the seed while it opens and develops its first root. This makes it easier to track progress compared with planting the seed directly in soil. The method is also simple because it only requires a few basic materials.
The main goal is to keep the seed warm, moist, and protected while still allowing access to oxygen. The paper towel should stay damp, but it should never be dripping wet. Too much water can reduce airflow around the seed and may cause mold or rot. Too little water can cause the seed to dry out before the taproot develops.
Careful handling is also important. The new taproot is soft and easy to damage. Once the seed has opened, it should be moved into the growing medium before the root becomes too long or tangled in the paper towel.
Materials Needed
The paper towel method requires clean paper towels, clean water, marijuana seeds, and a covered container. Two plates can be used, with one plate placed over the other to hold in moisture and block strong light. A sealable plastic container can also work well because it helps keep the environment stable.
Plain paper towels are usually the best choice. Towels with added scents, dyes, cleaning chemicals, or lotions should be avoided. These substances may affect the seed or the young root. The paper towel should also be strong enough to stay together when wet. Very thin paper may tear or stick to the taproot.
Clean water is important because the seed is sensitive during germination. Water that contains very high levels of salts or chemicals may create stress. Room-temperature water is often suitable because very cold water can slow the process, while hot water may damage the seed.
Clean tweezers can be useful when moving the seed after the taproot appears. The tweezers should have smooth ends and should not squeeze the seed. Clean hands are also important because dirt, oil, and germs can be transferred to the damp paper towel.
The germination setup should be placed in a warm area away from direct sunlight. A cupboard, drawer, or covered shelf may provide a stable environment. The location should not be near a heater, air conditioner, or cold window because sudden temperature changes can slow germination.
Step-by-Step Paper Towel Process
Start by wetting the paper towels with clean water. The towels should be evenly moist but not soaked. Excess water should be gently squeezed out before the seeds are added. When the towel is lifted, water should not drip from it.
Place one damp paper towel on a clean plate or inside a clean container. Set the seeds on the towel with some space between each one. Leaving space prevents the roots from growing into each other. It also makes each seed easier to remove later.
Cover the seeds with a second damp paper towel. The top towel should rest gently over the seeds without pressing down too hard. Place another plate over the first plate or close the container with its lid. The cover helps slow water loss and protects the seeds from direct light.
Keep the setup in a warm and stable location. The paper towel should be checked at least once each day. It should remain damp during the full germination period. When the towel starts to dry, add a small amount of water around the seeds. Pouring too much water directly over them should be avoided because it may move or flood the seeds.
Some seeds may begin to open within one or two days. Others may take several days. The outer shell usually cracks first, followed by the appearance of a small white root. This root is the taproot. It will later grow downward and form the main root system of the plant.
The container should not be opened too often. Constant checking can release heat and moisture. It can also expose the seed to germs or physical damage. A quick daily check is usually enough to confirm that the towel is moist and the seed is developing.
The seed is ready to move when the taproot is clearly visible. A short root is easier to handle than a long one. Allowing the root to grow too long can increase the risk of damage. Long roots may bend, break, or grow into the paper towel fibers.
Before moving the seed, prepare the soil, starter plug, or other growing medium. The planting hole should already be made so the seed can be moved without delay. Use clean tweezers to hold the seed by the shell. The taproot should not be touched or squeezed.
Place the seed gently into the hole, usually with the taproot facing downward. Cover it with a light layer of growing medium. The soil should be moist but not heavily watered. After planting, the seed should be left undisturbed while it begins to establish its roots.
Benefits and Drawbacks
One major benefit of the paper towel method is that seed development can be seen clearly. The grower can tell whether the seed has cracked and whether a taproot has formed. This removes some of the uncertainty that comes with direct soil germination.
The method also allows moisture levels to be controlled more easily. A paper towel holds enough water to keep the seed hydrated while still allowing some air to reach it. The setup is inexpensive and does not require special tools.
Another benefit is that seeds that fail to open can be identified before they are planted. This may help avoid using pots or growing space for seeds that are not viable. It also allows several seeds to be germinated in one container.
However, the method also has risks. The paper towel can dry out quickly, especially in a warm room or an uncovered container. A dry towel can stop germination and damage the young root. Moisture must be checked each day.
Too much water can also cause problems. A soaked paper towel may limit oxygen and create conditions where mold or bacteria can grow. Seeds that become soft, dark, or covered in fuzzy growth may be starting to rot.
Root damage during transfer is another common concern. The taproot is fragile and can be harmed by rough tools, dirty hands, or strong pressure. It may also grow into the paper towel if the seed is left for too long. Pulling the root free can tear its surface or break it.
Temperature control may also be difficult. Plates and small containers can become too hot if placed near a heat source or in direct sunlight. High heat can dry the towels or damage the seed. Cold conditions can slow the process and keep the seed inactive.
The paper towel method is a simple way to germinate marijuana seeds while watching each stage of development. It works best when the towels remain evenly moist, the temperature stays warm and stable, and the seeds are handled as little as possible. Clean materials can lower the risk of mold and infection.
The seed should be transferred after a short, healthy taproot appears. Waiting too long may cause the root to grow into the paper or become difficult to handle. Careful moisture control, clean tools, and gentle transfer can improve the chance of moving the seed safely into its growing medium.
Germinating Marijuana Seeds Directly in Soil
Germinating marijuana seeds directly in soil is a simple method that allows the seed to begin growing in the same medium where the young plant will develop. This method can reduce stress because the new taproot does not need to be moved after it appears. However, success depends on using the right soil, planting at the correct depth, and controlling moisture carefully.
Direct soil germination follows the natural way many seeds grow. The seed absorbs water, opens, and sends its first root into the soil. The young shoot then moves upward until it reaches the surface. Since this process happens below the soil, it is not possible to watch the seed crack open. Careful preparation and patience are important.
Preparing the Growing Medium
The growing medium should be light, loose, and able to drain excess water. Dense or compact soil may make it hard for the taproot to grow. It can also hold too much water, which reduces the amount of oxygen around the seed. Seeds need both moisture and oxygen during germination.
A seed-starting mix is often more suitable than heavy garden soil. A good mix may contain peat, coco coir, perlite, or other light materials. These ingredients help the soil stay moist without becoming waterlogged. The texture should allow the young root to move through the medium without much resistance.
The soil should be placed in a small container with drainage holes. A small pot, seedling cup, or starter tray may be used. Drainage holes allow extra water to escape and help prevent standing water around the seed. The container should also be clean to reduce the risk of mold or harmful microbes.
Before planting, the growing medium should be moistened evenly. Water should be added slowly until the soil feels damp but not soaked. When the soil is squeezed gently, it should hold together for a moment without releasing a large amount of water. If water drips freely from the soil, the medium may be too wet.
Heavy fertilizer should not be added before germination. Marijuana seeds already contain stored energy that supports their first stage of growth. Strong nutrients may damage the new root or cause nutrient burn. A mild seed-starting medium is usually enough until the seedling develops its first sets of true leaves.
How Deep to Plant Marijuana Seeds
Planting depth can affect how quickly and successfully a seed reaches the surface. A marijuana seed is usually placed about one-quarter to one-half inch deep. This depth provides enough coverage to keep the seed moist while still allowing the shoot to reach the surface.
A small hole can be made with a clean finger, pencil tip, or similar tool. The hole should not be packed tightly. Loose soil makes it easier for the seedling to push upward.
Planting too deeply can create several problems. The young shoot may use too much stored energy before it reaches the surface. Deep soil may also remain wetter and contain less oxygen. In some cases, the seed may germinate but fail to emerge.
Planting too close to the surface may also cause trouble. The seed may dry out quickly, especially when the air is warm or dry. The root may have poor support, and the seed shell may not come off correctly. A very shallow seed may also move when the soil is watered.
The seed may be placed on its side or with the pointed end facing downward. However, exact seed direction is not always required. The taproot naturally responds to gravity and normally grows downward. Careful placement may help, but forcing the seed into a certain position is not necessary.
Planting and Watering the Seed
Once the planting hole is ready, the seed should be placed gently inside. Clean fingers or tweezers may be used. The seed should not be squeezed, cracked, or pushed hard into the soil. Rough handling can damage the shell or the plant tissue inside.
After the seed is placed, it should be covered with a thin layer of loose soil. The surface should not be pressed down firmly. Compacted soil may block airflow and make it harder for the shoot to rise.
Watering should be gentle. Pouring a strong stream of water directly onto the planting area may move the seed deeper into the pot. It may also create compact soil. A spray bottle, dropper, or small amount of water poured around the planting spot can provide better control.
The goal is to keep the soil evenly moist. It should not be allowed to dry fully, but it should not remain soaked. Overwatering is one of the most common mistakes during direct soil germination. Too much water fills the air spaces in the soil and limits oxygen. This can cause the seed to rot before it develops.
The container should be kept in a warm location. A steady temperature supports the natural processes inside the seed. Cold conditions may slow germination, while excessive heat may dry the soil or encourage mold.
A clear humidity cover may be placed over the pot to reduce moisture loss. A plastic dome or loose covering can help maintain humidity, especially in a dry room. However, the cover should not completely block airflow. It should also be removed after the seedling breaks through the soil. High humidity around an emerged seedling may increase the risk of weak growth or fungal problems.
Strong light is not needed while the seed remains under the soil. Once the shoot appears, gentle and suitable lighting should be provided. Without enough light, the seedling may stretch and become weak.
Benefits and Drawbacks
One of the main benefits of direct soil germination is that the exposed taproot does not need to be handled. In methods such as paper towel germination, the seed must be moved after the root appears. During transfer, the taproot may be bent, touched, dried, or broken. Direct planting avoids this step.
The root can also begin growing naturally in the soil from the start. It does not need time to adjust to a new environment after transfer. This may support smooth early development when moisture and temperature are well controlled.
The method also requires only a container, soil, water, and a suitable growing space. No plates, paper towels, or soaking glasses are needed. This makes direct soil germination simple and easy to set up.
The main drawback is that progress cannot be seen below the surface. It is difficult to know whether the seed has opened, whether the root is growing, or whether the seed has started to rot. This may lead some growers to dig into the soil too early. Digging can damage the taproot and disturb the moisture around the seed.
Moisture control can also be harder in soil. The top layer may appear dry while the soil below is still wet. Adding more water too often may cause waterlogged conditions. Checking the weight of the container and feeling the surface gently may provide better information than watering on a fixed schedule.
Direct soil germination may also be less successful in dense, old, or heavily fertilized soil. Poor drainage, strong nutrients, and compact texture can slow root growth. Careful choice of the growing medium is therefore important.
Germinating marijuana seeds directly in soil can be an effective method because the seed begins growing in its final medium and the taproot does not need to be transferred. Success depends on using light, clean, and well-draining soil. The medium should be moist but never soaked, and strong fertilizer should be avoided during the earliest stage.
Seeds should be planted at a shallow and controlled depth, then covered loosely. Water should be applied gently so the seed is not moved or buried too deeply. Warm conditions, steady moisture, and limited disturbance give the seed the best chance to sprout. Although progress cannot be seen below the soil, patience is important. Digging up the seed or adding too much water can cause more harm than waiting for the seedling to emerge naturally.
Germinating Marijuana Seeds in Water
The water-soaking method is one of the simplest ways to begin marijuana seed germination. It is often used to help the seed absorb moisture before it is placed in soil, a paper towel, or a starter plug. The method does not require many materials, but it must be managed carefully. Seeds need moisture to germinate, yet they also need oxygen. Leaving seeds underwater for too long can reduce oxygen and increase the risk of rot.
Water soaking is usually treated as the first stage of germination rather than the complete process. Some seeds may open and show a small taproot while they are still in the glass. Other seeds may only soften or crack slightly. In both cases, the seeds should be moved to a suitable growing medium before they become damaged.
How the Water-Soaking Method Works
A dry marijuana seed is inactive. When it is placed in water, the outer shell begins to absorb moisture. This process helps soften the shell and activates the natural growth processes inside the seed. Once the seed has absorbed enough water, the embryo begins using the stored food inside it. The seed may then split open, allowing the first white root to appear.
To begin, fill a clean glass or small container with fresh water. The water should be close to room temperature. Very cold water may slow the process, while hot water may damage the seed. The container should also be clean because dirt, soap, or bacteria can increase the risk of contamination.
Place the seeds gently into the water. Some seeds may sink right away, while others may float on the surface. Floating does not always mean that a seed is bad. A dry seed may float because air is trapped inside or around its shell. After several hours, some floating seeds will absorb water and sink.
The container should be placed in a warm, dark location. Direct sunlight should be avoided because it can heat the water quickly. Strong light may also encourage algae or other unwanted growth. A cupboard or closed cabinet may provide a more stable environment.
The seeds should be checked from time to time, but they should not be touched often. Frequent handling can introduce bacteria or damage a seed that has begun to open. Clean hands or clean tools should be used whenever contact is necessary.
A seed may show several changes while soaking. The color may become darker, the shell may look swollen, or a small crack may appear. A white taproot may also begin to emerge. These are signs that germination has started.
How Long Seeds Should Stay in Water
Marijuana seeds should not remain underwater for an extended period. Most seeds only need enough time to become fully hydrated and begin opening. Many growers check the seeds after about 12 to 24 hours. Some seeds may need a little longer, especially when they are older or have thick shells.
The seeds should normally be removed once the shell cracks or a small white root appears. At that stage, the seed is active and needs access to both moisture and oxygen. It can be transferred to damp soil, a paper towel, or a starter plug.
Seeds should generally not be left soaking for several days. Water contains some oxygen, but the amount is limited. As the seed stays submerged, the oxygen around it may fall. A lack of oxygen can slow growth and create conditions that support bacteria and decay.
A seed that remains in water for too long may become soft, dark, or slimy. An unpleasant smell may also develop. These signs may point to rot. Once serious rot begins, the seed is unlikely to produce a healthy seedling.
Seeds that do not crack during the first day should still be checked carefully. A hard or older seed may take longer to absorb enough moisture. However, soaking should not continue without limits. After a reasonable soaking period, the seed can be moved to a damp paper towel. The paper towel provides moisture while allowing better access to oxygen.
The water should remain clear during the soaking period. Cloudy water may be a sign of bacteria, dirt, or material coming from a damaged seed. If the water becomes cloudy, the seeds should be removed and inspected. A clean container and fresh water may be needed if the process continues.
It is also important to avoid changing the water repeatedly unless there is a clear problem. Moving the seeds too often can cause stress and may damage a newly opened shell. Stable conditions are usually better than constant adjustments.
When Water Soaking May Be Useful
Water soaking may be especially useful for older marijuana seeds. As seeds age, their shells may become harder and drier. This can make it more difficult for moisture to enter. A short soak may help soften the outer layer and begin the hydration process.
The method can also help seeds with thick or firm shells. Some seeds may take longer to crack when placed directly in soil or a paper towel. Soaking allows water to reach the shell from all sides. This may support more even hydration.
Water soaking may also be useful before another germination method. For example, a seed can be soaked for several hours and then moved to a damp paper towel. This combination allows the seed to absorb water first while giving the developing root more oxygen during the next stage.
Some growers use soaking before planting seeds directly into soil. Once the seed has absorbed water, it may be placed in a shallow hole in a light, moist growing medium. This can reduce the amount of time the seed spends waiting for moisture to reach it underground.
However, soaking is not required for every seed. Fresh and healthy seeds may germinate well when planted directly into soil or placed in a paper towel. Soaking does not guarantee success, and it cannot correct problems caused by poor genetics, immature seeds, or bad storage.
Care is also needed when moving a soaked seed. A seed that has opened may have a very delicate taproot. The seed should be handled by the shell rather than the root. Clean tweezers may be used, but squeezing or dropping the seed should be avoided.
The next growing medium should be prepared before the seed is removed from the water. Soil should already be lightly moist, and a paper towel should be damp but not dripping. Preparing the new location first helps prevent the seed from drying out during transfer.
The water-soaking method can help marijuana seeds absorb moisture and begin germination. It works by softening the outer shell and activating growth inside the seed. Clean water, a clean container, gentle warmth, and limited handling are important for success.
Seeds should be moved once the shell cracks or a small taproot appears. They should not remain underwater for too long because low oxygen can lead to slow growth, bacteria, or rot. Water soaking may be helpful for older seeds, hard-shelled seeds, or seeds that will later be moved to paper towels, soil, or starter plugs. Careful timing and gentle transfer are the most important parts of this method.
Using Starter Plugs, Cubes, and Other Growing Media
Starter plugs and growing cubes offer a simple way to germinate marijuana seeds in a small and controlled space. These products hold moisture around the seed while still allowing air to reach it. They can also reduce the need to move or touch a young taproot after germination begins.
Many growers choose starter plugs because the seed can remain in the same material from germination through early seedling growth. Once roots begin growing through the plug, the whole plug can be moved into a larger pot or growing system. This lowers the risk of breaking or drying out the young root.
Starter plugs can be useful for beginners, but they still require careful control of moisture, warmth, and airflow. A plug that becomes too wet can cause the seed to rot. A plug that becomes too dry can stop germination. Understanding the different materials and how to prepare them can improve the chance of healthy growth.
Types of Germination Plugs
Peat-based plugs are made from compressed peat and other natural materials. They are designed to hold water while maintaining small spaces for oxygen. These plugs often expand when they are soaked. They are commonly used for seeds because they are soft and easy for young roots to grow through.
Peat plugs work well when the seedling will later be moved into soil. The entire plug can usually be planted directly into the final container. This helps protect the roots during transplanting. However, peat can dry out around the edges, so moisture should be checked often.
Coco coir plugs are made from fibers taken from coconut husks. Coco coir holds moisture well but usually provides better drainage than dense soil. It also allows oxygen to reach the growing root. These qualities make coco plugs useful for both soil-based and soilless growing methods.
Coco coir contains very few natural nutrients. This can be helpful during germination because young seeds do not need strong fertilizer. However, growers should understand that seedlings may need a mild nutrient solution later, once the first true leaves appear and the plant begins using its stored energy.
Rockwool cubes are made from heated mineral fibers that are formed into small blocks. They are widely used in hydroponic growing systems because they hold water while allowing air to remain inside the material. Their firm shape also makes them easy to move between trays, containers, and hydroponic systems.
Rockwool often has a naturally high pH level. It may need to be soaked in properly adjusted water before use. Poor pH control can make it harder for the young seedling to absorb nutrients after germination. Rockwool fibers can also irritate the skin, eyes, or lungs, so the cubes should be handled carefully.
Other seed-starting products may include foam plugs, compost-based cubes, and biodegradable fiber pots. Each product has a different balance of water retention, drainage, and airflow. The best choice depends on the final growing medium and the amount of control available in the germination area.
How to Prepare and Use Starter Plugs
Starter plugs should be prepared before the seed is added. Most plugs need to be soaked or moistened with clean water. The plug should become evenly damp, but it should not be dripping wet. Too much water can fill the air spaces inside the material and reduce the oxygen available to the seed.
After soaking, gently shake or drain away extra water. Do not squeeze the plug too hard because this can compress the material. A tightly compressed plug may hold less air and make it harder for the root to grow.
Most starter plugs have a small hole in the center. The marijuana seed can be placed inside this opening. The seed should not be pushed too deeply. A shallow position allows the seedling to reach the surface without using too much energy.
The seed can be covered lightly with a small piece of the plug material. The opening should not be packed tightly. Loose coverage helps maintain moisture while still allowing the seedling to emerge.
Place the prepared plug inside a clean seedling tray or small container. A humidity dome may be placed over the tray to slow moisture loss. The dome should not create heavy condensation or standing water. Some airflow is still needed to reduce the risk of mold.
The plug should remain warm during germination. A stable temperature supports the natural processes inside the seed. If a heat mat is used, it should have temperature control. Direct and uncontrolled heat may dry the bottom of the plug or make the growing area too warm.
The plug should be checked each day. Add a small amount of water only when the material begins to feel lighter or slightly dry. Pouring large amounts of water over the seed can move it deeper into the plug or reduce oxygen around it.
Once the seedling emerges, it should receive gentle and suitable light. Strong heat or intense light can dry the plug quickly. Light should be placed at a safe distance so the seedling can grow without stretching or becoming damaged.
Advantages of Starter Plugs
One major benefit of starter plugs is reduced root handling. With the paper towel method, the germinated seed must be picked up and moved after the taproot appears. This creates a risk of bending, breaking, or touching the root. A starter plug allows the taproot to remain inside the material.
Starter plugs also make transplanting easier. Once roots appear through the sides or bottom, the entire plug can be placed into a larger container. The young plant does not need to be removed from the plug. This can reduce transplant shock and allow growth to continue with less delay.
Moisture levels may also remain more stable inside a plug than in a thin paper towel. Many plugs are designed to hold enough water for germination while still allowing oxygen to reach the seed. This creates a more balanced environment when the material is prepared correctly.
Starter plugs are also suitable for several growing systems. Peat and coco plugs can be moved into soil, coco coir, or other soilless mixes. Rockwool cubes are often used in hydroponic setups. Choosing a plug that matches the final growing method can make the transfer process easier.
The small size of starter plugs allows several seeds to be placed in one tray. This can make it easier to maintain the same temperature, humidity, and lighting conditions for all seedlings.
Possible Problems
Too much water is one of the most common problems with starter plugs. A soaked plug may not contain enough oxygen for healthy germination. The seed may become soft, dark, or rotten. Mold may also appear on the surface when moisture stays high and airflow is poor.
Poor airflow can create a warm and damp space where fungi grow easily. A humidity dome may help during early germination, but it should not remain tightly closed once seedlings begin emerging. Opening vents or removing the cover for short periods can improve air movement.
Incorrect pH can cause problems in some materials, especially rockwool. Although seeds contain stored energy for early growth, the seedling will soon need to absorb nutrients. If the pH is far outside the suitable range, the young plant may show slow growth, pale leaves, or weak roots.
Starter plugs can also dry out. Small plugs contain less water than large pots, so they may lose moisture quickly in warm air or under strong light. The plug should remain evenly moist, but water should be added in small amounts.
Delayed transplanting may cause roots to become crowded. When roots grow far outside the plug, they may become tangled, dry, or damaged. The seedling should be moved once several healthy roots are visible and the plant can support the transfer.
Starter plugs, cubes, and other growing media can provide a stable place for marijuana seeds to germinate. Peat, coco coir, rockwool, and other seed-starting materials each offer different levels of moisture control, drainage, and airflow. The selected material should match the final growing system whenever possible.
The plug should be evenly moist, warm, clean, and protected from excess water. Seeds should be placed at a shallow depth and covered loosely. Once roots begin growing through the plug, the whole unit can be transplanted without exposing or handling the taproot.
Successful germination depends on balance. Too much water may cause rot, while too little water may stop growth. Poor airflow may support mold, and delayed transplanting may damage exposed roots. Careful preparation and regular checks can help the seed develop into a strong young seedling.
Ideal Conditions for Marijuana Seed Germination
Marijuana seeds need the right environment before they can open and begin growing. A seed may look inactive, but it contains a living plant embryo. Once the seed receives enough moisture, warmth, and oxygen, the embryo begins to develop. The outer shell softens, the seed opens, and the first root starts to emerge.
Germination can fail when conditions change too often. Seeds may also fail when they are kept too wet, too cold, or too hot. The goal is to create a stable environment that supports growth without encouraging mold or rot. Careful control of temperature, moisture, light, cleanliness, and airflow can improve the chance of successful germination.
Best Temperature for Germination
Temperature has a strong effect on how quickly marijuana seeds germinate. Seeds usually develop best in a warm and stable environment. A general temperature range of about 70°F to 80°F, or 21°C to 27°C, is often suitable. Temperatures within this range help activate the natural processes inside the seed.
Cold conditions can slow germination. When the environment is too cold, the seed absorbs water more slowly, and the embryo may remain inactive for a longer period. The seed may still germinate, but the process can take several extra days. Long periods in cold and wet conditions can also increase the risk of decay.
Excessive heat can be just as harmful. High temperatures may dry out paper towels, soil, or starter plugs too quickly. Heat can also encourage bacteria and fungal growth, especially when the environment is very humid. A seed exposed to strong heat may become damaged before the taproot develops.
Some growers use a seedling heat mat to maintain warmth. A heat mat should be used carefully because it can make the growing medium hotter than expected. It is safer to use a mat with a thermostat or temperature controller. The germination container should not be placed directly on a very hot surface. A small gap, tray, or folded towel may help prevent overheating.
The temperature should also remain steady. Large changes between daytime and nighttime conditions can slow development. Seeds do not need perfect conditions every minute, but stable warmth helps them germinate more evenly.
Moisture and Humidity
Moisture tells the seed that growing conditions are suitable. When water enters the seed, it softens the outer shell and activates the embryo. However, the seed needs moisture rather than complete saturation.
A germination material should feel damp but should not drip water when squeezed. Paper towels should remain moist throughout the process. Soil and starter plugs should also stay evenly damp. If the material dries out after the seed has started opening, the young taproot may become damaged.
Too much water creates a different problem. A soaked environment contains less oxygen. Seeds need oxygen for normal cell activity, even before they develop leaves. When a seed remains underwater or sits in waterlogged soil for too long, it may stop developing and begin to rot.
High humidity can help prevent the growing material from drying too quickly. A covered container or humidity dome may be useful during the early stage. However, the container should not remain completely sealed for long periods without fresh air. Trapped moisture and warm temperatures can create suitable conditions for mold.
Moisture levels should be checked regularly, but the seed should not be disturbed each time. Repeated handling may damage the shell or young root. It is better to examine the surrounding material and add a small amount of clean water only when needed.
Water quality may also affect germination. Clean water without a strong chemical smell is normally preferred. Water should be close to room temperature. Very cold water may reduce the temperature around the seed, while hot water can damage living tissue.
Does Germination Require Light or Darkness?
Marijuana seeds do not need strong light while they are opening. Germination mainly depends on moisture, warmth, and oxygen. For this reason, many germination methods keep seeds in a dark or shaded location.
Darkness also helps prevent the germination material from drying too quickly. Direct sunlight can heat a container, soil surface, or paper towel in a short time. This may cause the temperature to rise above a safe level. Sunlight can also dry exposed areas while other parts remain too wet.
Although complete darkness is not always required, bright light offers little benefit before the seedling appears. A closed cabinet, covered plate, or shaded shelf may provide a more stable environment. The area should still remain warm and clean.
Light becomes important after the seedling emerges. Once the shoot rises above the soil and the first leaves begin to open, the young plant needs a suitable light source. Without enough light, the stem may stretch as it searches for brighter conditions. A stretched stem can become thin, weak, and unable to support the new leaves.
The light used for a new seedling should not create extreme heat. It should provide gentle and even coverage. The seedling should be observed for signs of stress, such as curling, bleaching, drying, or excessive stretching. Light conditions may need to be adjusted as the plant develops.
Cleanliness and Airflow
Cleanliness reduces the chance of mold, bacteria, and seed rot. Marijuana seeds are vulnerable during germination because the shell is softening and the young root has little protection.
Hands should be washed before seeds are handled. Tweezers, plates, glasses, trays, and containers should also be clean. Reused equipment should be washed and allowed to dry before another batch of seeds is started. Dirty tools may carry fungal spores or bacteria from old soil, standing water, or decaying plant material.
The germination area should also be kept free from food waste, dirty dishes, old growing material, and other possible sources of contamination. Paper towels and starter plugs should be fresh and clean. Soil should not have a sour smell or visible mold.
Airflow is also important. Seeds need access to oxygen, and fresh air helps reduce excess humidity. However, strong air movement can dry the germination material. The goal is gentle air exchange rather than a direct fan blowing across the seeds.
A covered container may be opened briefly during checks to allow fresh air inside. Humidity domes may also have vents that can be adjusted. If large water drops remain on the container walls for long periods, humidity may be too high. A musty smell, fuzzy growth, or soft seed shell may also indicate that the environment is too wet and has poor airflow.
Successful marijuana seed germination depends on stable conditions. Seeds generally need steady warmth, balanced moisture, oxygen, cleanliness, and protection from strong light. Cold temperatures can delay growth, while excessive heat can dry the seed or encourage mold. The growing material should remain damp but never waterlogged. Seeds can be kept in darkness or low light until the seedling emerges. Clean tools and gentle airflow can help prevent contamination and decay. Maintaining these conditions gives the seed a better chance to open, develop a healthy taproot, and move into the seedling stage.
How Long Marijuana Seeds Take to Germinate
Marijuana seeds do not all germinate at the same speed. Some seeds may open within one or two days, while others may take a week or longer. The exact timing depends on the condition of the seed and the environment around it. Temperature, moisture, oxygen, seed age, and storage history can all affect how quickly the process begins.
Germination starts when the seed absorbs enough water to activate the plant inside it. The outer shell begins to soften, and the small root inside starts to grow. Once the shell opens, a white taproot appears. This is the first clear sign that the seed has germinated.
Patience is important during this stage. Seeds should not be handled, opened, or moved too often. Frequent checking may change the moisture level or damage the root as it begins to form. A stable environment usually gives the seed the best chance of developing normally.
Normal Germination Timeline
During the first 24 hours, the seed begins absorbing moisture. There may be no visible change during this time. The shell may look slightly darker or larger, but it often remains closed. This does not mean the seed has failed. The internal germination process may already be active.
Some seeds crack open within 24 to 48 hours. A small white point may become visible where the seed shell separates. This white point is the beginning of the taproot. The taproot usually grows downward once the seed is placed in a suitable growing medium.
Many marijuana seeds germinate within two to four days under stable conditions. During this period, the shell opens further, and the taproot becomes longer. When using the paper towel method, the root can be seen clearly. When the seed is planted directly in soil, germination cannot be observed below the surface. Instead, the first sign of success is the seedling emerging from the soil.
Seeds planted directly in a growing medium may take several extra days to become visible. The seed must first germinate underground. The new root then grows downward while the young stem pushes upward. Soil depth, moisture, and temperature can affect how long this takes.
Some healthy seeds may need seven to ten days before they open. Slow germination is more common with older seeds, seeds with thick shells, or seeds that were stored under less suitable conditions. A seed that takes longer is not always unhealthy. It may simply need more time to absorb water and begin growing.
The germination timeline should not be confused with seedling emergence. Germination is complete once the shell opens and the taproot appears. Seedling emergence happens later, when the stem and first leaves rise above the growing medium.
Factors That Affect Germination Time
Seed age has a strong effect on germination speed. Fresh, mature seeds often absorb moisture and open faster than older seeds. As seeds age, the stored energy inside them slowly decreases. The shell may also become harder, making it more difficult for water to enter.
Older seeds can still germinate, but they may take longer. They may also have a lower success rate. Seeds stored in hot, humid, or bright locations tend to lose quality faster than seeds kept in cool, dark, and dry conditions.
Seed maturity also matters. Mature seeds usually have a firm outer shell and darker coloring. Immature seeds may appear pale, green, or soft. These seeds may not contain a fully developed plant embryo, so they may germinate slowly or fail to open.
Genetics can also affect timing. Some varieties naturally germinate faster than others. Even seeds from the same group may behave differently. One seed may open after two days while another may need five or six days under the same conditions.
Temperature is another important factor. Seeds usually germinate faster when the environment is warm and stable. Cold conditions slow the biological activity inside the seed. A seed kept in a cool room may take several additional days to open.
Excessive heat can also cause problems. High temperatures may dry the germination material, damage the seed, or encourage mold growth. The goal is not to make the environment as hot as possible. The goal is to provide steady, gentle warmth.
Moisture must remain balanced throughout germination. The seed needs water to soften the shell and activate growth. However, too much water can reduce the oxygen available around the seed. A soaked seed may rot before the taproot develops.
If the germination medium dries out, the process may stop. A seed that has already started opening is especially sensitive to dry conditions. The young root can be damaged quickly if it loses moisture.
The germination method also affects timing. Water soaking may cause the seed coat to soften quickly. The paper towel method makes it easy to maintain moisture and observe progress. Direct soil planting may appear slower because the germination process is hidden. Starter plugs may provide stable moisture but can delay growth if they are kept too wet.
When a Seed May Be Considered Unlikely to Germinate
A seed should not be declared unsuccessful after only one or two days. Many viable seeds need several days before showing visible changes. Moving or pressing the seed too early may cause more harm than waiting.
Under stable conditions, most seeds that will germinate show progress within ten days. However, some older or slower seeds may take up to two weeks. During this time, the environment should remain warm, moist, and clean.
A seed may be unlikely to germinate if it remains hard, dry, and completely unchanged after an extended period. It may also be nonviable if the shell becomes soft, dark, slimy, or damaged. These signs can point to decay rather than slow growth.
An unpleasant smell is another warning sign. Healthy seeds and clean germination materials should not produce a strong odor. A sour or rotten smell may mean bacteria or fungi are growing around the seed.
White fuzzy growth should not be confused with a healthy taproot. A taproot is smooth, firm, and grows from one opening in the shell. Mold often appears as thin fuzz spreading across the seed or surrounding material.
Seeds should not be cut, crushed, or forced open to check their condition. This can damage the plant embryo inside. It is usually better to allow enough time and then judge the seed based on visible signs of life or decay.
Marijuana seeds often germinate within two to four days, but the full process may take a week or longer. Some older or slower seeds can need up to ten days or more before they open. Germination speed depends on seed age, maturity, genetics, storage, temperature, moisture, oxygen, and the method being used.
A slow seed is not always a failed seed. Stable conditions and patient monitoring are more helpful than frequent handling. A healthy germinated seed will develop a smooth white taproot. A seed that becomes soft, slimy, moldy, or foul-smelling is more likely to be decaying. Allowing enough time while keeping the environment clean, warm, and evenly moist gives each viable seed the best chance to germinate.
Transferring Germinated Seeds Without Damaging Them
Transferring a germinated marijuana seed is one of the most delicate parts of the germination process. At this stage, the seed has opened and produced a small white taproot. This root will later develop into the plant’s main root system. However, it is still soft, thin, and easy to damage.
A successful transfer depends on good timing, gentle handling, and a prepared growing medium. The seed should spend as little time as possible outside its moist germination environment. Dry air, pressure, heat, and rough movement can injure the young root.
Before starting, make sure the container and growing medium are ready. This allows the seed to be moved directly into its new location without unnecessary delays.
When to Move a Germinated Seed
A germinated seed should usually be moved after the shell has opened and a small white taproot is clearly visible. The taproot does not need to become long before planting. In fact, waiting too long can make the transfer more difficult.
A short taproot is easier to handle because it is less likely to bend, break, or become tangled. A root that has grown too long may attach itself to the paper towel or other germination material. Removing it can then damage the fine root surface.
Seeds should be checked carefully during germination, but they should not be disturbed too often. Opening the container many times can change the temperature and moisture level. It can also expose the root to dry air and bright light.
Once the taproot is visible, prepare to move the seed soon. A taproot that is roughly a few millimeters to about one centimeter long is often manageable. Exact growth can differ between seeds, so the root’s health is more important than its precise length.
A healthy taproot normally looks white or cream-colored. A dark, soft, slimy, or unpleasant-smelling root may indicate decay. A damaged or unhealthy root may have difficulty establishing itself after planting.
How to Handle the Taproot
The taproot is the most fragile part of a germinated seed. It should never be squeezed, pulled, scraped, or held directly. Even damage that is difficult to see can slow growth or prevent the seedling from surviving.
Wash and dry the hands before working with germinated seeds. Clean tools are also important because bacteria and fungal spores may be transferred to the damp seed or growing medium.
Clean tweezers can make the transfer easier. Hold the seed gently by its outer shell rather than by the white root. Do not use strong pressure. The goal is only to lift and guide the seed into the planting hole.
Some growers prefer to use clean fingers, but this may increase the risk of pressure, contamination, or accidental dropping. Tweezers provide more control when used carefully. However, sharp or dirty tweezers can cause damage, so they should be cleaned before use.
Keep the taproot moist during the transfer. Do not leave the seed sitting on a dry surface while preparing the pot. The planting container, hole, and water should already be ready before the seed is removed from the germination setup.
Move slowly and avoid sudden movements. If the root has grown into a paper towel, do not pull it free. Moisten the area with clean water and allow the fibers to loosen. If needed, a small piece of the paper can remain attached rather than risking a broken root.
How to Plant a Germinated Seed
The growing medium should be prepared before the seed is handled. It should feel evenly moist but not soaked. Waterlogged soil contains less oxygen, which can lead to slow growth, fungal problems, or root rot.
Use a small container with drainage holes. A light, loose seed-starting mix allows the young root to move through the medium while still receiving oxygen. Heavy, compacted, or strongly fertilized soil may place stress on the developing seedling.
Make a small planting hole in the center of the medium. The hole should be deep enough to cover the seed lightly, but it should not place the seed far below the surface. Planting too deeply forces the young shoot to use more stored energy before it reaches the light.
Place the germinated seed into the hole carefully. When possible, position the white taproot downward. The root naturally grows toward gravity, while the shoot grows upward toward the surface.
Perfect placement is not always required. Seeds can often adjust their direction as they grow. However, placing the taproot downward may reduce the amount of energy needed for the seedling to position itself.
After placing the seed, cover it with a thin layer of loose growing medium. Do not press the soil down firmly. Compacted soil may limit oxygen and make it harder for the seedling to emerge.
If additional moisture is needed, apply a small amount of water around the planting area. Avoid pouring a strong stream directly onto the seed. Heavy watering may move the seed deeper, expose it, or damage the taproot. A spray bottle or gentle watering method can help keep the surface moist without flooding it.
What to Do After Planting
After planting, place the container in a warm and stable environment. The growing medium should stay moist while the seedling begins to establish its root system. It should not be allowed to dry completely, but it should also not remain constantly saturated.
Check moisture by looking at and gently touching the surface of the medium. Avoid digging into the soil to see whether the seed is growing. Digging can break the root, move the seed, or disturb the moisture around it.
A humidity cover may help reduce moisture loss during the early stage. However, the cover should not create stagnant, dripping conditions. Some airflow is needed to reduce the risk of mold. Once the seedling rises above the surface, the cover should be removed or opened gradually.
Suitable light should be available when the seedling emerges. Without enough light, the young stem may stretch and become weak. The light should not be so intense or close that it causes heat stress or dries the growing medium too quickly.
Strong fertilizers are not usually needed during the earliest stage. The seed contains stored food that supports its first growth. Rich soil or concentrated nutrients may burn the young root. A mild seed-starting medium is often enough until the seedling develops its first sets of true leaves.
The seed shell may remain attached to the first leaves after the plant appears above the soil. This is sometimes called a helmet head. Avoid pulling the shell off immediately because the leaves may tear. Keeping the shell slightly moist may help it loosen naturally.
Transferring a germinated marijuana seed requires patience and gentle handling. The seed should be moved when a healthy white taproot is visible but before the root becomes long or tangled. The outer shell should be held carefully, while direct contact with the taproot should be avoided.
The growing medium should be prepared in advance, lightly moistened, and placed in a container with good drainage. The seed should be planted in a shallow hole, covered loosely, and protected from heavy watering. After planting, steady warmth, balanced moisture, airflow, and suitable light help support early development.
Common Marijuana Seed Germination Mistakes and Troubleshooting
Marijuana seeds need a stable environment to germinate. Even healthy seeds may fail when moisture, temperature, airflow, or handling is not controlled. Most germination problems happen because the seed receives too much water, too little water, too much heat, or too much attention.
The early root is very delicate. Small mistakes can stop growth before the seedling reaches the surface. Learning how to identify these problems can help protect the seed and improve the chance of healthy development.
Overwatering the Seed
Overwatering is one of the most common germination mistakes. Seeds need moisture to soften their outer shells and begin growing. However, they also need oxygen. When the soil, paper towel, plug, or other growing material becomes soaked, water fills the small air spaces around the seed. This limits oxygen and may cause the seed to rot.
A waterlogged seed may become soft, dark, or unpleasant-smelling. The shell may crack without producing a healthy white root. In soil, the seed may start growing but stop before reaching the surface.
The growing material should feel damp, not flooded. A paper towel should be moist enough to stay wet but should not release water when pressed. Soil should hold light moisture without becoming muddy. Containers should also have drainage holes so extra water can escape.
Allowing the Seed to Dry Out
A germinating seed can also fail when it becomes too dry. Once the seed absorbs water and starts the germination process, it needs steady moisture. If a paper towel dries out or the soil becomes completely dry, the young root may stop growing.
An exposed taproot can dry quickly because it does not yet have the protection of a developed root system. Even a short period in dry air may damage it.
Moisture should be checked regularly, but the seed should not be touched each time. The paper towel or soil can be inspected without moving the seed. Add small amounts of water only when needed. A clean spray bottle may help moisten the surface without flooding it.
Using the Wrong Temperature
Temperature has a strong effect on germination speed. Cold conditions may slow the process because the seed becomes less active. A seed kept in a cold room may take much longer to open or may not germinate at all.
Excessive heat can be just as harmful. High temperatures may dry the growing material, damage the seed, and encourage mold or bacterial growth. Placing seeds beside a heater, on a hot appliance, or in direct sunlight may create unsafe temperature changes.
A stable, warm location is usually better than an area that becomes hot during the day and cold at night. When using a seedling heat mat, the temperature should be controlled. The container should not be placed directly on a very hot surface without protection.
Handling the Taproot Too Much
The white taproot is one of the most fragile parts of a germinating seed. It can be damaged by fingers, rough tools, dry air, bright light, or pressure. Bending or squeezing the root may stop growth.
The seed should be handled by the shell whenever possible. Clean tweezers can be used during transfer, but the taproot should not be gripped. The new growing container should be prepared before the seed is moved. This reduces the amount of time the root spends outside a moist environment.
Repeatedly picking up the seed to inspect it also increases the risk of damage. It is better to observe the seed without moving it unless it is ready for planting.
Planting Too Deeply
A seed planted too deeply may struggle to reach the surface. The young shoot has limited stored energy. If it must travel through a thick layer of soil, it may become weak or stop growing before it reaches light.
Deep soil may also stay wet for longer periods. This can increase the risk of rot. Heavy or tightly packed soil creates even more resistance.
A germinated seed should be placed in a shallow hole and covered with a loose layer of growing medium. The surface should not be pressed down firmly. Loose soil allows oxygen to reach the seed and makes it easier for the shoot to emerge.
A seed planted too close to the surface may also dry out. It may struggle to anchor its root or may emerge with the shell still attached. The goal is to provide a light covering that protects the seed without burying it deeply.
Using Strong Fertilizer Too Early
Marijuana seeds contain stored nutrients that support the first stage of growth. They usually do not need strong fertilizer during germination. Young roots are sensitive, and concentrated nutrients may burn them.
Nutrient burn can cause the root to become brown, weak, or damaged. After emergence, the first leaves may show yellow or brown areas. Growth may slow or stop.
A mild seed-starting medium is often safer than heavily fertilized soil. Strong plant food should not be added simply because the seed appears slow. Slow germination is more often linked to temperature, moisture, seed age, or poor storage than to a lack of fertilizer.
Leaving Seeds in Water Too Long
Soaking marijuana seeds in water can help soften hard shells. However, seeds should not remain underwater for an extended period. Water contains less available oxygen than air. A seed left submerged for too long may begin to decay.
The seed should be checked for signs of cracking or a visible root. Once the seed begins to open, it can be moved carefully to soil, a damp paper towel, or a starter plug.
Seeds should not be left in water simply because they continue to float. Floating does not always mean that a seed is bad. Some seeds trap air inside the shell and may remain on the surface during part of the soaking process.
Checking or Digging Up Seeds Repeatedly
Many growers become concerned when a planted seed does not appear right away. Digging into the soil to find it may seem helpful, but this can damage the root or young shoot.
Moving the soil may also change the seed’s position, reduce moisture, or expose it to light and dry air. A small root can break without being noticed.
The seed should be given enough time to develop. Germination and emergence do not always happen at the same speed. A seed may open below the soil and still need several days to reach the surface. During this period, the soil should remain lightly moist and warm.
Mold, Rot, and Seeds That Will Not Open
Mold often appears as white, gray, or fuzzy growth around the seed or on the paper towel. Rot may cause the seed to become soft, dark, or foul-smelling. These problems are often linked to excess water, poor airflow, dirty tools, or high heat.
Clean hands, containers, tweezers, and water can reduce contamination. The germination setup should be humid but should not remain sealed without any fresh air for long periods.
Some seeds may remain hard and closed even when conditions appear correct. This may happen because the seed is old, immature, poorly stored, or damaged. A hard shell may also slow water absorption.
A slow seed can sometimes be moved to a different germination method, but frequent changes may cause more harm than good. The environment should first be checked for stable warmth, moisture, and airflow. If the seed becomes soft, smells bad, or develops heavy mold, it may no longer be viable.
Successful marijuana seed germination depends on balance. Seeds need moisture, but they should not remain soaked. They need warmth, but they should not be exposed to high heat. They also need oxygen, cleanliness, and minimal handling.
The most common mistakes include overwatering, drying out the seed, planting too deeply, using strong fertilizer, leaving seeds underwater too long, and disturbing them repeatedly. Mold, soft shells, bad smells, and dark roots may point to rot or contamination.
Careful monitoring is more useful than constant handling. A clean, warm, lightly moist environment gives the seed the best chance to open, form a healthy taproot, and develop into a young seedling.
Conclusion
Germinating marijuana seeds is the first stage of the cannabis growing process. Although the seed is small, it needs the right conditions to begin healthy growth. Moisture, warmth, oxygen, cleanliness, and careful handling all play an important role. When these conditions stay balanced, the seed can absorb water, open its shell, and produce a white taproot. This root becomes the base of the plant’s future root system.
Several germination methods may be used. The paper towel method makes it easy to watch the seed as it opens. It also allows the grower to see the taproot before planting. However, the paper towel must stay moist without becoming soaked. The root can also stick to the paper or become damaged during transfer. For this reason, the seed should be moved carefully once a healthy taproot appears.
Direct planting in soil is another common method. This method allows the seed to sprout in the same medium where it will begin growing. It reduces the need to touch or move the exposed root. However, the seed cannot be seen beneath the soil. This may cause some people to water too often or dig into the soil to check its progress. Both actions can damage the seed. The soil should remain lightly moist, and the seed should be given enough time to emerge on its own.
Water soaking may help hydrate seeds before they are moved into another growing medium. It can be useful for older seeds or seeds with harder shells. Still, seeds should not remain underwater for too long. Long soaking periods can reduce oxygen and increase the chance of decay. Once the seed begins to crack, it should be transferred to soil, a paper towel, or a starter plug.
Starter plugs and seedling cubes offer another controlled option. They can hold moisture while allowing the root to grow with less handling. Plugs can also make transplanting easier because the young root remains protected inside the growing material. However, the plug must not become waterlogged. Too much water may limit airflow and encourage mold. The plug should also be moved into a larger growing space before the roots become crowded.
No germination method can guarantee that every seed will sprout. Seed quality has a major effect on the result. Mature seeds are often firm and dark in color, while soft, pale, or damaged seeds may have a lower chance of success. Age and storage also matter. Seeds exposed to heat, moisture, strong light, or changing temperatures may lose their ability to germinate. Even seeds that look healthy may fail because of poor genetics, age, or damage that cannot be seen from the outside.
Germination time can also vary. Some seeds open quickly, while others need several days. Older seeds may take longer to absorb water and break through their shells. Stable conditions are more important than trying to force faster results. Repeatedly moving, squeezing, opening, or checking seeds can cause more harm than good. Patience allows the natural germination process to continue without unnecessary disturbance.
Many germination problems come from too much water. Seeds need moisture, but they also need oxygen. When paper towels, soil, or plugs become soaked, air spaces fill with water. This can cause the seed to rot before the root develops. A sour smell, soft shell, dark root, or fuzzy growth may be a sign of decay or mold. Clean tools, clean containers, and fresh growing materials can help lower the risk of contamination.
Dry conditions can also stop germination. A seed that begins absorbing water may fail if the surrounding material dries out. Moisture should remain steady, but the seed should never sit in standing water for long periods. Temperature should also remain stable. Conditions that are too cold may slow the process, while extreme heat may damage the seed or support fungal growth.
Once the taproot appears, careful handling becomes important. The young root is delicate and can be harmed by pressure, bending, bright light, or dry air. The seed should be held by the shell rather than the root. The growing medium should be prepared before the seed is moved so the transfer can be completed quickly. After planting, the seed should be covered lightly and left undisturbed.
Strong fertilizer is not needed during the earliest stage. The seed contains stored energy that supports its first growth. Heavy nutrients can damage young roots and slow development. A gentle seed-starting medium with good drainage is usually more suitable than dense or heavily fertilized soil. Once the seedling becomes established, its needs will change as it enters the next stage of growth.
Successful marijuana seed germination depends on balance. The seed needs enough water to become active, enough oxygen to support growth, enough warmth to continue developing, and enough time to open naturally. Overwatering, deep planting, rough handling, poor storage, strong fertilizer, and constant disturbance are among the most common reasons seeds fail.
The best approach is to choose a suitable method, prepare the materials in advance, and maintain steady conditions. Paper towels, soil, water soaking, and starter plugs can all work when used correctly. The goal is not to force the seed to sprout. The goal is to create a clean and stable environment where the seed can begin growing with as little stress as possible. Cannabis cultivation laws differ between locations, so all seeds should be handled and grown only where local laws allow it.
Research Citation
Geneve, R. L., Janes, E. W., Kester, S. T., Hildebrand, D. F., & Davis, D. (2022). Temperature limits for seed germination in industrial hemp (Cannabis sativa L.). Crops, 2(4), 415–427. https://doi.org/10.3390/crops2040029
Gul, V., Sefaoglu, F., Cetinkaya, H., & Seckin Dinler, B. (2024). The effect of different doses of salt stress on germination and emergence in cannabis (Cannabis sativa L.) seed treated with pre-salicylic acid. Brazilian Archives of Biology and Technology, 67, e24240047. https://doi.org/10.1590/1678-4324-2024240047
Hesami, M., Pepe, M., Monthony, A. S., Baiton, A., & Jones, A. M. P. (2021). Modeling and optimizing in vitro seed germination of industrial hemp (Cannabis sativa L.). Industrial Crops and Products, 170, 113753. https://doi.org/10.1016/j.indcrop.2021.113753
Hu, H., Liu, H., & Liu, F. (2018). Seed germination of hemp (Cannabis sativa L.) cultivars responds differently to the stress of salt type and concentration. Industrial Crops and Products, 123, 254–261. https://doi.org/10.1016/j.indcrop.2018.06.089
Islam, M. M., Rengel, Z., Storer, P., Siddique, K. H. M., & Solaiman, Z. M. (2022). Industrial hemp (Cannabis sativa L.) varieties and seed pre-treatments affect seed germination and early growth of seedlings. Agronomy, 12(1), 6. https://doi.org/10.3390/agronomy12010006
Kim, E.-S., Han, J.-H., Olejar, K. J., & Park, S.-H. (2023). Degeneration of oil bodies by rough endoplasmic reticulum-associated protein during seed germination in Cannabis sativa L. AoB Plants, 15(6), plad082. https://doi.org/10.1093/aobpla/plad082
Langa, S., Magwaza, L. S., Mditshwa, A., & Tesfay, S. Z. (2024). Seed dormancy and germination responses of cannabis landraces to various pre-treatments. South African Journal of Botany, 164, 328–338.
Langa, S., Magwaza, L. S., Mditshwa, A., & Tesfay, S. Z. (2024). Temperature effects on seed germination and seedling biochemical profile of cannabis landraces. International Journal of Plant Biology, 15(4), 1032–1053. https://doi.org/10.3390/ijpb15040073
Pepe, M., Hesami, M., & Jones, A. M. P. (2021). Machine learning-mediated development and optimization of disinfection protocol and scarification method for improved in vitro germination of cannabis seeds. Plants, 10(11), 2397. https://doi.org/10.3390/plants10112397
Sorokin, A., Yadav, N. S., Gaudet, D., & Kovalchuk, I. (2021). Development and standardization of rapid and efficient seed germination protocol for Cannabis sativa. Bio-Protocol, 11(1), e3875. https://doi.org/10.21769/BioProtoc.3875
Questions and Answers
Q1: How long do marijuana seeds take to germinate?
Most marijuana seeds germinate within 24 hours to 7 days. Fresh, healthy seeds often sprout within 2 to 4 days.
Q2: What is the best way to germinate marijuana seeds?
Common methods include using damp paper towels, planting directly in soil, or placing seeds in starter plugs. The best method keeps the seeds warm, moist, and protected from damage.
Q3: What temperature is best for marijuana seed germination?
Marijuana seeds usually germinate best at temperatures between 70°F and 80°F, or about 21°C to 27°C.
Q4: Do marijuana seeds need light to germinate?
No. Marijuana seeds do not need light during germination. They usually perform better in a dark or dim environment until the first shoot appears.
Q5: How wet should marijuana seeds be during germination?
Seeds should stay moist but not soaked. Too much water can reduce oxygen and increase the risk of mold, rot, or failed germination.
Q6: How deep should a germinated marijuana seed be planted?
A germinated seed should usually be planted about ¼ to ½ inch deep, with the small white root pointing downward when possible.
Q7: How can you tell if a marijuana seed is healthy?
Healthy seeds are often firm, dry, and brown or gray with darker markings. Pale, green, soft, or cracked seeds may have a lower germination rate.
Q8: Why is my marijuana seed not germinating?
A seed may fail to germinate because it is old, damaged, too cold, too wet, too dry, or planted too deeply. Poor storage and low seed quality may also cause failure.
Q9: Can marijuana seeds be germinated in water?
Yes. Seeds can be soaked in clean water for 12 to 24 hours before being moved to soil or another growing medium. Leaving them submerged for too long may cause oxygen problems or rot.
Q10: When should a germinated marijuana seed be moved to soil?
The seed should be moved when the white taproot is about ¼ to ½ inch long. Handle it gently and avoid touching or damaging the root.