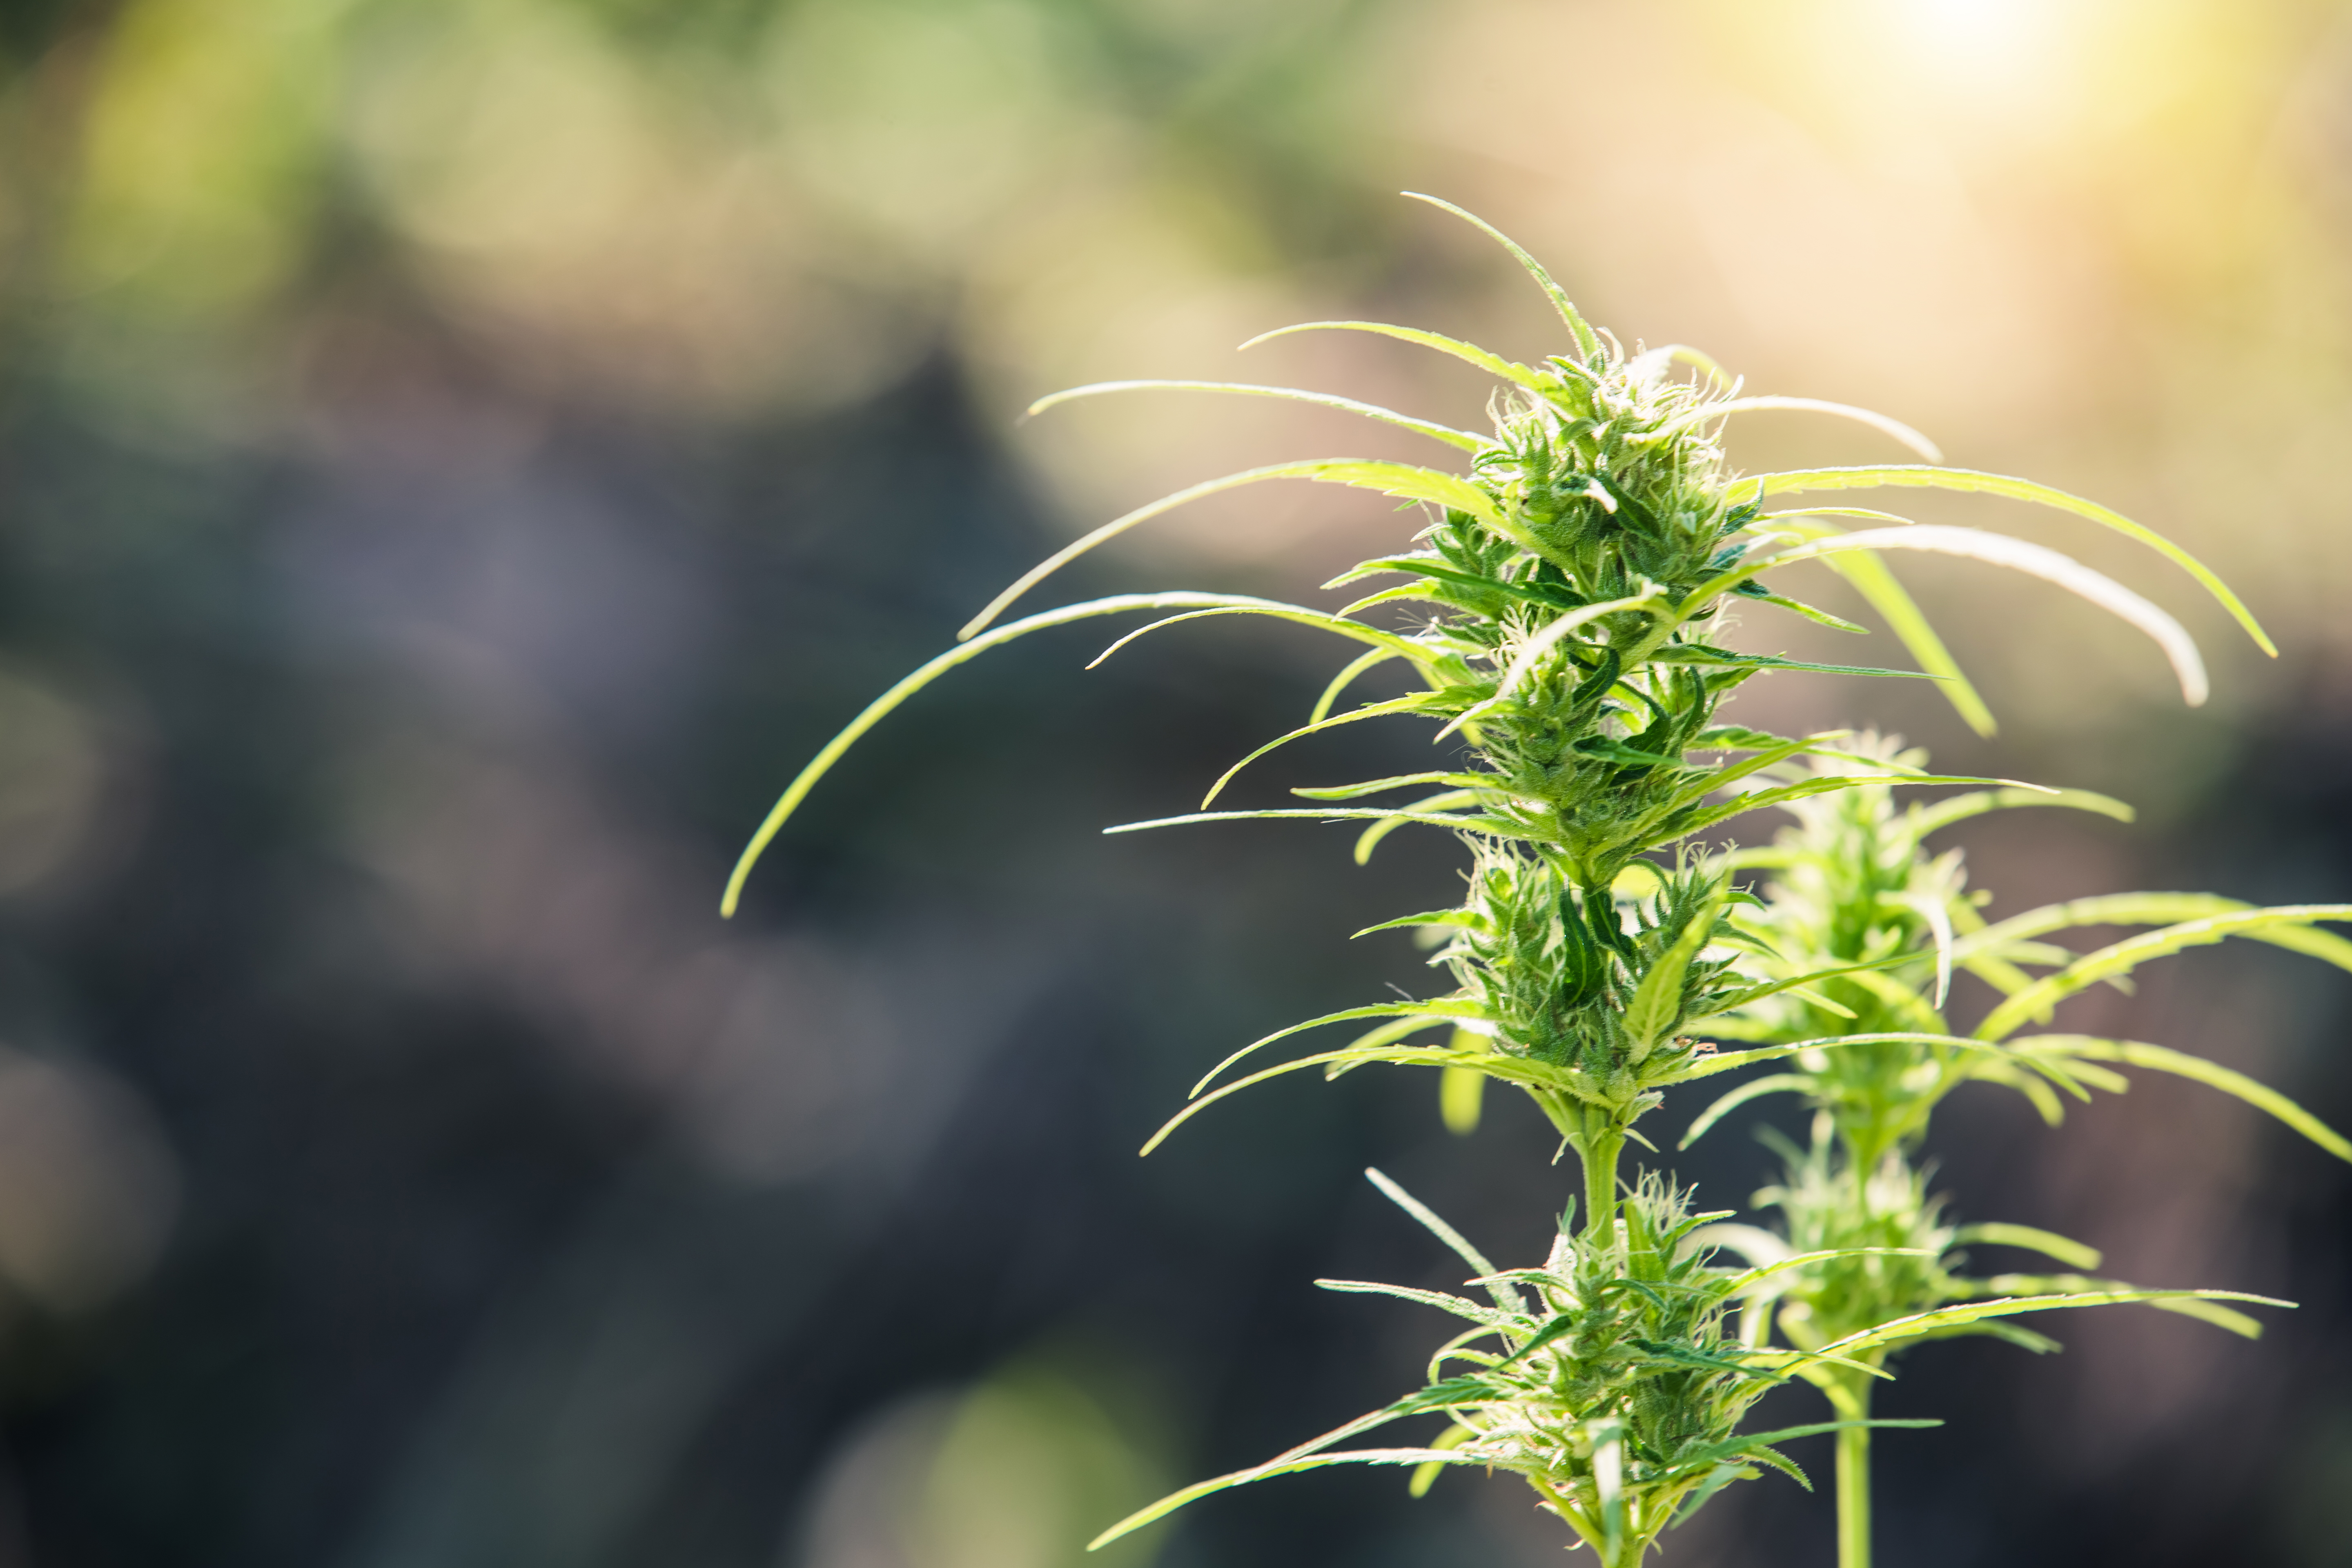


The marijuana seedling stage is one of the earliest and most delicate parts of the cannabis plant’s life cycle. It begins after a seed has opened, formed a small root, and started to grow above the surface of its growing medium. At this point, the plant is very small and fragile. Its root system is not yet strong, its stem is thin, and its first leaves are still developing. Conditions that may not harm a mature plant can cause serious stress to a young seedling. Too much water, strong heat, intense light, poor drainage, or rough handling may slow its growth or damage it.
A marijuana seedling is different from both a germinated seed and a plant in the vegetative stage. Germination is the process that takes place when a seed absorbs moisture and begins to open. A small white root, called the taproot, usually appears first. Once the root enters the growing medium and the young stem rises above the surface, the seedling stage begins. The plant remains a seedling while it develops its first sets of true leaves and builds a larger root system. It enters the vegetative stage when it becomes stronger, produces new leaves more quickly, and begins steady growth.
The first leaves that appear are known as cotyledons. These leaves are usually smooth, round, or oval in shape. They do not have the pointed and serrated edges normally linked with mature cannabis leaves. Cotyledons contain stored energy from the seed. This energy helps support the plant during its earliest days, before its roots and true leaves can fully support growth. Healthy cotyledons often look green and open outward toward the light. They may slowly turn yellow and fall away after the plant develops several true leaves. This can be a normal part of growth.
The first true leaves usually appear between or above the cotyledons. Unlike the smooth seed leaves, true leaves have serrated edges. The earliest set may have only one pointed blade on each leaf. Later leaves may develop three, five, or more blades as the plant becomes larger. The production of new true leaves is an important sign that the seedling is developing. These leaves allow the plant to collect light and produce energy through photosynthesis.
Below the surface, the roots are also changing. The taproot grows downward while smaller side roots spread through the growing medium. These roots absorb water, oxygen, and nutrients. They also hold the plant in place. Root health is very important during the seedling stage because the visible part of the plant depends on what happens below the surface. A seedling may appear to grow slowly for a short time while it develops new roots. However, ongoing slow growth may also point to wet soil, poor drainage, low temperatures, weak light, or another problem.
The stem connects the roots to the leaves. During the first days of growth, it may look thin and soft. It should gradually become thicker and stronger as the seedling develops. A stem that becomes very long, pale, and weak may show that the plant is stretching toward a light source. A stem that bends or collapses near the soil line may point to excess moisture, disease, or physical damage. Careful observation can help identify these problems before they become severe.
Nodes also begin to form during early development. A node is the point where leaves and future branches grow from the main stem. The spacing between nodes can provide useful information about the plant’s environment. Very wide spaces may be linked to poor lighting or excess heat. Close, balanced spacing often suggests compact and steady development. Seedlings do not need many nodes before they leave this stage, but the first few nodes help show that the plant is moving toward vegetative growth.
Good seedling care creates a foundation for the rest of the plant’s life. A healthy seedling is more likely to develop a strong root system, stable stem, and balanced leaf growth. These traits may help the plant handle later changes more successfully. A stressed seedling may recover, but severe early damage can slow future growth. For this reason, growers often pay close attention to moisture, light, airflow, temperature, humidity, and the condition of the growing medium.
Many seedling problems come from doing too much rather than too little. New growers may water too often, add strong nutrients too early, place lights too close, or make several changes at once. Young plants usually respond better to stable and gentle conditions. When a problem appears, it is important to check the growing environment and root zone before taking action. Similar symptoms can have different causes. For example, drooping leaves may result from too much water, too little water, high heat, damaged roots, or poor airflow.
This guide explains the main stages of marijuana seedling growth and the signs of healthy development. It also covers growing media, containers, light, temperature, humidity, airflow, watering, nutrients, pH, transplanting, and common problems. Readers will learn how to recognize stretching, yellow leaves, curling, slow growth, damping-off, root stress, pests, and other warning signs. The goal is to make seedling development easier to understand so that problems can be identified early.
Cannabis laws differ between countries, states, provinces, and local areas. Some locations allow limited personal cultivation, while others ban it or require a license. Anyone considering cannabis cultivation should check all current local laws, housing rules, lease terms, and safety requirements before starting. Legal limits may cover the number of plants, where plants can be kept, who can access them, and whether growing equipment may be used. Following these rules is an essential part of responsible cannabis education and cultivation.
Marijuana Seedling Growth Stages and Timeline
The marijuana seedling stage begins after a seed has germinated and the young plant starts to rise above the growing medium. This stage is short compared with the full life cycle of the plant, but it is very important. During this time, the seedling begins forming its first leaves, roots, stem, and nodes. These early parts create the base for later growth.
A marijuana seedling is delicate because its roots are still small and its stem is thin. It cannot handle the same amount of water, nutrients, heat, or strong light as a mature plant. Understanding each part of the seedling timeline can help growers notice healthy development and respond quickly when something goes wrong.
Most marijuana seedlings remain in this stage for about two to three weeks. However, the exact timing can change based on genetics, light quality, temperature, moisture, growing medium, and root health. Some seedlings develop faster, while others may need more time before they enter the vegetative stage.
From Germination to Emergence
The first step in the seedling timeline is germination. Germination begins when the seed absorbs moisture and the outer shell starts to open. A small white root, called the taproot, comes out of the seed. This root grows downward because it is searching for moisture, oxygen, and a stable place to anchor the plant.
After the germinated seed is placed in the growing medium, the taproot continues to grow down. At the same time, the young stem begins moving upward toward the light. The seed shell may remain attached to the top of the stem as the plant pushes through the soil or other medium.
The period between planting the germinated seed and seeing the seedling above the surface is called emergence. Emergence often happens within a few days, but the timing can vary. Warm conditions, even moisture, and a loose growing medium usually support faster emergence. Cold temperatures, dry soil, deep planting, or compacted soil can slow the process.
The seed should not be planted too deeply. A seedling has a limited amount of stored energy. If it must travel through a thick layer of heavy soil, it may use too much energy before reaching the surface. Planting the seed at a shallow and suitable depth gives the stem a better chance of emerging successfully.
Once the seedling reaches the surface, it begins to straighten. The small stem may look curved at first. This is normal because the stem often forms a hook while pushing through the medium. It should slowly become upright as it receives light.
Sometimes, the seed shell stays attached to the first leaves. Growers often call this condition a helmet head. The seedling may remove the shell on its own as it expands. Keeping the shell slightly moist may help soften it. It is important not to pull the shell off too early because the young leaves underneath can tear easily.
Cotyledon Development
The first leaves that appear on a marijuana seedling are called cotyledons. These leaves are usually smooth, small, and rounded or oval in shape. They do not have the pointed, serrated edges commonly linked with mature cannabis leaves.
Cotyledons develop inside the seed before germination. Their main purpose is to provide stored energy to the young plant during its earliest days. They support the seedling while the roots are still small and before the first true leaves are able to collect enough light.
Healthy cotyledons normally open soon after the seedling emerges. They should spread outward and face the light. Their color is usually green, although the exact shade can vary. The stem between the soil and the cotyledons should remain firm and upright.
During this period, the seedling begins using light for photosynthesis. Photosynthesis is the process that allows a plant to turn light, water, and carbon dioxide into energy. The cotyledons help start this process, but they are only temporary leaves.
Cotyledons may remain on the plant for several weeks. Over time, they may become pale, yellow, dry, or fall off. This can be normal after the true leaves are well developed. However, yellow cotyledons during the first few days may point to stress, such as too much water, damaged roots, poor drainage, or unsuitable environmental conditions.
Growers should avoid removing healthy cotyledons. Even though they do not look like regular cannabis leaves, they continue to support the young plant. Damaging or removing them too early can reduce the seedling’s available energy.
Development of True Leaves
After the cotyledons open, the first true leaves begin growing from the center of the seedling. These leaves have serrated or saw-like edges. They are the first leaves that start to look like standard marijuana leaves.
The first set of true leaves may have only one pointed section, sometimes called a finger or leaflet. The next sets usually develop more fingers. A later leaf may have three fingers, followed by leaves with five, seven, or more. The exact pattern depends on genetics and growing conditions.
The appearance of true leaves is an important sign because it shows that the seedling is becoming more active. The plant is now producing more of its own energy through photosynthesis. Its roots are also expanding below the surface to collect water, oxygen, and nutrients.
As new leaves form, the stem begins to grow taller and thicker. The areas where leaves and branches connect to the main stem are called nodes. Early node development shows that the plant is moving toward a more complex growth pattern.
Healthy new leaves should open gradually and remain mostly flat. Minor twisting can sometimes happen while the leaves are young, but serious curling, spotting, yellowing, or damaged tips may signal a problem. Common causes include excessive light, too much water, strong nutrients, heat, or incorrect pH.
Growth may appear slow during the first week because much of the plant’s energy is going into root development. A seedling may look small above the soil even while its root system is expanding quickly. Once the roots become stronger, leaf and stem growth usually speeds up.
When the Seedling Stage Ends
The marijuana seedling stage usually lasts about two to three weeks after emergence. However, growers should not rely only on the number of days. Plant development is a better guide than a fixed calendar.
A seedling is normally ready to enter the vegetative stage when it has several healthy sets of true leaves. It should also have a stronger stem, visible nodes, active new growth, and a root system that can support faster development.
The exact number of leaf sets can vary, but many plants begin showing clear vegetative growth after developing three to five nodes. At this point, the plant may start producing larger leaves and new growth more quickly. The stem becomes firmer, and the distance between watering sessions may become shorter because the growing root system uses more moisture.
Root development is also an important sign. Roots may begin reaching the sides or bottom of a starter container. In clear or lightly colored containers, growers may see white roots near drainage holes. Healthy roots are usually pale or white and do not have a foul smell.
A plant may remain in the seedling stage longer when conditions are not suitable. Weak light can cause stretching, while excessive watering can slow root development. Cold temperatures, dense soil, pest damage, or strong fertilizer may also delay growth.
The transition into vegetative growth should be gradual. The plant does not suddenly change in one day. Instead, it begins growing faster, forming more leaves, and building a wider root system. Care should also change slowly. Water amounts may need to increase, and the plant may become ready for mild nutrients depending on the growing medium.
The marijuana seedling timeline begins when the germinated seed develops a taproot and is placed into a growing medium. The young stem then rises above the surface, carrying the seed shell and the first rounded leaves known as cotyledons. These cotyledons provide stored energy while the root system and first true leaves develop.
True leaves have serrated edges and become more complex as the seedling grows. New nodes, thicker stems, larger leaves, and faster growth are signs of steady development. Most seedlings stay in this stage for around two to three weeks, but healthy growth matters more than the exact number of days.
The seedling stage ends when the plant has several sets of true leaves, a stronger stem, active roots, and clear new growth. Careful observation during each stage helps growers identify problems early and gives the plant a stronger start before vegetative growth begins.
What a Healthy Marijuana Seedling Should Look Like
A healthy marijuana seedling has a simple but balanced appearance. Its stem should stand upright, its leaves should have an even green color, and new growth should appear at a steady rate. The plant may still look small and delicate, but it should not seem weak, limp, or badly discolored.
It is important to remember that seedlings do not all grow at the same speed. Genetics, light, temperature, moisture, and the growing medium can affect early development. Some seedlings may grow taller, while others may stay short and produce wider leaves. Small differences are normal as long as the plant continues to form healthy new growth.
Growers should focus on the overall condition of the seedling instead of judging it by one feature. Leaf color, stem strength, node spacing, and growth rate can all help show whether the plant is developing well.
Healthy Leaf Color and Shape
Healthy marijuana seedling leaves are usually green and firm. The first leaves to appear are called cotyledons. These small leaves often have a smooth, rounded, or oval shape. They do not have the pointed edges found on mature cannabis leaves.
Cotyledons contain stored energy that helps the seedling during its first days of growth. They may remain green while the first true leaves begin to develop. Later, the cotyledons may fade, turn yellow, and fall away. This can be normal once the seedling has formed several healthy true leaves.
The first true leaves often have serrated or saw-like edges. They may begin as single-finger leaves. Newer leaves may later develop three or more fingers as the plant matures. Early leaves can be small, but they should slowly become larger with each new set.
Healthy leaves should usually sit open and face toward the light. They may lift slightly during the light period. This often shows that the plant is actively growing. The leaf surface should look smooth or gently textured rather than badly curled, twisted, or dry.
New leaves may appear lighter green than older leaves. This is often normal because the leaf tissue has not fully developed. The color should become deeper as the leaf grows. However, very pale, white, yellow, brown, or spotted leaves may point to stress.
A healthy seedling should also show fairly even growth on both sides. Minor differences are common, but one side should not remain badly damaged while the other side grows normally. Continued uneven growth may suggest a lighting, pest, root, or environmental problem.
Healthy Stem and Node Development
The stem of a healthy marijuana seedling should stand upright and support the leaves. It may be thin during the first few days, but it should slowly become thicker and stronger. A healthy stem is often green, although some seedlings may show red or purple tones due to genetics or environmental conditions.
The stem should not be extremely long, pale, or weak. A very tall seedling with a thin stem may be stretching toward the light. This often happens when the light source is too weak or too far away. The seedling may lean, bend, or fall because the stem cannot support the upper growth.
A short distance between each set of leaves is often a sign of balanced light. These spaces are called internodes. Seedlings with proper light usually develop compact growth without large gaps between leaf sets. However, node spacing can also vary by genetics.
The stem may move slightly when exposed to gentle airflow. This small amount of movement can help it become stronger over time. Strong wind should be avoided because it can dry the leaves or damage the stem.
Growers should also inspect the base of the stem near the growing medium. It should look firm rather than dark, narrow, soft, or wet. A stem that becomes thin and weak at the soil line may be affected by damping-off disease. This condition can cause a seedling to collapse quickly.
Healthy Root Development
Most early root growth happens below the surface, so it may not be easy to see. A seedling can appear to grow slowly above the soil while its roots are expanding below. This is a normal part of early development.
Healthy roots are usually white or cream-colored. They should look firm and active rather than brown, slimy, or damaged. In clear cups or containers, roots may become visible along the sides. However, clear containers should normally be covered because roots can be harmed by too much light.
A healthy root system allows the seedling to absorb water, oxygen, and nutrients. The growing medium should support this process by holding some moisture while still allowing air to reach the roots. Soil that stays soaked for too long can reduce oxygen and slow root development.
The roots should spread outward and downward as the plant grows. If a seedling remains in a very small container for too long, the roots may begin to circle around the inside. This can limit future growth and increase the need for transplanting.
Root health is closely linked to leaf health. A seedling with damaged roots may show drooping leaves, slow growth, pale color, or poor water uptake. This is why growers should not assume every leaf problem is caused by a lack of fertilizer. The real cause may be overwatering, poor drainage, cold soil, or root damage.
Normal Differences Between Seedlings
Two seedlings planted at the same time may not grow in exactly the same way. One may be taller, while another may have wider leaves. One may develop its next leaf set earlier. These differences may come from genetics, seed quality, root development, or small changes in the growing environment.
A slower seedling is not always unhealthy. It may simply need more time. The most important sign is continued progress. New leaves should appear, the stem should strengthen, and the plant should slowly increase in size.
Some seedlings may have minor leaf twists or uneven first leaves. This can happen when the seed shell sticks during emergence or when the young leaves are slightly damaged. If the next sets of leaves grow normally, the plant may recover without lasting problems.
Warning signs include growth that completely stops, severe yellowing, repeated leaf damage, a collapsing stem, constant drooping, brown spots, or a bad smell from the growing medium. These problems should be checked early because seedlings have limited energy and small root systems.
A healthy marijuana seedling should have green leaves, a stable stem, balanced node spacing, and steady new growth. The cotyledons should support the plant during its earliest stage, while true leaves should become larger and more complex over time.
The stem should remain upright and gradually become thicker. Roots should stay light-colored, firm, and protected by a loose, well-draining growing medium. Small differences in height, leaf shape, and growth speed are normal, especially between different genetics.
Growers should watch the plant as a whole. Healthy new growth is often a better sign than the appearance of one older leaf. When a seedling continues to produce new leaves and build a stronger stem, it is usually developing in the right direction.
Best Growing Medium and Containers for Marijuana Seedlings
Marijuana seedlings need a growing medium that supports both moisture and air. Young roots are thin, soft, and easy to damage. They cannot move well through soil that is packed, heavy, or waterlogged. A good seedling medium should feel light and loose. It should hold enough water to keep the roots moist, but it should also allow extra water to drain away.
The right container is just as important. A container that holds too much water can slow root growth and raise the risk of disease. A container that is too small can dry out quickly and may restrict the roots. Choosing a suitable medium and container gives the seedling a better chance to build a strong root system before it enters the vegetative stage.
Choosing a Seedling-Friendly Growing Medium
A seedling-friendly growing medium should be soft, clean, and easy for roots to enter. Many growers use a seed-starting mix because it is made for young plants. These mixes often contain peat moss, coco coir, perlite, or similar materials. They are usually light and do not contain large pieces of bark or wood.
Light potting soil can also work well. It should have a fine texture and good drainage. Soil that feels thick, sticky, or muddy may hold too much water. Heavy soil can press against the roots and reduce the amount of oxygen around them. Roots need oxygen to grow and absorb water. When the medium stays soaked for too long, root growth may slow down.
Coco coir is another common choice. It is made from coconut fiber and has a loose texture. Coco coir can hold moisture while still allowing air to reach the roots. However, coco does not contain many natural nutrients. Seedlings grown in coco may need very mild feeding earlier than seedlings grown in soil.
Some growers add perlite to improve drainage. Perlite is a light, white material that creates small air spaces in the medium. It can help prevent the mix from becoming too compact. A medium with good air space allows roots to spread more easily.
Garden soil is usually not the best choice for indoor seedlings. It may contain insects, weed seeds, mold, or disease-causing organisms. It can also be too dense for small roots. Outdoor garden soil may work in some situations, but it should not be used without checking its texture and drainage.
No matter which medium is chosen, it should drain well and remain loose after watering. A seedling should not sit in wet, packed soil for long periods.
Nutrient Strength in the Growing Medium
Young marijuana seedlings do not need strong fertilizer. During the first stage of life, the seedling receives stored food from its cotyledons. Cotyledons are the first smooth, rounded leaves that appear after the seed opens. They help support the plant until the first true leaves develop.
Some potting soils contain a large amount of fertilizer. These are sometimes called rich or hot soils. They may be useful for larger plants, but they can be too strong for seedlings. Excess nutrients can damage young roots and leaf tissue.
Nutrient burn often starts at the tips of the leaves. The tips may turn yellow, brown, or dry. The leaves may also curl downward or become very dark green. Growth may slow if the roots are damaged.
A mild seed-starting mix is often safer because it contains little or no added fertilizer. A light potting soil with low nutrient levels may also work well. Always check the product label before using a commercial mix. Look for terms such as seed-starting mix, light mix, or low-fertilizer soil.
The need for feeding depends on the growing medium. Soil may contain enough nutrients to support the seedling for a short time. Coco coir and other soilless media usually contain fewer nutrients. Even so, any early feeding should be weak. Strong feeding can cause more harm than a small delay in feeding.
It is also important to avoid adding fertilizer simply because a seedling looks small. Slow growth can be caused by excess water, low temperatures, weak light, or damaged roots. Adding nutrients without finding the real cause may make the problem worse.
Selecting the Right Container
Seedlings can begin in seed trays, small nursery pots, starter cups, or other small containers. The main goal is to provide enough room for early roots while keeping moisture easy to control.
Small starter pots are useful because they dry at a steady rate. They also make it easier to water the root area without soaking a large amount of soil. A very large container may hold wet soil far beyond the reach of the young roots. This can keep the medium wet for too long.
Every container must have drainage holes. Extra water should be able to leave the bottom after watering. Without drainage holes, water can collect around the roots and reduce oxygen. This may cause drooping, slow growth, root damage, or damping-off disease.
Clear plastic containers are sometimes used, but roots grow best in darkness. If a clear cup is used, it should be placed inside a darker outer cup. The outer cup can block light while allowing the grower to remove it and check root development.
The container should also be clean. Old pots may carry mold, pests, or disease. Wash and dry reused containers before planting. Make sure the drainage holes are open and not blocked by old soil.
A container that is too small may dry out very quickly. It may also become crowded with roots before the seedling is ready for a larger pot. A container that is too large can make watering harder to control. A small starter pot often provides the best balance during the early seedling stage.
Preparing the Medium Before Planting
The growing medium should be prepared before the seed is planted. Dry soil can pull moisture away from a new root. Soaked soil can prevent oxygen from reaching the root. The best approach is to moisten the medium evenly.
Add water slowly and mix the medium until it feels damp. It should not drip when lightly squeezed. It should hold together for a moment, then break apart easily. Large dry areas should not remain in the container.
Do not press the medium down firmly. Heavy packing removes air spaces and makes it harder for roots to spread. Fill the container loosely, then tap it gently to settle the mix. The surface can be smoothed without pushing it down hard.
When planting a germinated seed, handle it carefully. The white taproot is fragile and can break easily. Touch the seed shell rather than the root when possible. Make a small hole in the medium and place the seed at a shallow depth. The taproot is commonly placed downward so it can continue growing into the medium.
Cover the seed lightly. A thick layer of soil can make it harder for the seedling to reach the surface. The medium should remain moist while the seedling emerges, but it should not stay soaked.
After planting, water should be applied gently. A strong stream can move the seed, pack the soil, or expose the root. A spray bottle or small amount of carefully poured water may help keep the area evenly moist.
The best growing medium for marijuana seedlings is light, loose, and well-draining. It should hold enough moisture for young roots while still allowing oxygen to move through the root zone. Seed-starting mix, light potting soil, and coco coir can all work when managed correctly.
Young seedlings should not be placed in heavily fertilized soil. Strong nutrients may burn the roots and leaves. A mild mix gives the plant time to develop before stronger feeding begins.
Containers should be clean, suitable in size, and fitted with open drainage holes. Small starter pots usually make watering easier to control. Before planting, the medium should be evenly damp but not soaked. It should also remain loose rather than tightly packed.
Careful preparation at this stage can prevent many common problems. A healthy root zone gives the seedling the support it needs to form strong leaves, a stable stem, and steady new growth.
Light Requirements for Marijuana Seedlings
Light is one of the most important needs during the marijuana seedling stage. A young seedling uses light to make energy and build new leaves, roots, and stems. Too little light can cause weak and stretched growth. Too much light can burn the leaves, dry the growing medium, and slow development. The goal is to provide steady, gentle light that supports growth without placing the seedling under stress.
Seedlings do not need the same light strength as mature cannabis plants. Their leaves are small, their roots are still developing, and they cannot handle strong heat or intense light for long periods. Growers should watch the plant closely and adjust the light based on its response. A healthy seedling should remain upright, produce new leaves, and develop a stem that becomes thicker over time.
Choosing a Light Schedule
A regular light schedule helps marijuana seedlings develop in a stable way. Many growers provide between 16 and 18 hours of light each day. The remaining hours are used as a dark period. One common schedule is 18 hours of light followed by 6 hours of darkness.
Some growers use a 20-hour light period, while others keep lights on for 24 hours. However, a daily dark period gives the seedling time to complete natural plant processes. Darkness also allows the grow space to cool down. This can reduce heat stress and lower energy use.
The most important part of a light schedule is consistency. Lights should turn on and off at the same time each day. A timer can make this easier. Sudden changes in the schedule may stress young plants and affect their growth.
Seedlings should not be exposed to complete darkness for long periods during active growth. Without enough daily light, they cannot make the energy needed to form healthy leaves and roots. At the same time, longer light periods do not always create faster growth. Light strength, temperature, moisture, and root health must also remain balanced.
Selecting a Suitable Grow Light
Several types of lights can be used for marijuana seedlings. LED grow lights are common because they use less energy and often produce less heat than older lighting systems. Many LED lights can also be dimmed, which allows growers to lower the intensity for young plants.
Fluorescent lights can also work well for seedlings. They usually provide soft light and do not create as much heat as stronger grow lamps. Compact fluorescent lights and tube-style fluorescent lights may be useful for small seedling areas.
High-powered grow lights may also be used, but they must be placed farther away or set to a lower output. A strong light designed for flowering plants can easily stress a young seedling. The plant may develop pale spots, curled leaves, dry edges, or slow growth if the light is too intense.
Natural sunlight can support seedling growth, but it may be harder to control. Light near a window may not be strong enough, especially during cloudy weather or short winter days. The glass can also block some useful light and create uneven exposure. A seedling near a window may begin leaning toward the brightest side.
No single light is best for every setup. The right choice depends on the size of the growing area, heat levels, energy use, and the number of seedlings. The light should provide even coverage without creating hot spots.
Finding the Correct Light Distance
Light distance is the space between the lamp and the top of the seedling. The correct distance depends on the type of light, its power, and the manufacturer’s instructions. A low-power fluorescent light may be placed closer to the plant. A strong LED light may need to be placed much farther away.
When the light is too far away, the seedling may stretch. Its stem becomes long, thin, and weak as it tries to reach the light. The spaces between new leaves may also become larger. A stretched seedling can lean, bend, or fall over because the stem is not strong enough to support the upper growth.
Moving the light closer may help, but the change should be gradual. Lowering a strong light too quickly can shock the seedling. It is better to make a small adjustment and observe the plant for a day.
A light that is too close can cause a different set of problems. The leaves may curl upward, fade, develop dry spots, or appear bleached. The growing medium may also dry too quickly. Heat from the lamp can raise the temperature around the seedling even when the rest of the room feels comfortable.
Growers can place a hand near the top of the seedling to check for strong heat, but this method does not measure light intensity. A light meter can provide more accurate information. Manufacturer guidelines should also be used as a starting point.
The seedling itself gives useful signs. A short, upright plant with steady new growth is usually receiving enough light. A tall, thin plant likely needs more light. A pale or curled seedling may need less intensity or more distance from the lamp.
Introducing Seedlings to Outdoor Sunlight
Indoor-grown marijuana seedlings should not be moved directly into strong outdoor sunlight. Even when indoor lights seem bright, natural sunlight can be much more intense. A sudden move can cause sunburn, drooping, dry leaves, and serious stress.
The process of slowly preparing a seedling for outdoor conditions is often called hardening off. The plant is placed outside for a short period in a protected area. Early exposure may last only an hour or two. Gentle morning light or bright shade is safer than strong midday sun.
Outdoor time can be increased over several days. The seedling may then receive a little more direct sunlight each day. This gradual process allows the leaves to adjust and become stronger.
Temperature must also be considered. Young seedlings can be damaged by cold nights, extreme heat, or sudden changes in weather. Strong wind can bend the stem or dry the leaves. Heavy rain can flood the container, disturb the growing medium, or damage soft growth.
A sheltered location is best during the first few outdoor visits. The seedling should be protected from pets, insects, strong wind, and intense rain. Growers should check the soil moisture often because outdoor conditions may cause containers to dry faster.
If the seedling begins to droop or develop pale patches, it may be receiving too much sun. Moving it back into partial shade can help it recover. Outdoor exposure should then increase more slowly.
Marijuana seedlings need steady light, but they do not need the same strong intensity as mature plants. A schedule of about 16 to 18 hours of light each day can support healthy growth while still giving the plant a dark period. LED and fluorescent lights are common choices because they can provide gentle and controlled lighting.
The correct distance between the light and the seedling is also important. Too little light can cause stretching and weak stems. Too much light can cause curling, bleaching, dryness, and slow growth. Growers should make small changes and watch how the plant responds.
Seedlings moved outdoors need time to adjust to sunlight, wind, and changing temperatures. Gradual exposure reduces stress and lowers the risk of leaf damage. Balanced light helps the seedling build strong leaves, a thicker stem, and a healthy base for the vegetative stage.
Temperature, Humidity, and Airflow
Marijuana seedlings need a stable environment to grow strong roots, healthy leaves, and firm stems. Young plants are more sensitive than mature cannabis plants. A sudden change in heat, moisture, or airflow can slow their growth. It can also make them more likely to suffer from mold, drooping, weak stems, or root problems.
The goal is not to create perfect conditions every minute. Instead, growers should aim for a steady range without large changes between day and night. Temperature, humidity, and airflow also work together. For example, high heat can cause water to leave the leaves faster. High humidity can slow that water loss. Strong airflow can dry the growing medium more quickly. Each part of the environment must be adjusted with the others in mind.
Maintaining a Stable Temperature
Marijuana seedlings usually grow well in warm conditions. A general daytime temperature range of about 70°F to 80°F, or 21°C to 27°C, is suitable for many seedlings. Night temperatures may be a little lower, but large drops should be avoided. A mild difference between day and night is normal. However, cold nights can slow root activity and reduce growth.
Cold conditions can cause several problems. The growing medium may stay wet for too long because water dries more slowly. Roots may absorb less water and fewer nutrients. The seedling may droop, stop growing, or develop pale leaves. Cold roots are often more harmful than slightly cool air because the root system controls water and nutrient uptake.
High heat can also stress seedlings. Temperatures above the ideal range may cause fast water loss. Leaves may curl upward at the edges, droop, or feel dry. The growing medium may dry too quickly, especially in small containers. Seedlings under hot lights may also stretch or become weak if heat and poor lighting occur at the same time.
Grow lights can raise the temperature near the plant, even when the rest of the room feels comfortable. This is why temperature should be measured close to the top of the seedling. A thermometer placed across the room may not show the conditions around the leaves.
Growers should also check for hot and cold areas. Windows, vents, heaters, and air conditioners can cause sudden changes. A seedling placed beside a cold window may experience a much lower temperature at night. A seedling near a heater may dry out quickly. Moving the plant to a more stable area can prevent these problems.
Changes should be made slowly when possible. A sudden increase in light strength or heat may shock a young plant. Small changes give the seedling time to adjust.
Managing Humidity
Humidity describes the amount of moisture in the air. Young marijuana seedlings often benefit from moderate to high humidity because their root systems are still small. Their leaves can lose water faster than the roots can replace it. Moist air slows this water loss and helps the plant remain firm.
A relative humidity range of about 60% to 70% is often suitable during the early seedling stage. As the plant grows stronger and develops a larger root system, humidity can be reduced slowly. Older seedlings may do well closer to 55% to 65%.
Humidity that is too low can cause the plant to dry out quickly. Leaves may curl, develop dry edges, or droop. The growing medium may also lose moisture faster. This can be a serious issue in small starter pots because they hold little water.
A humidifier may help in a very dry room. However, it should not blow mist directly onto the plant. Constant moisture on the leaves can create conditions that support fungal growth. The humidifier should raise the moisture level in the surrounding air instead.
Excess humidity also creates risks. Air that stays too wet can slow evaporation from the growing medium. The root zone may remain damp for too long. High humidity, wet soil, and poor airflow can increase the risk of damping-off disease. This disease can weaken the stem near the soil line and cause the seedling to fall over.
Humidity domes are sometimes used after germination, but they should be used with care. Seedlings need fresh air after they rise above the growing medium. A sealed dome can trap too much moisture and heat. If a dome is used, it should have air openings, and it should be removed once the seedling can remain firm without it.
A hygrometer can measure relative humidity. It should be placed near the seedlings rather than near the floor or ceiling. Humidity levels can be different in various parts of the same room.
Providing Gentle Airflow
Fresh air is important for healthy marijuana seedlings. Plants use carbon dioxide during photosynthesis. Air movement helps replace the air around the leaves and prevents the space from becoming still and damp.
Gentle airflow also helps strengthen the stem. A light movement in the air encourages the plant to build stronger stem tissue. The seedling may sway slightly, but it should not bend sharply or shake for long periods.
A small fan can be used to improve circulation. The fan should not point directly at the seedling at full strength. Direct, strong wind can dry the leaves and growing medium too quickly. It can also cause wind stress, which may make leaves curl or develop dry edges.
The fan can point toward a nearby wall so the air bounces gently around the growing area. It can also be placed farther away or used on its lowest setting. The leaves should move only a little.
Good airflow reduces areas where moisture collects. This can lower the risk of mold, fungus, and damping-off. It also helps the top layer of the growing medium dry at a steady rate. However, airflow does not fix overwatering. If the root zone stays soaked, a fan alone will not solve the problem.
The grow area also needs air exchange. Moving the same stale air around is not enough in a closed space. Fresh air should enter while warm, damp air leaves. A simple vent may be enough for a small setup. A larger indoor grow area may need an exhaust fan.
Seedlings should not be placed directly beside an intake or exhaust opening. Fast air from these areas may cause sudden changes in temperature and humidity.
Monitoring the Environment
Environmental conditions should be checked at the seedling canopy, which is the level of the leaves. Heat rises, so the top of the growing area may be warmer than the bottom. Humidity can also vary depending on airflow and equipment placement.
A digital thermometer and hygrometer can provide useful readings. Some models show the highest and lowest measurements over a period of time. This helps growers notice heat spikes during the light period or cold drops at night.
Growers should also observe the plants. Tools provide numbers, but the seedlings show how they are responding. Upright leaves, steady new growth, and firm stems usually suggest that conditions are suitable. Drooping, curling, stretching, or slow growth may show that part of the environment needs attention.
Only one major change should be made at a time. For example, changing the fan, light height, humidity, and watering routine on the same day can make it hard to identify the real problem. Small changes followed by careful observation are safer.
Marijuana seedlings grow best when temperature, humidity, and airflow remain stable. Warm conditions support root activity and steady growth, while extreme heat or cold can cause stress. Moderate humidity helps young seedlings hold moisture, but excessive humidity can increase the risk of fungal disease. Gentle airflow supports fresh air exchange, stronger stems, and a drier leaf surface.
Growers should measure conditions near the seedling leaves and watch for changes during both the light and dark periods. They should avoid strong fans, sudden temperature shifts, and constantly wet air. A balanced environment gives marijuana seedlings the support they need to develop healthy roots, firm stems, and strong new leaves.
How to Water Marijuana Seedlings Correctly
Watering is one of the most important parts of marijuana seedling care. Young plants need steady moisture to develop roots, stems, and new leaves. However, they do not need the same amount of water as mature plants. Their root systems are still small, so they can only absorb moisture from a limited area.
Too much water can reduce oxygen around the roots and slow plant growth. Too little water can cause the seedling to wilt, dry out, and stop developing. The goal is to keep the growing medium lightly moist without leaving it soaked. Learning how to check the soil and read the plant’s condition is more useful than following a strict watering schedule.
Understanding Seedling Water Needs
Marijuana seedlings use only a small amount of water during their first days of growth. A newly emerged seedling may have one short taproot and a few small side roots. These roots cannot reach every part of a large container. Watering the entire container can leave the growing medium wet for too long.
The amount of water a seedling needs will increase as the roots spread. During early growth, water should be applied close to the seedling. A small circle of moisture around the stem is often enough. The circle can become wider as the plant grows and develops more leaves.
Seedlings should not be watered only because a certain number of days has passed. Some containers may dry within one or two days, while others may stay moist for much longer. Drying speed depends on the size of the container, the type of growing medium, room temperature, humidity, airflow, and light strength.
Warm temperatures and steady airflow usually cause moisture to leave the medium faster. High humidity, cool temperatures, and large containers often slow the drying process. A dense soil mix may also hold more water than a loose seed-starting mix or coco-based medium.
A fixed schedule can lead to overwatering because it does not consider these changing conditions. It is better to check the growing medium before adding more water.
Checking the Growing Medium
The surface of the growing medium can help show whether a seedling may need water, but it should not be the only guide. The top layer may look dry while the area around the roots remains moist. Adding water too soon can keep the lower part of the container soaked.
One simple method is to touch the surface and gently check the medium slightly below it. The top section should feel drier before more water is added. The deeper root area should still hold some moisture, but it should not feel muddy or saturated.
Container weight is another useful guide. A recently watered pot feels heavier than a pot that has started to dry. Lifting the container each day can help a grower learn the difference. This method becomes easier with practice and can be more reliable than looking at the surface alone.
The color of the growing medium may also change as it dries. Many soil and coco mixes look darker when wet and lighter when dry. However, color can be affected by the material in the mix, so it should be used together with touch and container weight.
Drainage holes should also be checked. If the bottom of the container remains wet for several days, the medium may be holding too much water. Poor drainage, low temperature, or a container that is too large may be causing the problem.
Applying Water Carefully
Water should be applied slowly and gently. A strong stream can move the growing medium, expose roots, or knock over the seedling. A small watering bottle, cup, syringe without a needle, or narrow-spout container can give better control.
During the first stage of growth, water can be added in a small ring around the seedling. It should not always be poured directly against the stem. Constant moisture at the base of the stem may increase the risk of fungal problems, including damping-off.
The wet area should become wider as the roots spread. This encourages the roots to grow outward in search of moisture. Watering only one tiny spot for too long may limit the root zone and create uneven moisture in the container.
Large amounts of water should not be poured into a small starter pot all at once. Add a little water, allow it to soak in, and then check the medium. The goal is to moisten the root area without flooding it.
Drainage holes are essential because extra water needs a way to leave the container. Water should not collect around the bottom of the pot. A seedling container that sits in standing water can develop low oxygen levels around the roots.
Spraying the surface with a mist bottle may help keep the upper layer from drying during germination, but misting alone may not provide enough water once the seedling begins growing. The roots need moisture below the surface, not just on top. Gentle, controlled watering is usually more useful after emergence.
Signs of Overwatering
Overwatering is common because growers may think a drooping seedling always needs more water. In many cases, the opposite is true. A soaked growing medium contains less air, which makes it difficult for roots to take in oxygen.
An overwatered seedling may have drooping leaves that look heavy or swollen. The leaves may curl downward, and growth may become slow. The stem may remain upright at first, but the entire plant can weaken if wet conditions continue.
The growing medium may stay dark and wet for many days. It may also develop a stale or unpleasant smell. Algae or fungus may appear on the surface when moisture remains high and airflow is poor.
Adding more water will not fix an overwatered seedling. The medium should be allowed to dry to a safer level. Airflow and temperature may need to be adjusted, but strong heat or direct fan pressure should be avoided. The container should also be checked for open drainage holes.
If overwatering happens often, the problem may be linked to dense soil, a large pot, poor drainage, or frequent watering. Correcting the cause is more effective than treating each case after the seedling droops.
Signs of Underwatering
An underwatered seedling may also droop, but the growing medium will feel dry and the container will be light. The leaves may look thin, soft, or weak. The stem may bend, and the leaf edges may begin to dry if the condition continues.
The surface may pull away from the sides of the container when the medium becomes very dry. Water may then run down the gap and leave the center of the root zone dry. In this case, water should be applied slowly in small amounts so the medium can absorb it evenly.
A dry seedling should not be flooded with a large amount of water. Sudden saturation can stress the roots and create uneven moisture. Slow watering allows the root zone to recover without becoming waterlogged.
The plant may begin to lift its leaves within several hours after proper watering. Severe dryness can cause lasting damage, especially if the roots have dried completely. Regular checks help prevent the growing medium from reaching this point.
Telling the Difference Between Overwatering and Underwatering
Overwatering and underwatering can both cause drooping, so the appearance of the leaves is not enough to identify the problem. The growing medium must be checked before any action is taken.
A heavy container with wet soil often points to overwatering. A light container with dry soil suggests underwatering. Overwatered leaves may look thick and heavy, while underwatered leaves may appear thin and weak. However, these signs can vary, which is why checking moisture is essential.
Growers should also consider how recently the plant was watered. A seedling that droops while the medium is still wet should not receive more water. A seedling in dry medium may need a small and careful watering.
Making one correction at a time helps reveal the true cause. Adding fertilizer, changing the light, and watering at the same time can make the problem harder to identify.
Marijuana seedlings need light and steady moisture, but they should never remain in soaked growing medium. Their small roots can only use a limited amount of water, so watering should begin close to the plant and increase as the root system expands.
The growing medium should be checked by touch, color, and container weight before water is added. Water should be applied slowly, and all containers should have working drainage holes. A wet, heavy pot usually points to overwatering, while a light pot with dry soil often shows that the seedling needs water.
Nutrients, Water pH, and Early Feeding
Marijuana seedlings need careful feeding because their roots and leaves are still small. Giving too many nutrients at this stage can cause more harm than giving too little. Young plants cannot handle the same fertilizer strength as mature plants. Their roots are thin, soft, and easy to damage. A strong nutrient mix can burn these roots and slow the plant’s growth.
The right feeding plan depends on the growing medium. Seedlings growing in soil may already have enough nutrients for the first part of their life. Seedlings growing in coco coir or another low-nutrient medium may need mild feeding sooner. Water quality and pH also affect how well the roots can take in nutrients. A plant may show signs of a deficiency even when nutrients are present if the pH is outside the suitable range.
Growers should follow local laws before cultivating cannabis. They should also read the instructions for every fertilizer, soil mix, and pH product they use.
When Seedlings Need Nutrients
A newly opened seedling often does not need added fertilizer right away. Its first two rounded leaves are called cotyledons. These leaves contain stored energy that helps the young plant begin growing. The cotyledons support the seedling while the first roots spread and the first true leaves develop.
True leaves are the serrated leaves that appear after the cotyledons. Once several sets of true leaves have formed, the seedling may begin to use more nutrients. However, this does not mean that every seedling must be fed at the same time. The growing medium is one of the most important factors.
Many potting soils and seed-starting mixes contain a small amount of plant food. This may be enough for the first two or three weeks. Rich soil may contain enough nutrients for even longer. Adding fertilizer too early to a soil that already contains nutrients can create an overly strong root zone.
Coco coir usually contains little or no plant nutrition. It acts mainly as a support for roots and water. Seedlings in coco may need a mild nutrient solution earlier than seedlings in soil. The amount should still be low because small roots cannot use a heavy dose.
A seedling should not be fed only because it has reached a certain age. Growers should also look at its color, rate of growth, leaf condition, and growing medium. A healthy seedling with green leaves and steady new growth may not need extra nutrients yet. Feeding a healthy plant without a clear reason can disturb its natural development.
When feeding begins, a weak solution is safer than a full-strength mix. The strength can increase slowly as the plant becomes larger. Product labels may give instructions for mature plants, so the seedling rate may need to be much lower. Changes should be gradual. Sudden increases can stress the roots.
Avoiding Nutrient Burn
Nutrient burn happens when the growing medium contains more fertilizer salts than the plant can safely handle. Seedlings are at high risk because their root systems are still developing. Even a dose that seems small may be too strong for a very young plant.
One early sign of nutrient burn is browning or yellowing at the tips of the leaves. The damaged tips may become dry and crisp. The leaves may also turn very dark green. Some may curl downward or develop a claw-like shape. Growth may slow because the roots are under stress.
Nutrient burn is often caused by mixing fertilizer at full strength. It may also happen when a seedling is planted in soil made for heavy-feeding mature plants. Some soils contain compost, manure, or strong slow-release fertilizer. These materials can make the soil too rich for delicate roots.
Feeding too often can also cause salts to build up. This is more likely when the growing medium does not drain well. Poor drainage keeps fertilizer around the roots for too long. Water may leave the container slowly, while salts remain behind.
The safest way to prevent nutrient burn is to start with a mild growing medium and use weak feedings. Growers should measure products instead of guessing. Adding several supplements at once can make the total nutrient level much stronger than expected.
When burn appears, adding more fertilizer will make the problem worse. The first step is to stop feeding and check the growing conditions. The plant may need plain, correctly balanced water for a short period. The container must also drain well. However, repeatedly soaking a small seedling can cause overwatering, so any correction should be careful.
Damaged leaves may not return to their original color. The main goal is to protect the new growth. If fresh leaves appear healthy after the feeding strength is reduced, the seedling is likely recovering.
Understanding Water pH
Water pH measures how acidic or alkaline the water is. The pH scale runs from 0 to 14. A value of 7 is neutral. Values below 7 are acidic, while values above 7 are alkaline.
The pH of the root zone affects nutrient availability. Plant roots can only absorb nutrients well within certain pH ranges. When the pH is too high or too low, some nutrients become difficult for the plant to use. This can happen even when the growing medium contains enough fertilizer.
For seedlings grown in soil, a slightly acidic root zone is often suitable. Many growers aim for a range close to pH 6.0 to 7.0, although the ideal target can depend on the soil mix and water source. For coco coir and hydroponic media, the preferred range is often lower, close to pH 5.5 to 6.5.
These ranges should not be treated as exact numbers for every situation. Soil can help buffer small pH changes, while coco and hydroponic systems may respond more quickly. The instructions from the growing-medium maker should be checked when available.
Water should be tested after nutrients are mixed because fertilizer can change the pH. A digital meter or liquid test kit can be used. Digital meters must be cleaned, stored, and calibrated as directed. A poorly maintained meter can give a false reading and lead to unnecessary corrections.
Growers should avoid chasing a perfect number with large amounts of pH adjustment products. Rapid swings can stress roots. Small changes are usually safer. The goal is to keep the root zone within a suitable range, not to force every watering to one exact value.
Water quality also matters. Tap water may contain minerals that raise its hardness or pH. Very hard water can cause mineral buildup. Very soft or purified water may contain few minerals and may need careful nutrient management. Before changing the water source, growers should understand how the current water affects the plants.
Recognizing Possible Deficiencies
A nutrient deficiency occurs when a plant does not receive or absorb enough of an important element. Common symptoms can include yellow leaves, pale growth, brown spots, weak stems, or slow development. However, these signs do not always mean that more fertilizer is needed.
Overwatering is one of the most common causes of seedling problems. Wet soil contains less oxygen, which makes it harder for roots to function. A waterlogged plant may look pale, droopy, or underfed because damaged roots cannot absorb nutrients well.
Incorrect pH can create a similar problem. Nutrients may be present, but the roots cannot take them in. This is sometimes called nutrient lockout. Adding more fertilizer during lockout can raise salt levels and make the damage worse.
Cold temperatures can also slow nutrient uptake. Roots work less efficiently in a cold growing medium. Strong heat can damage roots and increase water stress. Poor drainage, compact soil, and root disease may also cause symptoms that look like a deficiency.
The location of the symptoms can provide useful clues. Some nutrient problems begin on older leaves, while others appear first on new growth. The pattern of yellowing also matters. A whole leaf may become pale, or the tissue between the veins may turn yellow while the veins stay green.
Growers should check the simplest causes first. They should examine soil moisture, drainage, temperature, light strength, water pH, and recent feeding. It is best to change one factor at a time. Making many changes at once makes it difficult to identify the real cause.
Minor fading of the cotyledons is not always a serious problem. These first leaves may naturally turn yellow and fall away as the plant grows. Yellowing true leaves, spreading spots, or stopped growth deserve more attention.
Marijuana seedlings need only small amounts of nutrition during early growth. The cotyledons provide stored energy, while many soil mixes already contain enough nutrients for the first few weeks. Seedlings in coco coir or other low-nutrient media may need mild feeding sooner, but strong fertilizer should still be avoided.
Nutrient burn often causes brown tips, dark leaves, curling, and slow growth. It can be prevented by using a gentle growing medium, measuring fertilizer carefully, and increasing strength in small steps. Water pH is also important because it affects how easily roots can absorb nutrients.
Yellowing or slow growth does not always mean that a seedling needs more fertilizer. Overwatering, poor drainage, incorrect pH, cold roots, heat, and root damage can create similar symptoms. Growers should check the full environment before feeding. Careful observation and small corrections give young plants the best chance to recover and continue healthy growth.
Why Marijuana Seedlings Stretch, Lean, or Fall Over
Marijuana seedlings are small and delicate. Their stems are still soft, and their roots are not yet strong enough to support much stress. A healthy seedling should have a short, firm stem that holds the first leaves upright. When a seedling becomes very tall, bends to one side, or falls over, it is often reacting to a problem in its growing space.
The most common cause is weak or poorly placed light. However, heat, excess water, poor airflow, and a loose growing medium may also play a role. A stretched seedling is not always lost. Many seedlings can recover when the cause is found early and corrected with care.
Common Causes of Stretching
Stretching happens when a seedling grows a long, thin stem while trying to reach a better light source. This is sometimes called leggy growth. The space between the growing medium and the first leaves becomes longer than normal. The stem may look pale, weak, or too narrow to support the leaves.
Low light is the main cause of seedling stretching. A grow light may be too far above the plant, too weak, or turned on for too few hours each day. The seedling senses that it is not receiving enough light for healthy growth. It responds by growing upward as fast as possible.
Uneven light can also cause a problem. A seedling placed near the edge of a growing area may lean toward the center, where the light is stronger. A plant growing near a window may bend toward the glass because sunlight is coming from one direction.
High temperatures may make stretching worse. Warm conditions can speed up stem growth, especially when light levels are low. The result is fast upward growth without enough strength or thickness. A hot seedling area may also dry the leaves while the growing medium remains wet.
Seedlings may stretch when they are crowded together. Larger plants can block light from smaller seedlings. The shaded plants then grow taller to compete for light. Leaving enough space between containers helps each seedling receive more even light.
A stretched stem is weaker than a short, thick stem. It may bend under the weight of the leaves or fall after watering. The problem should be corrected as soon as possible because continued stretching makes the seedling harder to support.
Fixing a Stretched Seedling
The first step is to improve the light. Move the light closer only when it can be done safely. The correct distance depends on the type and strength of the fixture. A powerful light placed too close may burn the leaves or cause heat stress. A weak light placed too far away may not stop the stretching.
Make small changes instead of moving the light a large distance at once. Watch the seedling for signs of stress during the next day or two. Leaves that curl upward, become pale, or develop dry areas may be receiving too much light or heat.
The light should be placed above the seedling rather than to one side. Overhead light helps the plant grow upright. It also provides more even coverage across the leaves.
A stretched stem may need physical support while it becomes stronger. More growing medium can be added around the lower part of the stem. This helps hold the seedling upright and reduces the amount of exposed stem. Add the medium gently and do not press it down hard. Heavy pressure can damage the stem or reduce air around the roots.
A small plant stake may also be used for short-term support. A soft tie can hold the stem loosely against the stake. The tie should not squeeze the plant. The stem will become thicker as healthy growth continues, so tight support can cause damage.
Avoid handling the seedling more than needed. Young stems can break easily. Never pull the plant upward or push it deeply into the growing medium after the roots have started to develop.
Seedlings Leaning Toward the Light
A marijuana seedling often bends toward the strongest light source. This natural response is called phototropism. The plant directs its growth toward light because it needs light for photosynthesis.
Slight leaning is not always a serious problem. A seedling near a window may follow the sun during the day. It may become upright again when the light changes. Strong leaning that continues in one direction may mean the light is too far to the side or the plant is receiving uneven coverage.
The best correction is to place the light directly above the seedling. If several plants are growing under one fixture, make sure they are all within the main light area. Plants at the edge may receive much less light than those in the center.
Containers may be turned from time to time when natural window light is used. This can help balance growth. However, constant turning should not be used as a replacement for proper light placement. The seedling needs steady and even light to develop a straight, strong stem.
Leaning may also occur when the growing medium does not support the stem. A very loose or washed-out surface can allow the plant to tilt. Add a small amount of medium around the base when needed. Keep the surface level, but do not bury the leaves.
A seedling that suddenly leans after watering may have been disturbed by the force of the water. Pouring water directly onto the stem can move the soil and expose the roots. Apply water slowly around the plant instead of pouring it onto the base.
Strengthening Weak Stems
Correct light is the most important part of building stronger stems. Once a seedling receives enough light, it should slow its upward stretch and begin to grow thicker. New growth should appear more compact, with shorter spaces between the leaves and nodes.
Gentle airflow can also help. Light movement causes the stem to flex slightly. This may encourage it to become firmer over time. A small fan can be used to move air around the growing space, but it should not blow hard directly at the plant.
The leaves should move only a little. Strong airflow may dry the seedling, bend the stem, or cause the plant to fall over. A fan can be aimed at a nearby wall so the air spreads gently through the area.
Watering habits also affect stem strength. Constantly wet soil may weaken the roots and reduce the amount of oxygen around them. Weak roots cannot support strong stem growth. Allow the growing medium to begin drying between waterings, but do not let the seedling become severely dry.
The temperature should remain stable. Very high heat may cause fast, weak growth, while cold conditions may slow root development. A balanced environment allows the roots, stem, and leaves to grow at a similar rate.
A seedling that has already stretched may not become shorter. However, the new part of the plant can grow stronger after the conditions improve. The lower stem can be supported while the upper growth becomes more compact.
When a Seedling Falls Over
A fallen seedling should be checked carefully. If the stem is still firm and has only bent, it may recover with support. Add growing medium around the base or use a small stake to hold it upright.
If the stem looks thin, dark, or pinched near the soil line, the problem may be damping-off disease. This fungal problem can cause a seedling to collapse suddenly. Affected stems often become weak at the base and may not recover.
A seedling may also fall because the growing medium is too wet. Waterlogged roots receive less oxygen, and the whole plant may become weak or droopy. Check the moisture level before adding more water.
Physical damage is another possible cause. A fan, pet, tool, or strong stream of water can knock the seedling over. Reduce movement near the plant and protect it until the stem becomes stronger.
Marijuana seedlings usually stretch, lean, or fall over because of poor light, uneven light, excess heat, weak roots, or physical stress. Low light is the most common cause of tall and thin growth. Placing a suitable light above the plant can help stop further stretching.
A weak seedling can often recover when it receives gentle support, proper lighting, steady temperatures, careful watering, and mild airflow. Add growing medium around the lower stem when needed, but avoid rough handling. Watch the new growth closely. Stronger stems, upright leaves, and shorter spaces between nodes are signs that the seedling is improving.
Yellow Leaves, Drooping, Curling, and Slow Growth
Marijuana seedlings are small and sensitive. Even a minor problem with water, light, heat, nutrients, or the growing medium can affect their appearance. Yellow leaves, drooping stems, curled edges, and slow growth are some of the most common warning signs during this stage. These symptoms can look serious, but they do not always mean the seedling is dying.
The key is to study the whole plant before making changes. Check the growing medium, leaf color, stem strength, room temperature, humidity, and light position. Many growers make a problem worse by reacting too fast. For example, they may add fertilizer when the true cause is overwatering or poor soil drainage. It is safer to identify the most likely cause and make one small correction at a time.
Yellow Cotyledons Versus Yellow True Leaves
Cotyledons are the first smooth leaves that appear after a seedling rises from the growing medium. They do not have the pointed or serrated shape seen on mature cannabis leaves. Cotyledons contain stored energy that helps support the young plant during its first days of life.
It can be normal for cotyledons to turn pale or yellow as the seedling grows. Once the plant develops several healthy true leaves, it may no longer depend on the cotyledons. The plant may then use the remaining nutrients stored inside them. The cotyledons may slowly dry, shrink, and fall away.
Yellow true leaves require closer attention. True leaves are the serrated leaves that begin to form above the cotyledons. When these leaves become yellow, the seedling may be under stress. The position and pattern of the yellow color can provide useful clues.
Yellowing on the lowest leaves may be linked to normal aging, limited nutrients, or root problems. Yellow new growth may suggest that the roots cannot absorb certain nutrients. This can happen when the pH is unsuitable, the root zone is too wet, or the growing medium has become compacted.
Pale leaves can also appear when a seedling receives too little light. Without enough light, the plant may struggle to produce the energy needed for healthy green growth. However, too much light can also damage leaves. Intense light may cause pale patches, upward curling, dry edges, or bleaching near the top of the plant.
Growers should not add fertilizer as soon as they notice yellow leaves. Young seedlings need only small amounts of nutrients. Strong fertilizer may burn the roots and make the yellowing worse. First, check the moisture level, drainage, light distance, temperature, and pH.
Drooping Seedlings
Drooping occurs when the leaves or stem lose their upright position. The plant may look tired, soft, or weak. Both overwatering and underwatering can cause this problem, which makes it important to check the growing medium before taking action.
An overwatered seedling often has heavy or swollen-looking leaves that bend downward. The growing medium may stay wet for several days. Constant moisture can push air out of the root zone. Roots need oxygen to function, so a lack of air may reduce water and nutrient uptake. The seedling may droop even though plenty of water is present.
To correct overwatering, allow the growing medium to dry slightly before watering again. Make sure the container has clear drainage holes. Avoid leaving the pot in standing water. Strong fans or high heat should not be used to force rapid drying because they can create more stress.
An underwatered seedling may also droop, but its leaves often appear thin, soft, or dry. The container may feel very light, and the growing medium may pull away from the sides of the pot. Water should be added slowly so it spreads through the root area. Pouring a large amount all at once may cause water to run through dry gaps without fully moistening the medium.
Heat stress can also cause drooping. High temperatures increase water loss through the leaves. A seedling may wilt during the hottest part of the day or when the grow light is too close. Moving the light slightly farther away and improving gentle air circulation may help.
Root damage, transplant stress, and strong fertilizer can also cause drooping. When the cause is not clear, avoid making several changes at once. Check the easiest factors first, including moisture, heat, and drainage.
Curling or Twisted Leaves
Leaf curling can appear in several forms. The edges may curl upward, the tips may point downward, or the entire leaf may twist. Each pattern can have more than one cause.
Upward curling is often linked to excessive heat or strong light. The leaf edges may lift as the plant tries to reduce exposure. Leaves may also feel dry or thin. Check the temperature at the top of the seedling instead of relying only on a room reading. Conditions directly under a grow light can be warmer than the rest of the space.
Downward-curled tips may be linked to excess nutrients. Young seedlings can be damaged by soil or fertilizer that is too strong. The leaves may become very dark green before the tips curl downward. Brown or yellow tips may later appear. When this happens, stop adding nutrients and avoid using another product to correct the first one.
Watering problems can also cause curled or twisted growth. Constantly wet roots may prevent the plant from taking in nutrients correctly. Dry roots may cause leaves to curl as they lose moisture. Uneven watering can create changing conditions that stress the seedling.
Some seedlings produce slightly twisted first leaves because of genetics, damage from the seed shell, or stress during emergence. Minor twisting may not require treatment when the next leaves appear healthy. New growth is often a better sign of recovery than old damaged leaves. A leaf that has already been harmed may not return to its original shape.
Growers should also inspect curled leaves for pests. Small insects may hide under the leaves or near new growth. Tiny spots, silver marks, webbing, or damaged tissue may suggest pest activity. Early detection makes the problem easier to manage.
Slow or Stunted Growth
Seedlings do not all grow at the same speed. Genetics, seed quality, root development, temperature, and growing conditions can affect growth rate. A seedling may appear slow above the soil while it develops roots below the surface.
Slow growth becomes more concerning when it continues for several days without healthy new leaves. Cold temperatures are a common cause. Cold roots absorb water and nutrients less effectively. Keeping the growing environment stable can support better development.
Poor drainage can also stop growth. A dense or constantly wet medium limits oxygen around the roots. This can cause the seedling to remain small, droop, or develop pale leaves. A light, loose medium with drainage holes supports stronger root growth.
Weak lighting may produce slow growth and thin stems. The seedling may stretch toward the light without developing strong leaves. Increasing light exposure carefully may help, but sudden exposure to intense light can cause more damage.
Too much fertilizer can also slow the plant. Seedlings have small root systems and cannot handle strong nutrient levels. Nutrient burn may damage root tips and reduce future growth. A mild growing medium is often enough during the earliest stage.
Incorrect pH can make nutrients unavailable even when they are present in the soil or water. This condition is sometimes called nutrient lockout. Adding more fertilizer will not solve the problem if the roots cannot absorb it. Checking the pH and improving root conditions is usually more helpful.
The size of the container can also affect watering and root growth. A very large container may stay wet for too long around a small seedling. A very small container may dry quickly or restrict roots. The container should match the plant’s current size and provide proper drainage.
When correcting slow growth, focus on stable conditions. Avoid transplanting, feeding, changing lights, and altering the watering method all at once. The seedling needs time to respond. Healthy new leaves, stronger stems, and faster water use are signs that recovery has started.
Yellow leaves, drooping, curling, and slow growth are signs that a marijuana seedling may be under stress. However, one symptom can have several possible causes. Yellow cotyledons may be part of normal development, while yellow true leaves may point to watering, light, nutrient, root, or pH problems. Drooping can result from too much water, too little water, heat, or root damage. Curling may be caused by strong light, high temperatures, excess nutrients, uneven watering, or pests. Slow growth may develop because of cold conditions, poor drainage, weak lighting, root stress, or strong fertilizer.
Common Marijuana Seedling Diseases, Pests, and Emergencies
Marijuana seedlings are small, delicate, and easy to stress. Their roots are still forming, their stems are thin, and their leaves have limited energy reserves. A problem that would cause only mild stress in a mature plant may cause serious damage to a young seedling. Fast action can help, but growers should first identify the likely cause. Adding water, nutrients, or treatments without checking the plant may make the problem worse.
Many seedling emergencies begin with too much moisture, poor airflow, dirty equipment, or rough handling. Careful observation is one of the best ways to prevent loss. Check the stem, leaves, growing medium, and container each day. Look for sudden color changes, weak growth, insects, damaged tissue, or unusual smells.
Damping-Off Disease
Damping-off is a fungal problem that affects young seedlings. It often attacks the lower stem near the surface of the growing medium. The stem may become thin, dark, soft, or weak. The seedling may then bend over and collapse. Once the stem is badly damaged, recovery is often difficult.
This problem is more common when the growing medium stays wet for too long. High humidity, poor drainage, stagnant air, and crowded conditions can also increase the risk. Fungi grow well in warm, damp places, especially when air does not move around the seedlings.
Prevention is usually more effective than treatment. Start with clean containers, tools, and growing medium. Containers should have enough drainage holes so extra water can escape. Avoid soaking the entire pot when the root system is still small. Water only the area around the seedling, and allow the upper part of the medium to begin drying before watering again.
Gentle airflow can also help. A small fan may be used to move air around the growing area, but it should not blow directly at the seedlings. Strong wind can damage young stems. The goal is to prevent still, damp air without creating physical stress.
A seedling that has completely collapsed because of damping-off may not survive. Removing badly affected seedlings can help reduce the chance of the disease spreading to nearby plants.
Root Rot and Oxygen-Starved Roots
Roots need both water and oxygen. When the growing medium remains soaked, the spaces that normally hold air fill with water. This limits oxygen around the roots. Without enough oxygen, roots may weaken, stop growing, or begin to decay.
A seedling with damaged roots may droop even when the growing medium is wet. Growth may slow or stop. Leaves may turn pale, yellow, or dull green. In severe cases, the root area may have a sour or unpleasant smell. Healthy roots are usually pale or white, while damaged roots may become brown, soft, or slimy.
The first step is to stop adding water until the growing medium has had time to dry. Make sure the container is not sitting in runoff water. Check that all drainage holes are open. A dense growing medium may hold too much moisture, so a lighter mix with better airflow may be needed for future seedlings.
Do not add extra nutrients to a seedling with weak roots unless there is clear evidence that feeding is needed. Damaged roots cannot absorb nutrients well. Strong fertilizer may increase stress and lead to burned leaf tips or further root damage.
To prevent root problems, use a loose growing medium and a container that drains freely. Water based on the condition of the medium instead of following a fixed daily schedule.
Seed Shells Stuck on Seedlings
Sometimes the seed shell remains attached after the seedling rises above the growing medium. This is sometimes called a helmet head. The shell may hold the cotyledons closed and prevent them from opening fully.
A stuck shell often happens when the seed was planted too close to the surface. Moving through the growing medium normally helps remove the shell. Dry air may also cause the shell or the thin inner membrane to become hard and remain attached.
Patience is important. In many cases, the seedling will remove the shell without help. A small drop of clean water can be placed on the shell to soften it. Allow the moisture to sit before checking again.
Do not pull the shell off with force. The cotyledons and growing tip are very delicate. Pulling too hard may tear the leaves, break the stem, or remove the top of the seedling. When the shell is clearly loose, it may be eased away with clean tools and very gentle pressure. Any resistance means it should be left longer.
A damaged cotyledon does not always mean the seedling will die. The plant may still survive if the growing tip remains healthy and true leaves begin to form.
Early Pest Problems
Pests can damage seedlings quickly because the plants have only a few leaves. Common early pests may include fungus gnats, thrips, mites, and small aphids. The exact pests present can depend on the growing medium, location, and surrounding plants.
Fungus gnats are small dark flies that often appear near wet soil. Adult gnats are mainly a warning sign, while their larvae may feed on young roots. Constantly moist growing media increase the risk of fungus gnat problems.
Thrips may cause pale marks, silver streaks, or rough patches on leaves. Mites can cause tiny spots, weak growth, or fine webbing in more serious cases. Aphids often gather on soft new growth and may cause leaves to curl or become sticky.
Inspect both sides of the leaves, the stem, and the top of the growing medium. A magnifying glass can make small pests easier to see. Keep the growing space clean, remove dead plant material, and avoid bringing untreated outdoor plants into an indoor growing area.
Young seedlings are sensitive to strong pest-control products. Any treatment should be suitable for tender plants and used carefully. Heavy spraying can damage leaves, soak the growing medium, or increase humidity. Preventing pests through cleanliness, moisture control, and regular inspection is often safer than reacting after a large infestation develops.
Broken or Damaged Seedlings
Seedlings may become damaged during watering, transplanting, moving containers, or adjusting lights. Pets, tools, strong fans, and falling objects can also bend or break weak stems.
A bent stem may recover when the tissue is still partly connected. Support the seedling with a small stake, plant label, or soft tie. The support should hold the stem upright without crushing it. Adding a small amount of growing medium around a stretched lower stem may also provide stability.
Avoid touching the damaged area repeatedly. Each movement can reopen the injury. Keep the environment stable and reduce strong airflow until the stem begins to strengthen. New growth is a positive sign that the seedling is recovering.
A stem that has been completely separated may be much harder to save, especially when the seedling is very young. Severe damage to the main growing tip can also slow development or change the plant’s shape.
Careful handling prevents most physical injuries. Lift containers instead of pulling plants. Pour water slowly so the stream does not strike the stem. Keep lights, tools, and fans secured above or beside the growing space.
Marijuana seedlings may face fungal disease, root damage, pests, stuck seed shells, and physical injuries. Damping-off is often linked to excess moisture, poor drainage, and weak airflow. Root rot can develop when roots remain wet and cannot access enough oxygen. Stuck seed shells usually require moisture and patience rather than force.
Early pest checks can prevent small problems from becoming serious infestations. Broken stems may recover when they are supported and still partly connected. Clean tools, proper drainage, gentle airflow, careful watering, and daily observation provide the best protection. When a problem appears, identify the cause before applying a solution. Small, careful corrections are usually safer for young seedlings than sudden or aggressive changes.
Transplanting Seedlings and Moving Into Vegetative Growth
Transplanting is the process of moving a marijuana seedling from its starter container into a larger pot. This step gives the roots more room to spread and allows the plant to continue growing. A seedling that stays in a small container for too long may become root-bound. This means the roots circle around the inside of the pot because they have no space left. Root-bound plants may dry out quickly, grow slowly, or show signs of stress.
The timing of the transplant is important. Moving a seedling too early can damage its weak root system. Waiting too long can also slow growth. The best time depends on the size of the seedling, the container, the growing medium, and the speed of root development. Growers should look at the full condition of the plant instead of following a fixed number of days.
Signs a Seedling Is Ready to Transplant
A marijuana seedling is often ready to transplant after it has formed several sets of true leaves. True leaves have the pointed and serrated shape linked with cannabis plants. The first rounded leaves are called cotyledons. These do not count as true leaves. A seedling with three or four healthy sets of true leaves is often strong enough to handle a move.
The stem should also look stable. It does not need to be thick, but it should be able to hold the leaves without falling over. A very thin, stretched, or weak stem may need more time before transplanting. Correcting the light level and adding gentle airflow can help the stem become stronger.
Roots may also give clear signs that the plant needs more space. Small white roots may appear through the drainage holes at the bottom of the container. This often means that the root system has reached the edge of the pot. However, one visible root does not always mean an urgent transplant is needed. The plant should also have healthy leaves and steady growth.
Another sign is that the growing medium begins to dry much faster than before. A larger root system can use water quickly. A seedling that once needed several days between waterings may begin drying out in one or two days. This can show that the roots are filling the container.
Slow growth can also happen when a seedling has outgrown its pot. The leaves may remain healthy, but new growth may become smaller or slower. Before assuming that the container is the cause, growers should also check the light, temperature, watering habits, and nutrient level.
Choosing the Next Container
The next container should provide enough space for root growth without being much larger than the current pot. Moving from a very small cup into a huge container can make watering harder. A large volume of growing medium stays wet longer because the young roots cannot use all the moisture. This can raise the risk of overwatering and poor root oxygen.
Many growers move seedlings into pots that are only a few times larger than the starter containers. This gives the roots room to expand while keeping moisture easier to control. The exact size depends on how long the plant will remain in that pot.
Every container should have proper drainage holes. Extra water must be able to leave the pot after watering. Without drainage, the roots may sit in wet soil and lose access to oxygen. Poor drainage can lead to drooping, slow growth, root disease, and nutrient problems.
The growing medium in the new pot should be similar to the medium around the seedling roots. A major change in texture can affect how water moves through the container. For example, a dense outer soil may stay wet while a light inner mix dries faster. A loose and well-draining medium makes root growth easier.
Some growers place seedlings directly into their final containers. This avoids the stress of repeated transplanting. However, it also requires careful watering. Only a small area around the young roots should receive water at first. Soaking the entire large container may keep the medium wet for too long.
Transplanting Without Damaging Roots
The new container should be prepared before the seedling is removed from its old pot. Fill the container with growing medium and make a hole in the center. The hole should be large enough to hold the seedling’s root ball. Preparing the space first helps reduce the amount of time the roots remain exposed.
The growing medium should be slightly moist but not soaked. Very dry soil may fall away from the roots, while very wet soil may break apart or become heavy. A lightly moist root ball is often easier to move as one piece.
To remove the seedling, support the stem area and the surface of the growing medium with one hand. Do not pull the plant upward by its stem. Turn the container gently and allow the root ball to slide out. Soft plastic cups can be pressed lightly around the sides to loosen the medium.
The roots should be handled as little as possible. Young root tips are easy to damage. Avoid breaking apart the root ball unless the roots are tightly circling the pot. In most cases, placing the full root ball directly into the new hole causes less stress.
Set the plant at about the same depth it was growing before. A stretched seedling may be planted slightly deeper to support part of the long stem. However, the leaves and growing tip should remain well above the soil surface.
Fill the space around the root ball with fresh growing medium. Press it very lightly to remove large air gaps, but do not pack it down firmly. Compacted soil can reduce airflow around the roots.
After transplanting, add a small amount of water around the root zone. This helps settle the new medium and brings it into contact with the root ball. Avoid fully soaking a large container unless the medium is very dry.
Adjusting Care After Transplanting
A seedling may show mild stress after transplanting. The leaves may droop slightly for a few hours, or growth may pause for a short time. This can be normal. The plant is adjusting to changes in moisture, root space, and the growing environment.
Keep the light stable after the move. Raising the light intensity at the same time as transplanting can add extra stress. The plant should first recover and begin showing healthy new growth. Any major light changes should be made slowly.
Watering should also be controlled. The larger pot will hold more moisture than the old container. Water near the root ball at first, then slowly expand the watered area as the plant grows. Do not water again only because the surface looks dry. Check the weight of the container and the moisture below the top layer.
Strong fertilizer should not be added immediately after transplanting unless the growing method requires it. Fresh soil may already contain nutrients. Giving extra fertilizer can place more pressure on stressed roots. In a low-nutrient medium, mild feeding may be needed, but it should match the plant’s stage and condition.
Gentle airflow can continue after transplanting. Air movement helps strengthen the stem and prevents stagnant moisture. The fan should not cause the seedling to bend sharply or shake without stopping.
Healthy vegetative growth should begin after the roots settle into the new medium. New leaves may grow larger, the stem may thicken, and the space between new nodes may become more regular. Water use will slowly increase as the root system expands.
Transplanting gives a marijuana seedling the root space it needs to continue healthy growth. A seedling may be ready when it has several sets of true leaves, a stable stem, visible roots, faster water use, and steady development. The next container should have good drainage and enough space without being much larger than the root system.
Preparing the new pot before removing the seedling helps protect the roots. The root ball should remain together, and the plant should never be pulled by its stem. After transplanting, stable light, careful watering, gentle airflow, and mild feeding practices can reduce stress. When the roots adjust, the plant can move into the vegetative stage and begin faster growth.
Conclusion: Building a Strong Start for Healthy Growth
The marijuana seedling stage is short, but it can have a major effect on the plant’s future growth. A strong seedling has a better chance of developing healthy roots, firm stems, broad leaves, and steady new growth. A weak or stressed seedling may recover, but early problems can slow its progress. For this reason, growers should pay close attention to the plant during its first few weeks.
A healthy marijuana seedling should have a short, upright stem and leaves that look fresh and firm. The first rounded leaves are called cotyledons. These leaves provide stored energy while the young plant begins to grow. After the cotyledons open, the first true leaves appear. True leaves have the serrated edges linked with cannabis plants. More leaf sets and nodes develop as the seedling becomes stronger.
Leaf color is also a useful sign of health. Most healthy seedlings have green leaves without large spots, dry edges, or severe curling. New growth may be a little lighter than older leaves, which is often normal. The stem should slowly become thicker as the roots spread through the growing medium. Small differences in height, shape, and growth speed can happen due to genetics. However, major drooping, yellowing, stretching, or stopped growth may show that the plant is under stress.
Balanced light is one of the most important needs during this stage. A seedling that receives too little light may stretch upward. Its stem can become long, thin, and weak because the plant is trying to reach a stronger light source. Light that is too close or too powerful can also cause problems. The leaves may curl, fade, dry out, or develop burned areas. The goal is to provide enough light for compact growth without creating excess heat or stress.
Watering also requires careful control. Young seedlings have small root systems, so they do not need as much water as mature plants. Too much water can fill the spaces in the growing medium and reduce the oxygen available to the roots. This may lead to drooping, slow growth, root damage, or fungal disease. Too little water can cause dry soil, weak leaves, and a limp stem.
The growing medium should remain lightly moist, but it should not stay soaked. Growers should check the medium before watering again. The surface, container weight, and moisture below the top layer can help show whether water is needed. Water should be added slowly around the root area. As the seedling grows and its roots spread, the amount of water can increase.
The growing medium must also drain well. A loose and airy mix allows water to move through the container while leaving space for oxygen. Dense or compact soil can stay wet for too long and make it harder for new roots to grow. Containers need open drainage holes so extra water can escape. Good drainage is one of the best ways to reduce the risk of root rot and damping-off disease.
Marijuana seedlings also need stable temperature, humidity, and airflow. Sudden changes can slow growth and weaken the plant. Very low temperatures may reduce root activity, while high heat may cause fast water loss and leaf stress. Humidity can help young plants while their roots are still developing, but the air should not remain wet and stagnant.
Gentle airflow helps create a healthier environment. Light air movement can support stem strength and reduce moisture around the leaves and soil surface. However, a strong fan aimed directly at the plant may bend, dry, or damage the seedling. Air should move around the growing area without pushing the plant over.
Nutrients must be used with care. During the earliest stage, the cotyledons help provide the seedling with energy. Some growing media also contain enough nutrients to support early development. Adding strong fertilizer too soon can burn the roots and leaves. Common signs of excess nutrients include brown leaf tips, very dark leaves, curling, and slow growth.
Yellow leaves do not always mean that more fertilizer is needed. Yellowing may come from excess water, poor drainage, incorrect pH, damaged roots, heat, or natural cotyledon aging. Growers should study the whole plant and its environment before choosing a solution. Adding more nutrients without finding the true cause can make the problem worse.
Many seedling problems share the same symptoms. Drooping can happen from too much water, too little water, heat stress, or root damage. Yellowing may come from nutrient trouble, pH problems, old cotyledons, or poor root health. Slow growth may result from weak light, low temperatures, compact soil, excess fertilizer, or a wet root zone. This is why careful observation is so important.
When a problem appears, it is often best to make one change at a time. Changing the light, water, nutrients, temperature, and humidity all at once can make it difficult to know what caused the problem. Small corrections are usually safer. After making a change, growers should watch the newest leaves. Healthy new growth is often a better sign of recovery than damaged older leaves.
Transplanting is another important step. A seedling may be ready to move when it has several sets of true leaves, a stronger stem, and roots that have spread through its starter container. The new container should have enough space for continued root growth and good drainage. The root ball should be handled gently because young roots can break easily.
Some mild stress may occur after transplanting. The plant may pause its growth while the roots adjust to the new space. Proper light, stable conditions, and careful watering can help it recover. Once the roots begin growing again, the plant should start producing new leaves and enter the vegetative stage.
A successful seedling stage depends on balance. The plant needs enough light, but not too much heat. It needs moisture, but not soaked soil. It may need nutrients, but only in mild amounts at the correct time. It also needs clean tools, fresh air, suitable humidity, and room for the roots to grow.
Strong seedlings do not require constant changes or heavy feeding. They need a stable environment and careful observation. Growers who learn to read the plant’s leaves, stem, roots, and growing medium can often identify problems early. Early action may prevent a small issue from becoming serious.
The main goal of seedling care is to create a healthy foundation. Strong roots support better water and nutrient intake. A firm stem supports future branches and leaves. Healthy early growth prepares the plant for the faster development of the vegetative stage. Careful seedling management can make the rest of the growing process easier and more predictable.
Cannabis cultivation laws vary by country, state, and local area. Before growing marijuana, people should check the laws that apply where they live. They should follow all rules related to plant limits, age requirements, permits, property use, and secure growing areas.
Research Citation
Sorokin, A., Yadav, N. S., Gaudet, D., & Kovalchuk, I. (2021). Development and standardization of rapid and efficient seed germination protocol for Cannabis sativa. Bio-Protocol, 11(1), e3875. https://doi.org/10.21769/BioProtoc.3875
Kakabouki, I., Mavroeidis, A., Tataridas, A., Roussis, I., Katsenios, N., Efthimiadou, A., Tigka, E., Karydogianni, S., Zisi, C., & Papastylianou, P. (2021). Effect of Rhizophagus irregularis on growth and quality of Cannabis sativa seedlings. Plants, 10(7), 1333. https://doi.org/10.3390/plants10071333
Yoshimatsu, K., Kitazawa, T., Kawano, N., Iida, O., & Kawahara, N. (2010). Characteristics of Cannabis sativa L.: Seed morphology, germination and growth characteristics, and distinction from Hibiscus cannabinus L. Yakugaku Zasshi, 130(2), 237–246. https://doi.org/10.1248/yakushi.130.237
Kim, E.-S., Kim, J.-H., Kim, S.-H., & Mahlberg, P. G. (2023). Degeneration of oil bodies by rough endoplasmic reticulum-associated protein during seed germination in Cannabis sativa. AoB Plants, 15(6), plad082. https://doi.org/10.1093/aobpla/plad082
Moher, M., Llewellyn, D., Jones, M., & Zheng, Y. (2022). Light intensity can be used to modify the growth and morphological characteristics of cannabis during the vegetative stage of indoor production. Industrial Crops and Products, 183, 114909. https://doi.org/10.1016/j.indcrop.2022.114909
Danziger, N., & Bernstein, N. (2021). Light matters: Effect of light spectra on cannabinoid profile and plant development of medical cannabis (Cannabis sativa L.). Industrial Crops and Products, 164, 113351. https://doi.org/10.1016/j.indcrop.2021.113351
Cockson, P., Landis, H., Smith, T., Hicks, K., & Whipker, B. E. (2019). Characterization of nutrient disorders of Cannabis sativa. Applied Sciences, 9(20), 4432. https://doi.org/10.3390/app9204432
Cockson, P., Mooneyham, K., Oji, C., & Whipker, B. E. (2020). Impact of phosphorus on Cannabis sativa reproduction, cannabinoids, and terpenes. Applied Sciences, 10(21), 7875. https://doi.org/10.3390/app10217875
Pedrosa, A. M., Martins, A. D., Pasqual, M., Dória, J., & de Souza, A. G. (2024). Cannabis sativa L. from seized drug material: In vitro seed disinfestation, germination, and plant establishment. Plants, 13, Article 123.
Trancoso, I., de Souza, G. A., dos Santos, P. R., dos Santos, K. D., de Miranda, R. M., & de Oliveira, A. R. (2022). Cannabis sativa L.: Crop management and abiotic factors that affect phytocannabinoid production. Agronomy, 12(7), 1492. https://doi.org/10.3390/agronomy12071492
Questions and Answers
Q1: How long does the marijuana seedling stage last?
The marijuana seedling stage usually lasts about two to three weeks. It begins when the sprout emerges and ends when the plant develops several sets of true leaves.
Q2: How often should marijuana seedlings be watered?
Water seedlings only when the top layer of the growing medium begins to feel dry. The soil should stay lightly moist but never soaked, since too much water can damage young roots.
Q3: How much light do marijuana seedlings need?
Marijuana seedlings need gentle, consistent light. Many growers use an 18-hour light and 6-hour dark schedule, while keeping the light far enough away to prevent heat or leaf damage.
Q4: What temperature is best for marijuana seedlings?
Seedlings generally grow well at temperatures between 68°F and 77°F, or about 20°C to 25°C. Large temperature changes may slow growth and cause stress.
Q5: What humidity level is best for marijuana seedlings?
A relative humidity level of about 60% to 70% is often suitable for young seedlings. Humidity can be lowered gradually as the plant grows and develops a stronger root system.
Q6: When should marijuana seedlings receive nutrients?
Seedlings usually do not need strong nutrients during their first days of growth. A mild nutrient solution may be introduced after the first sets of true leaves appear, especially when using a nutrient-free growing medium.
Q7: Why is my marijuana seedling tall and thin?
A tall, thin seedling is often stretching because it is not receiving enough light. Moving the light slightly closer or increasing its strength may help, but the leaves should be watched for signs of heat stress.
Q8: Why are my marijuana seedling leaves turning yellow?
Yellow leaves may result from overwatering, poor drainage, incorrect pH, nutrient problems, excessive light, or natural aging of the first seed leaves. Check the growing conditions before adding more nutrients.
Q9: When should a marijuana seedling be transplanted?
A seedling may be ready for transplanting when it has several sets of true leaves and roots reaching the edges or drainage holes of its container. Handle the roots carefully to reduce transplant stress.
Q10: How can you tell if a marijuana seedling is healthy?
A healthy seedling usually has a firm upright stem, green leaves, steady new growth, and no signs of drooping, spotting, pests, or root damage.