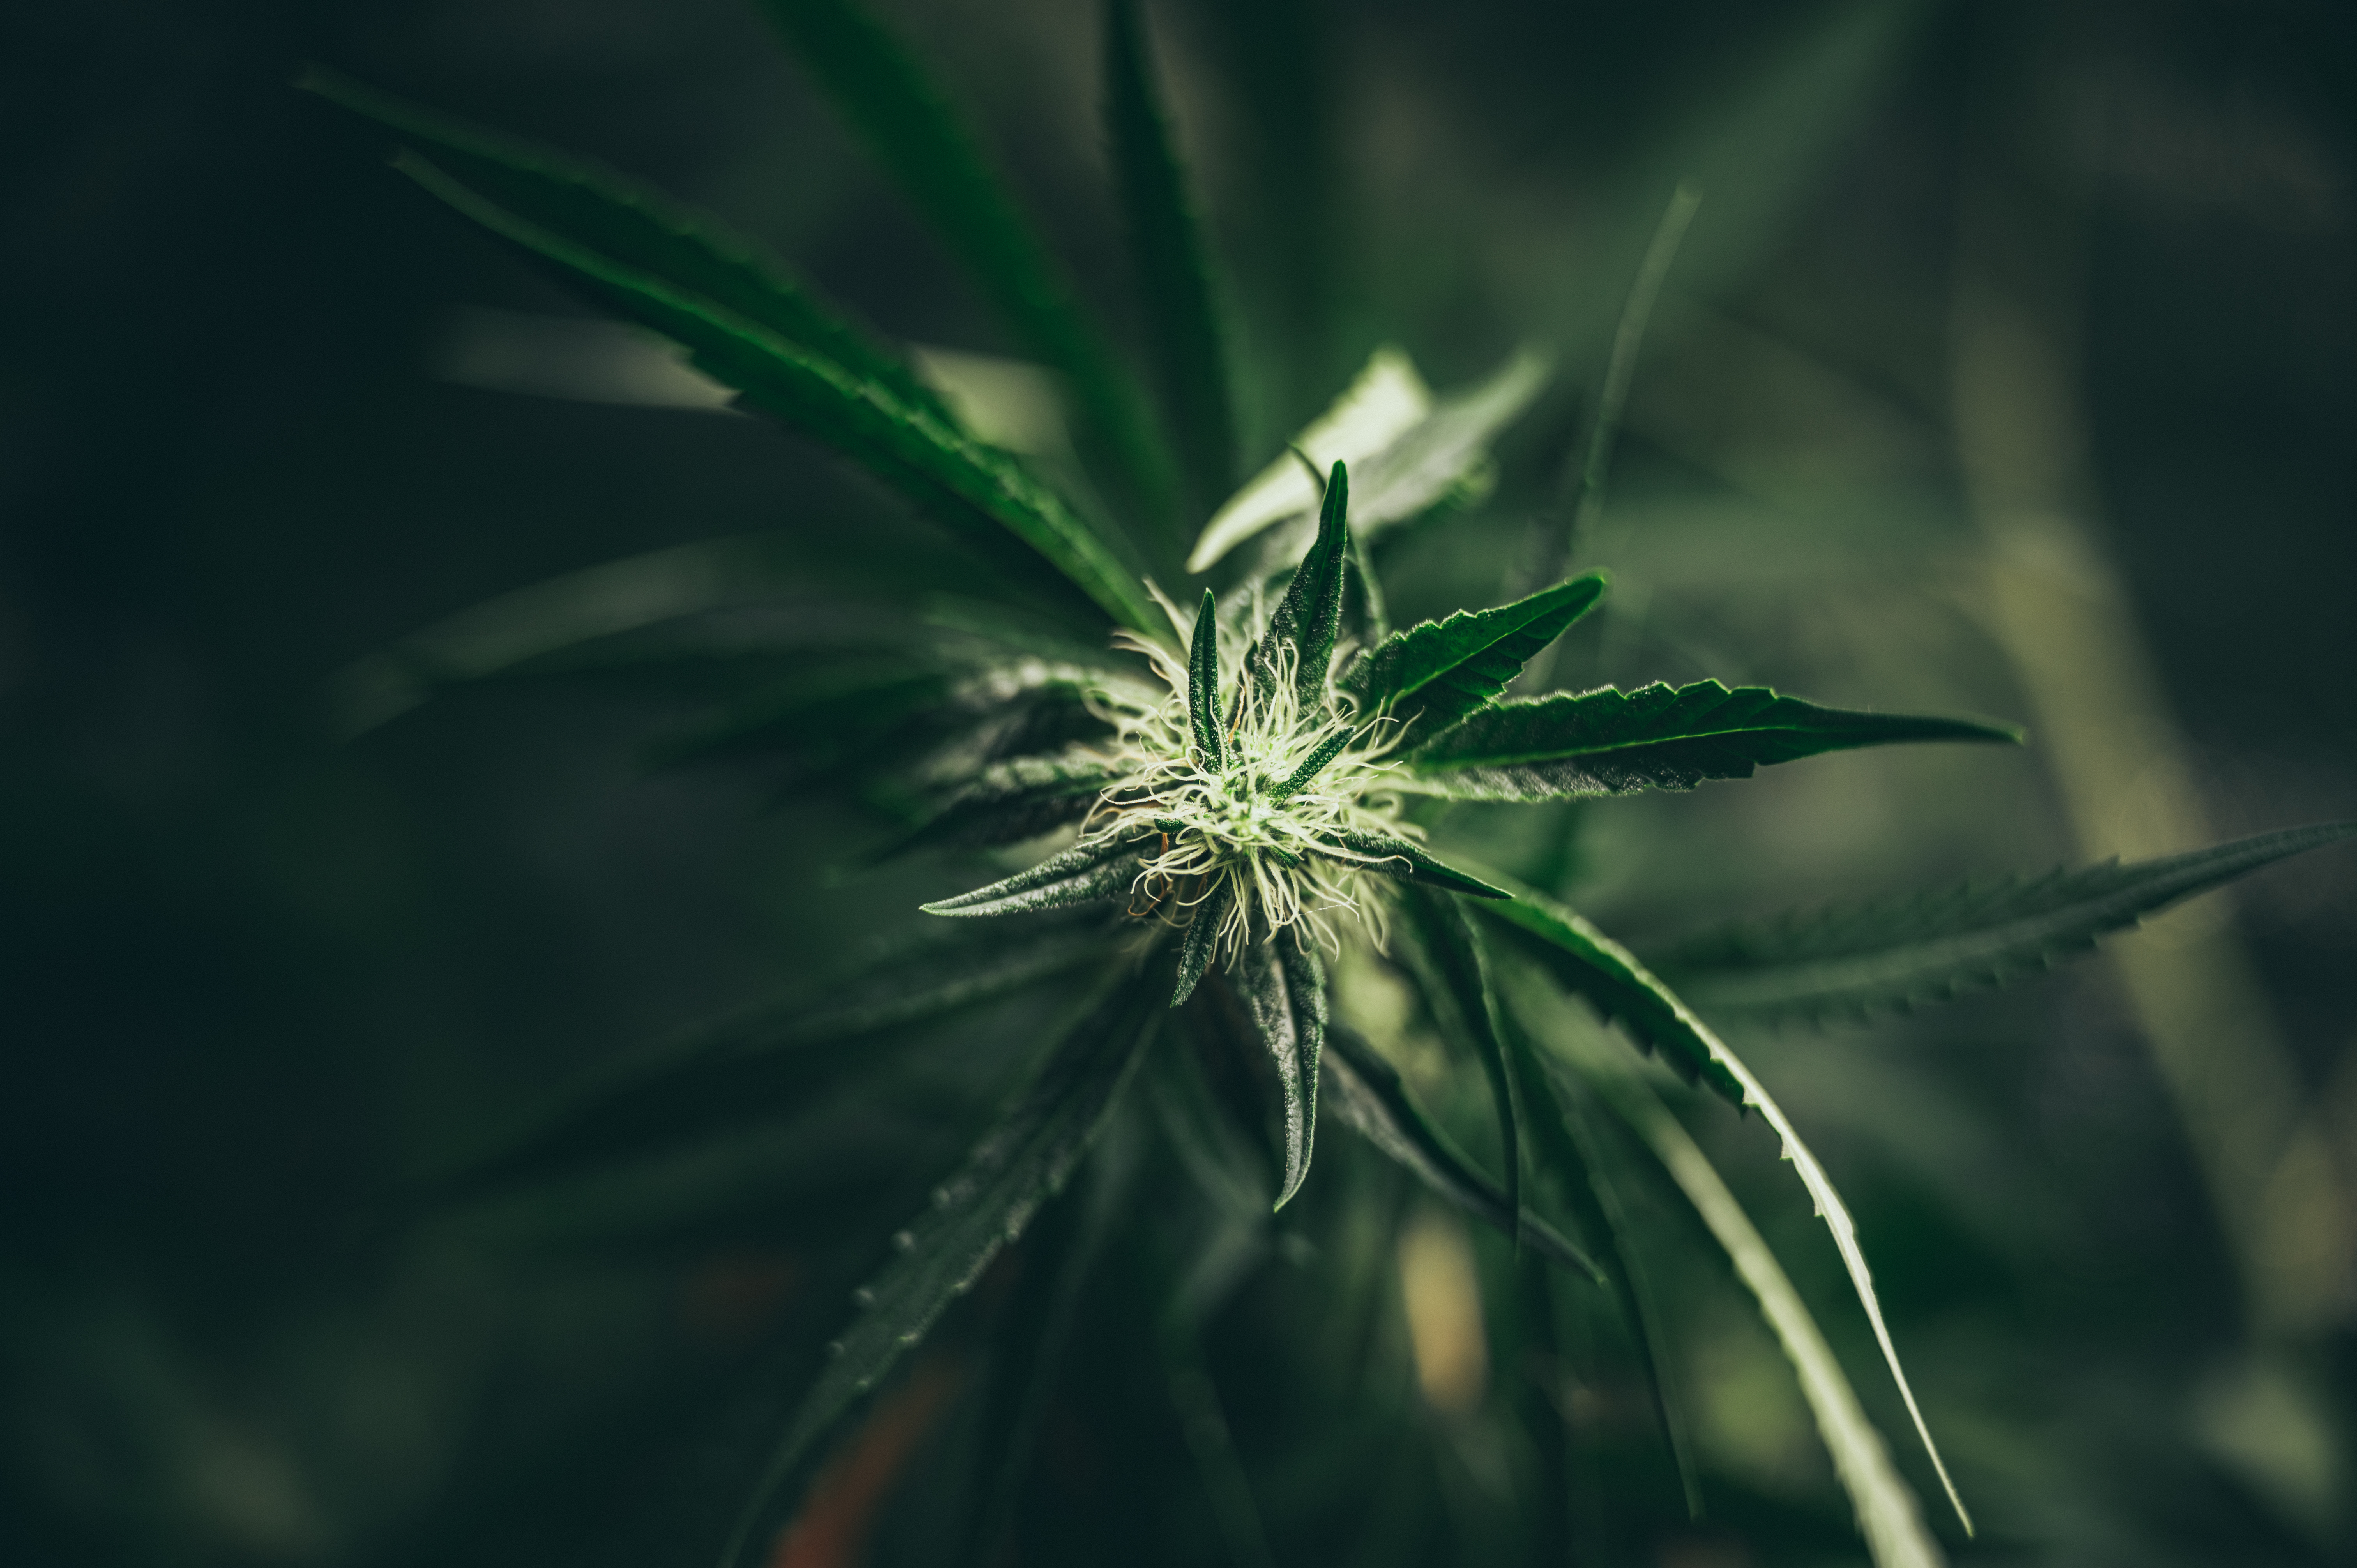


Weed photography is the process of taking clear, detailed, and visually accurate photos of cannabis plants, flowers, leaves, seeds, and related products. It can be used for education, product listings, cultivation records, websites, social media, and visual reference. Good weed photography is not only about making a plant or flower look attractive. It is also about showing its shape, color, texture, and small details in a way that is easy to understand.
Cannabis can be a difficult subject to photograph because it has many fine details. A single flower may contain small leaves, orange or red pistils, sticky resin, and tiny trichomes that reflect light. These details can be hard to capture with a basic camera setup. Poor lighting can hide texture. Strong lighting can create glare. A shallow focus area can make part of the flower look sharp while the rest becomes blurry. Because of this, photographers need to pay attention to lighting, focus, camera position, and exposure.
There are several common subjects in weed photography. One is the whole cannabis plant. Whole-plant photos are useful for showing plant size, shape, branching, and general structure. These images may be taken from the front, side, or above. A wider view is usually needed so the entire plant fits inside the frame.
Cannabis buds are another common subject. Bud photography often focuses on the appearance of individual flowers. These photos can show density, color, pistils, leaf structure, and resin coverage. Buds may be photographed while still on the plant or after they have been removed and prepared for display. Close-up images are often used when the goal is to show more texture.
Trichomes are one of the smallest details that photographers may want to capture. These tiny structures cover many parts of the flower and nearby leaves. Under magnification, they can appear as small stalks with rounded heads. Because trichomes are so small, they usually require macro photography or a camera with strong close-focus ability. Good lighting and careful focusing are very important when photographing them.
Leaves are also useful subjects. Cannabis leaves have a clear shape and visible veins, so they can work well for educational images. A leaf can be photographed on the plant or placed against a plain background. Seeds may also be photographed, especially when the goal is to show their size, shape, markings, or surface texture. Since seeds are small, close-up photography is often needed.
Cannabis products can also be photographed. These may include packaged items, containers, labels, or finished goods. Product photography is different from plant photography because the main goal is usually to show the item clearly and accurately. Clean backgrounds, even lighting, and sharp focus are especially important for these images.
Lighting has a major effect on all types of weed photography. Light controls how bright the subject appears and how much texture the camera can record. Soft light can help reveal details without creating strong reflections. Hard light can create deep shadows and bright spots. This is especially important with cannabis flowers because trichomes can reflect light. If the light is too strong or pointed directly at the flower, some areas may look white or washed out.
Focus is just as important. The camera needs to focus on the part of the plant that matters most. For a full plant, this may be the center of the canopy. For a close-up bud, it may be the front surface of the flower. For a macro shot, the focus may need to be placed on a group of trichomes. Small changes in camera distance can affect sharpness, especially at close range.
Composition is the way subjects are arranged inside the photo. A clear composition helps the viewer understand what they are looking at. The plant or bud should not be hidden by clutter. Background objects should not distract from the main subject. The photographer can also use different angles to show shape and depth. A straight-on view may work well for product photos, while a side angle can show the form of a flower more clearly.
Editing is another part of weed photography. Editing can be used to correct brightness, white balance, contrast, and sharpness. It can also help remove small distractions or improve the crop. However, editing should not change the subject so much that the final image no longer looks accurate. Strong color changes, heavy sharpening, and extreme contrast can make cannabis look unnatural.
There is also a difference between basic product photography and macro photography. Product photography usually shows the entire item or most of it. The camera is placed far enough away to keep the subject easy to recognize. Macro photography focuses on very small details. It may show only a small part of a bud, leaf, seed, or trichome-covered surface. Macro images often require more control because the area that appears sharp can become very thin.
A complete weed photography workflow usually begins with choosing the subject and background. The next steps include setting up the light, placing the camera, choosing the angle, adjusting focus, and checking exposure. After the photo is taken, it can be reviewed for blur, glare, poor color, or distracting objects. The final step is editing the image while keeping the subject natural and clear.
Learning these basic ideas makes the rest of weed photography easier to understand. Good results come from combining stable camera work, controlled lighting, careful focus, useful angles, and simple editing. Whether the subject is a full plant, a single bud, or a group of tiny trichomes, the main goal is the same: create an image that shows the subject clearly, accurately, and with enough detail for the viewer to understand what they are seeing.
What Equipment Do You Need for Weed Photography?
Good weed photography does not always require expensive gear, but the right equipment can make the process much easier. Cannabis plants and buds have many small details, including fine hairs, textured leaves, and tiny trichomes. A basic camera may capture the overall shape and color, but close-up work often needs more control over focus, lighting, and stability.
The equipment you choose should match the type of images you want to create. A full plant photo needs a different setup from a close-up image of a single bud. Macro photography also has its own needs because the camera is placed much closer to the subject.
A useful setup usually includes a camera, the right lens, stable support, and controlled lighting. You do not need to buy every accessory at once. Start with the main tools and add more equipment as your photography becomes more detailed.
Cameras for Cannabis Photography
A DSLR or mirrorless camera is a strong choice for weed photography because it gives you more control over the final image. These cameras allow you to change lenses and manually adjust settings such as aperture, shutter speed, ISO, and white balance. This can be useful when photographing shiny trichomes, dark green leaves, or buds with several colors.
DSLR cameras use a mirror system inside the camera body. Mirrorless cameras do not. In practical use, both types can produce detailed cannabis images when paired with a suitable lens. Mirrorless cameras are often smaller and lighter, while DSLR models may offer a large range of lenses and accessories.
Compact cameras can also work well. Many newer compact models include manual settings and strong close-focus features. They may not offer the same lens choices as interchangeable-lens cameras, but they can still create clear plant and bud photos.
A smartphone is another useful option, especially for simple photography. Modern phone cameras can capture good detail when there is enough light. Some phones also include a built-in macro mode for close-up subjects. However, phones usually offer less control over depth of field and lens choice than a DSLR or mirrorless camera.
The best camera is not always the most expensive one. A well-lit, stable photo taken with a basic camera can look better than a poorly lit photo taken with professional equipment. Learning how to control light and focus is just as important as the camera itself.
Essential Lenses
The lens has a major effect on the way a cannabis subject appears in a photo. A standard lens is often enough for whole plants, branches, or larger buds. Common standard focal lengths allow you to keep a natural viewing angle without moving too far away from the subject.
A macro lens is more useful when you want to photograph very small details. True macro lenses are designed to focus at close distances and can reproduce small subjects at high magnification. Many true macro lenses provide a 1:1 reproduction ratio. This means the subject can appear at life size on the camera sensor.
This type of lens is especially useful for photographing trichomes, pistils, leaf texture, and resin coverage. It can reveal details that may be difficult to see in a wider photograph.
Focal length also matters. Shorter macro lenses require the camera to be closer to the subject. Longer macro lenses let you work from a greater distance while keeping similar magnification. Extra working distance can make it easier to place lights around the bud and reduce the chance of the camera blocking the light.
A dedicated macro lens is not always required for beginners. Extension tubes, close-up filters, or phone macro attachments can provide a lower-cost way to explore close-up photography. However, image quality and focusing control may vary depending on the accessory.
Tripods and Camera Support
A tripod is one of the most useful accessories for weed photography. It keeps the camera still and reduces blur caused by hand movement. Stability becomes even more important during close-up and macro photography because small movements become much more visible at high magnification.
A tripod also makes it easier to use slower shutter speeds. If the subject is not moving, a slower shutter speed can allow more light into the camera without raising the ISO too much. This can help produce cleaner images with less digital noise.
For tabletop bud photography, a small desktop tripod may be enough. For whole plants, a full-size tripod provides more height and position options.
A focusing rail can also be helpful for advanced macro work. It lets the photographer move the camera forward or backward in very small steps. This is useful for precise focusing and for creating a series of images that can later be combined through focus stacking.
Remote Shutter Releases
Pressing the camera’s shutter button can cause a small amount of movement. In normal photography, this movement may not matter. In macro photography, however, even a slight shake can reduce sharpness.
A remote shutter release allows you to take the photo without touching the camera. Some cameras also connect to a phone app that can trigger the shutter remotely.
If a remote release is not available, the camera’s built-in timer can serve a similar purpose. Setting a two-second or five-second delay gives the camera time to stop moving after the shutter button is pressed.
This simple technique can improve sharpness without requiring expensive equipment.
Reflectors and Diffusers
Reflectors are used to redirect light toward the subject. They can help brighten dark areas of a bud or plant without adding another lamp. A white reflector creates soft fill light, while silver surfaces can create stronger reflections.
Even a simple piece of white foam board can act as a reflector. It can be placed opposite the main light source to reduce deep shadows.
Diffusers have the opposite purpose. Instead of reflecting light, they soften it. Cannabis buds often contain shiny trichomes that can create bright spots under direct light. A diffuser spreads the light over a larger area and reduces harsh reflections.
Softboxes are a common form of diffusion. They cover a light source with a soft material that creates more even lighting. Diffusion sheets and translucent panels can also work.
Controlled, soft light is often easier to work with than a bare lamp or direct flash.
Continuous Lights
Continuous lights stay on while you compose and photograph the subject. This makes them easy to use because you can see the lighting effect before taking the photo.
LED lights are a common choice because they produce strong light while using relatively little power. Many LED photography lights also allow brightness and color temperature adjustments.
For weed photography, adjustable lighting can help show texture without making the image look too harsh. Moving one light slightly to the side can bring out the shape of a bud. Adding a second softer light can reduce shadows.
Continuous lighting is especially helpful for beginners because there is less guesswork than with flash photography.
It is important to use lights that provide consistent color. Poor-quality lighting can create green, blue, or orange color casts that make the cannabis look unnatural.
Light Tents
A light tent is a small enclosed setup made from white or translucent material. It is often used for product photography and can also work well for individual cannabis buds.
The sides of the tent spread the light evenly around the subject. This can reduce strong shadows and bright reflections. It also creates a simple background that keeps attention on the bud.
Light tents are most useful for smaller subjects. They are not practical for photographing large cannabis plants, but they can make close-up product-style photography easier.
Some light tents include built-in LED strips. Others are designed to be used with external lamps.
When photographing highly textured buds, completely flat lighting may hide some surface detail. Moving one light slightly to the side can create enough shadow to show the shape and structure of the flower.
Choosing Equipment Based on the Type of Shot
Not every cannabis photo requires the same setup. A whole plant image may only need a standard camera, normal lens, tripod, and soft light. A close-up bud image may benefit from a macro lens and small reflector.
Detailed trichome photography usually requires the most careful setup. A macro lens, strong tripod, remote shutter, diffused lighting, and focusing rail can make it easier to capture very small details.
Smartphone users can follow the same basic ideas. A phone tripod, external macro lens, small LED light, and simple diffuser can improve close-up results without requiring a full camera system.
The goal is to build a setup that helps you control three main things: stability, focus, and light. If these three areas are managed well, even a simple camera can create strong images.
The basic equipment for weed photography includes a camera, suitable lens, stable support, and controlled lighting. DSLR and mirrorless cameras offer the most control, while compact cameras and smartphones can also produce clear results. Standard lenses work well for whole plants and larger subjects, while macro lenses are better for buds, trichomes, and other fine details.
A tripod helps prevent blur, while a remote shutter or timer reduces movement when taking the photo. Reflectors can brighten shadows, and diffusers soften harsh light. Continuous LED lights are useful because they let you see the lighting before you take the picture. Light tents can also create even lighting for smaller cannabis subjects.
Can You Take Good Weed Photos With a Smartphone?
You do not need an expensive camera to take clear and attractive weed photos. Modern smartphones can produce strong images when the light, focus, and camera position are handled well. Many phones now include advanced cameras, automatic image processing, portrait settings, and close-up features. These tools make it easier to photograph cannabis plants, buds, leaves, and other details without carrying a full camera setup.
However, a phone camera still has limits. The small camera sensor and lens can make it harder to capture very fine details, especially in low light. Close-up shots can also be difficult because the phone may struggle to focus when it is too close to the subject. The good news is that careful lighting and a steady shooting method can improve the final image.
Understanding Modern Phone Cameras
Smartphone cameras have improved greatly over the years. Many newer models have several lenses, including wide, ultra-wide, telephoto, and sometimes macro cameras. The main camera is usually the best choice for general weed photography because it often has the largest sensor and strongest image quality.
The main camera can capture whole cannabis plants, single branches, trimmed buds, and product-style images. It usually produces more detail than the ultra-wide lens, especially indoors. If your phone has a dedicated macro mode, you may also be able to photograph small details such as trichomes, pistils, and leaf texture.
It is important to understand that not every phone macro mode produces the same level of detail. Some phones use a true close-focus lens, while others rely more heavily on software. This can affect sharpness. A high-quality main camera may sometimes give better results if you stand slightly farther away and crop the image later.
You should also avoid relying too much on digital zoom. Digital zoom does not bring the lens physically closer to the subject. Instead, the phone enlarges part of the image through software. This often reduces detail and can make the photograph look soft or grainy. Moving the phone closer, when the camera can still focus, usually gives better results.
Cleaning the Camera Lens
One of the easiest ways to improve smartphone weed photography is to clean the camera lens before taking a photo. Phone lenses collect fingerprints, dust, oil, and lint throughout the day. These small marks may not be easy to see, but they can reduce image quality.
A dirty lens can make the image look hazy or soft. Bright lights may also create unwanted glare around the subject. This is especially noticeable when photographing shiny trichomes because they reflect light easily.
Use a clean microfiber cloth to gently wipe the lens before shooting. Avoid using rough fabric because it may leave small marks or fibers behind. A clean lens helps the phone capture sharper edges, clearer colors, and better contrast.
This simple step is often overlooked, but it can make a large difference in the final image.
Stabilizing the Phone
Keeping the phone still is another important part of cannabis photography. Even small movements can cause blur, especially when shooting indoors or in low light. The camera may use a slower shutter speed when there is not enough light, which increases the chance of motion blur.
Holding the phone with both hands can help improve stability. Keep your elbows close to your body and avoid stretching your arms too far forward. You can also rest the phone against a table, shelf, or another solid object.
A small smartphone tripod can be useful when you want more consistent results. It is especially helpful when photographing buds from the same angle or taking close-up photos. A tripod also allows you to make small changes to the lighting without changing the camera position.
Using the phone’s timer can reduce movement as well. Set a short delay, press the shutter button, and allow the phone to become still before the picture is taken.
Tapping to Set Focus
Most smartphone cameras allow you to choose the focus point by tapping the screen. This is important when photographing cannabis because the camera may otherwise focus on the background instead of the bud or plant.
Tap directly on the area you want to appear sharp. If you are photographing a full bud, focus on the center or on a detailed section near the front. When shooting a close-up, focus on visible trichomes, pistils, or another clear surface.
After tapping, wait a moment for the camera to lock focus before taking the picture. Some phones also allow you to lock focus by holding your finger on the screen. This can be useful when you want to take several images without having the camera change focus each time.
Close-up photography has a narrow area of sharp focus. If the phone is too close, it may not be able to focus at all. Move back slightly until the details appear sharp.
Adjusting Exposure Manually
Smartphones normally choose exposure automatically, but the automatic setting is not always correct. Cannabis photography can be difficult for a phone because buds may have bright trichomes, dark leaves, and deep shadows in the same image.
After tapping the screen to focus, many camera apps allow you to adjust brightness by sliding your finger up or down. Lowering the exposure slightly can help protect bright trichomes from becoming completely white. Raising the exposure can help when the image is too dark.
Try to keep detail in both the bright and dark areas. An image that is slightly too dark can often be corrected during editing, but heavily overexposed areas may lose detail completely.
Good lighting makes exposure easier to control. Soft window light or diffused artificial light usually works better than a harsh flashlight or direct overhead bulb.
Avoiding Excessive Digital Zoom
Digital zoom should be used carefully in weed photography. When you zoom too far, the phone enlarges pixels instead of capturing more true detail. This can make trichomes and leaf edges look soft or artificial.
For most photos, use the normal 1x camera setting and physically move closer to the subject. Stop when the camera reaches its minimum focusing distance. If you still need a tighter image, you can crop the photo later.
Some phones have a true optical telephoto lens. Optical zoom can provide better quality because it uses a separate lens rather than simply enlarging the image. However, telephoto lenses often need more light than the main camera.
The main goal is to preserve detail. A slightly wider sharp photo is usually better than a highly zoomed image that looks blurry.
Adding a Macro Lens
A clip-on or magnetic macro lens can help a smartphone capture much smaller details. These accessories attach over the phone’s existing camera lens and allow the camera to focus at a much shorter distance.
Macro lenses can be useful for photographing trichomes, resin glands, pistils, seed surfaces, and leaf texture. They are especially helpful when the phone does not have a strong built-in macro mode.
When using a macro lens, working distance becomes very important. You may need to position the phone only a few centimeters away from the subject. Moving even slightly forward or backward can change what part of the image is in focus.
Good lighting is also important because the phone may block light when it is very close to the bud. Position the light from the side or above instead of directly behind the phone.
Stability becomes even more important at high magnification. A tripod, phone stand, or firm support can help prevent blur. You may also need to take several photos because only a small part of the subject may be perfectly sharp in each image.
A smartphone can take clear and detailed weed photos when it is used carefully. The main camera is usually the best choice for general images, while built-in macro modes or add-on macro lenses can help with very close details. Good results also depend on simple habits such as cleaning the lens, keeping the phone stable, setting focus manually, and controlling exposure.
Avoid excessive digital zoom because it can reduce image quality. Instead, move closer when possible and keep the subject well lit. For macro photography, use a steady setup and pay close attention to working distance and focus.
What Is the Best Lighting for Weed Photography?
Lighting is one of the most important parts of weed photography. A good camera can help produce a sharp image, but poor lighting can still make the final photo look dull, flat, or unclear. Cannabis has many small details, including fine hairs, crystal-like trichomes, textured leaves, and different shades of green, orange, purple, and red. Good lighting helps show these details in a natural and clear way.
The best lighting for weed photography is usually soft, controlled, and even. Harsh light can create bright reflections on trichomes and deep shadows between parts of the flower. Very weak light can also cause problems because the camera may need a slower shutter speed or higher ISO. This can increase blur or visible image noise.
The right lighting setup depends on the type of photo being taken. A full plant may need broad, even light. A single cannabis bud may look better with light coming from the side. A macro shot of trichomes often needs carefully placed light that shows texture without creating strong glare.
Why Lighting Matters
Lighting affects almost every part of a cannabis photo. It controls how bright the image appears, but it also affects color, texture, contrast, and depth.
Cannabis flowers contain many small surfaces that reflect light in different ways. Trichomes are especially reflective because their resin glands can catch bright light. When lighting is too direct, these areas may become white spots with little visible detail. If the light is too weak, the trichomes may not stand out at all.
Good lighting also helps show accurate color. Cannabis plants can contain many shades of green, while some varieties have purple, blue, orange, or red tones. If the light source has a strong color cast, the camera may record these colors incorrectly. Warm indoor lights can make the plant appear too yellow. Some cool LEDs can make leaves look more blue than they really are.
Texture is another important part of weed photography. Cannabis buds have layers of leaves, pistils, and trichomes. Light coming from a slight side angle can create small shadows between these details. These shadows help the viewer see shape and texture.
Flat lighting from directly in front of the subject may remove too much shadow. The photo can still be clear, but the flower may look less detailed. In many cases, light placed slightly above and to one side of the subject creates a better sense of depth.
Natural Light
Natural light can work very well for cannabis photography because it can produce soft and realistic colors. A bright window is often enough for basic plant, bud, or product photography.
Indirect window light is usually better than strong direct sunlight. Placing the subject near a large window allows light to spread across the cannabis flower. This creates softer shadows and helps reveal texture without producing too much glare.
Overcast daylight can also be useful. Clouds act like a large natural diffuser. They spread sunlight over a wider area and reduce harsh shadows. This type of light can create a soft and balanced look.
Direct sunlight is harder to control. Bright sunlight can create strong contrast between light and dark areas. The top of a bud may become very bright while the lower areas become too dark. Reflective trichomes may also create small blown highlights where detail is lost.
If direct sunlight is the only option, a thin white curtain can help soften it. The curtain spreads the light and makes it less harsh. A white piece of card or foam board can also be placed on the darker side of the cannabis flower to reflect some light back onto the subject.
Natural light changes throughout the day, so consistency can be a challenge. A photo taken in the morning may look different from one taken later in the afternoon. Photographers who need several images with the same look may find artificial lighting easier to control.
Artificial Light
Artificial lighting provides more control than natural light. It can be used at any time of day, and the position, brightness, and direction of the light can remain consistent between photos.
Continuous LED lights are a common option. These lights stay on while the photographer works, so it is easy to see where shadows and reflections will appear before taking the photo. Adjustable LED lights can also make it easier to control brightness.
A softbox can be added to an artificial light source to create softer light. The larger the light source appears in relation to the subject, the softer the shadows usually become. This can be helpful when photographing cannabis flowers because strong shadows can hide fine details.
Flash units and strobes can also produce sharp and detailed images. They create a short burst of powerful light, which can help reduce motion blur. However, direct flash can be too harsh for cannabis photography. It may create bright reflections on trichomes and dark shadows behind the subject.
When flash is used, it is often better to soften or bounce the light. A diffuser can spread the flash over a wider area. Another option is to point the flash toward a white wall or ceiling so the reflected light reaches the subject more gently.
Ring lights are another option, especially for close-up work. A ring light surrounds the lens or sits close to the camera. This can create even lighting with fewer strong shadows. However, it can sometimes make the image look flat because the light comes from nearly the same direction as the camera.
For greater depth, the main light can be placed slightly to one side. A second weaker light or reflector can then soften the shadows on the opposite side.
Using Reflectors
Reflectors are simple tools that can improve cannabis photos without adding another powered light. They work by bouncing existing light back onto the subject.
A white reflector creates soft fill light. It can brighten shadows without making them look harsh. White foam board, poster board, or even a clean sheet of white paper can work for small setups.
Silver reflectors return more light and create stronger highlights. They can help when the main light is weak, but they may produce more glare on shiny trichomes.
Reflectors are especially useful when using window light. If the window is on the left side of the cannabis flower, a reflector can be placed on the right side. This reduces dark shadows while still keeping enough contrast to show texture.
The reflector does not need to remove every shadow. Some shadow is useful because it gives the flower shape and depth.
Diffusing Harsh Light
Diffusion is one of the most useful techniques in weed photography. A diffuser is a material placed between the light source and the subject. It spreads the light so that it reaches the cannabis flower from a wider area.
Softboxes already contain diffusion material. Other options include photography diffusion sheets, translucent fabric, or a thin white curtain when using window light.
The main goal is to reduce harsh highlights and strong shadows. This is especially important when photographing resin-covered buds. Trichomes can reflect small points of light directly toward the camera. If those reflections are too bright, important surface detail may disappear.
Moving the diffuser closer to the subject can often make the light appear softer. Another method is to move the light farther away while using a larger diffusion surface.
The position of the light also matters. A light placed directly in front of the camera may reflect straight back from shiny areas. Moving it slightly to the side can reduce glare while still showing the trichomes.
For macro photography, small changes in light position can make a large difference. Moving a light only a few inches can change which trichomes appear bright and which areas fall into shadow. It is useful to test several positions before choosing the final setup.
Lighting for Macro Weed Photography
Macro photos need careful lighting because the camera is working very close to the subject. At this distance, the lens or camera body may block some of the available light.
A small LED panel or diffused light placed beside the bud can work well. The light should be bright enough to allow a lower ISO and a useful shutter speed, but it should not create strong white reflections.
Side lighting often works well for trichomes because it helps define their shape. Small shadows around each resin gland can make the surface texture easier to see.
A second light can be added from the opposite side if the shadows become too dark. However, both lights do not need to be equally bright. Using one stronger main light and one weaker fill light usually creates more depth.
Photographers should also watch the background when setting up macro lighting. Light that spills onto the background can reduce separation between the bud and the area behind it. Keeping the background slightly darker can help the cannabis flower stand out.
Choosing the Best Lighting Setup
There is no single lighting setup that works for every weed photo. The best choice depends on the subject and the type of detail that needs to be shown.
For a whole cannabis plant, broad natural window light or a large softbox can provide even coverage. For individual buds, a diffused light placed at an angle can show shape and texture. For macro trichome photography, smaller controlled lights can make it easier to highlight fine surface details.
The photographer should check the image for three main problems before taking the final photo: areas that are too bright, areas that are too dark, and incorrect color. Small changes in the light angle, distance, or diffusion can often solve these problems.
It is also helpful to keep the lighting setup simple. One main light and one reflector may produce better results than several lights placed around the subject without a clear purpose.
The best lighting for weed photography is soft, controlled, and bright enough to show detail without creating harsh glare. Natural window light and overcast daylight can provide realistic color and gentle shadows, while artificial lights offer greater control and consistency. Continuous LEDs, softboxes, reflectors, and diffusers can all help create a balanced setup.
Direct sunlight and direct flash can be difficult because they may create deep shadows and bright reflections on trichomes. Diffusing the light and moving it slightly to the side can produce a softer and more detailed image.
What Camera Settings Are Best for Cannabis Photography?
Good camera settings can make a major difference in weed photography. Cannabis plants and buds have many small details, including leaf edges, pistils, trichomes, and changes in color. If the camera settings are not balanced, these details may look blurry, dark, noisy, or washed out.
There is no single camera setting that works for every cannabis photo. The best settings depend on the amount of light, the type of lens, how close the camera is to the subject, and whether the plant is moving. However, understanding aperture, shutter speed, ISO, and white balance can help you make better choices.
It is also useful to know when to shoot in RAW or JPEG. Each file type has advantages, especially when you plan to edit the image later.
Aperture
Aperture controls how much light passes through the lens. It also affects how much of the image appears sharp from front to back. This area of sharpness is called depth of field.
A wide aperture, such as f/2.8 or f/4, lets more light into the camera. It also creates a shallow depth of field. This means the main subject may look sharp while the area in front of and behind it becomes blurry.
This effect can work well when photographing a single cannabis bud. A soft background can help separate the flower from the rest of the scene. However, a very wide aperture may make too little of the bud appear sharp.
This becomes more important in close-up and macro photography. When the camera is very close to the subject, depth of field becomes much smaller. You may focus on the trichomes near the front of a bud while the rest of the flower becomes soft.
A smaller aperture, such as f/8 or f/11, can increase depth of field. This allows more parts of the plant or bud to stay in focus. It can be useful when you want to show the full shape and texture of the flower.
However, smaller apertures let less light into the camera. You may need a slower shutter speed, brighter lighting, or a higher ISO to create a proper exposure.
Very small apertures can also reduce fine detail because of diffraction. For this reason, it is better to balance depth of field with overall sharpness instead of always choosing the smallest aperture available.
Shutter Speed
Shutter speed controls how long the camera sensor is exposed to light. It also affects how well the camera can freeze movement.
A fast shutter speed can reduce blur caused by camera shake or movement in the subject. This may be helpful when photographing a cannabis plant outdoors, where leaves can move in the wind.
For handheld photography, using a faster shutter speed can also make the image sharper. Even small movements of your hands can become more noticeable when taking close-up photos.
Slower shutter speeds allow more light to reach the sensor. This can be useful indoors, especially when using a smaller aperture. However, slow shutter speeds increase the risk of motion blur.
A tripod can solve many of these problems. When the camera is firmly supported, you can use a slower shutter speed without moving the camera during the exposure.
A remote shutter release or built-in camera timer can help even more. Pressing the shutter button by hand can cause slight movement. Using a timer allows the camera to settle before the photo is taken.
When photographing a still cannabis bud in a controlled indoor setup, shutter speed can often be adjusted mainly for exposure. When photographing a moving plant, it becomes more important to use a speed that freezes the motion.
ISO
ISO controls how sensitive the camera appears to light. A lower ISO usually produces cleaner images with less visible noise.
For cannabis photography, a low ISO is often the best starting point. Values such as ISO 100 or ISO 200 can help preserve fine details in trichomes, leaves, and buds.
This is especially important for macro photos. High ISO settings may introduce grain or colored noise into areas that should look smooth and detailed. Noise can make tiny trichomes harder to see clearly.
Higher ISO settings can still be useful when there is not enough light. For example, if you are taking photos indoors without a tripod, raising the ISO may allow you to use a faster shutter speed.
The goal is to use the lowest ISO that still gives you a proper exposure.
If your camera is on a tripod, there is usually less need to raise ISO. You can often keep the ISO low and use a slower shutter speed instead.
Modern cameras can handle higher ISO levels better than older models, but image quality still tends to decrease as ISO rises. Checking your photo at full size can help you see whether the noise level is acceptable.
White Balance
White balance controls how the camera records color under different types of light.
Different light sources have different color temperatures. Daylight may look neutral, while some indoor bulbs can create yellow, orange, green, or blue color casts.
Incorrect white balance can make cannabis look unnatural. Healthy green leaves may appear too yellow or too blue. Purple flowers may also lose their true color.
Most cameras have automatic white balance, and it can work well in simple lighting. However, mixed lighting can cause problems. For example, sunlight coming through a window may have a different color than an indoor lamp.
Using one main type of light can make color correction easier.
You can also select a white balance preset, such as daylight, shade, cloudy, or tungsten, depending on your setup. Some cameras allow you to set a custom white balance for more accurate color.
A gray card or neutral reference can also help. You can photograph the card under the same light as the cannabis and use it later to correct the color during editing.
Accurate white balance is important when the goal is to show the true appearance of the plant or flower. Heavy color casts can hide natural differences in green, orange, red, and purple tones.
RAW Versus JPEG
RAW and JPEG are two common file formats used in digital photography.
JPEG files are processed inside the camera. They are smaller, easy to share, and ready to use with little or no editing.
RAW files contain more image data. They give you greater control when adjusting exposure, white balance, shadows, highlights, and color.
This can be very useful for weed photography because cannabis often has both bright and dark areas in the same image. Trichomes may reflect a lot of light, while areas between the leaves or buds may appear much darker.
A RAW file gives you more room to recover detail from these areas during editing.
RAW files also make it easier to correct white balance without lowering image quality as much. This is useful if the original lighting created a color cast.
The main disadvantage is file size. RAW files take up more storage and usually need editing software before they can be shared or published.
JPEG may be enough for quick photos, social media posts, or situations where little editing is needed. RAW is usually better when you want maximum control and image quality.
Some cameras allow you to save RAW and JPEG files at the same time. This gives you a ready-to-use JPEG and a RAW file for detailed editing.
The best camera settings for cannabis photography depend on the subject, lighting, and type of shot. Aperture controls both light and depth of field, while shutter speed affects exposure and motion blur. ISO can help in low light, but lower ISO settings usually produce cleaner and more detailed images.
White balance is also important because it helps keep the natural colors of the cannabis plant accurate. Shooting in RAW gives you more control when editing exposure and color, while JPEG is useful when you need smaller files that are ready to share.
For clear cannabis photos, start with good lighting, keep the ISO as low as practical, choose an aperture that gives enough depth of field, and use a tripod when slower shutter speeds are needed. These basic settings can help create sharper, cleaner, and more accurate weed photography.
How to Choose the Best Angles and Composition
The angle and composition of a weed photo can change how the subject looks. A good angle can show the shape, color, and texture of a cannabis plant or bud. Poor framing can hide important details or make the image feel crowded. This is why photographers should think about both camera position and the space around the subject before taking a photo.
There is no single angle that works for every cannabis photo. A full plant needs a different approach than a single bud or close-up image. The best choice depends on what you want the viewer to notice. For example, a top-down photo may show the shape of the plant canopy, while a side view may show the height and structure of the plant.
Composition is also important. It controls where the subject appears inside the frame and how the viewer’s eye moves through the image. Simple composition often works best because it keeps attention on the cannabis subject.
Photographing a Whole Cannabis Plant
When photographing a whole cannabis plant, the main goal is often to show its overall shape and structure. A straight-on view is one of the simplest options. Place the camera at about the same height as the middle of the plant. This angle can show the main stem, branches, leaves, and flower sites in a clear way.
A straight-on photo works well when you want to document plant growth. It can also make it easier to compare plants because each image can be taken from a similar position. Try to keep the camera level so the plant does not appear tilted.
A side view can provide another useful look at the plant. This angle can show its height and how far the branches extend from the main stem. Side views are also useful when the plant has a clear shape that may not be easy to see from the front.
Top-down photos offer a different type of information. By holding or placing the camera above the plant, you can show the shape of the canopy. This makes it easier to see how leaves and branches spread across the growing area. A top-down angle may also show differences in leaf color and plant coverage.
When taking a top-down photo, keep the camera as level as possible. If the camera is tilted, one side of the plant may look larger than the other. Good lighting is also important because large leaves can create shadows over lower parts of the plant.
Photographing Individual Buds
Individual cannabis buds often have more visible detail than a full plant. Because of this, small changes in camera angle can make a large difference.
A three-quarter angle is often useful for bud photography. Instead of shooting directly from the front or side, move the camera slightly around the flower. This gives the image more depth and allows the viewer to see more than one surface of the bud.
A side profile can help show the shape and length of a flower. It may also reveal how the smaller leaves and flower structures grow together. If the bud has a clear shape or a long form, a side view may be more useful than a top-down image.
A top-down bud photo can show the upper surface of the flower. This angle may reveal the pattern of small leaves, pistils, and visible trichomes. It can also work well when the bud has a rounded or dense form.
Before taking the photo, turn the flower slowly and look at each side. One side may show more color, texture, or visible resin than another. Choose the side that gives the clearest view of the features you want to photograph.
Try not to force the subject into an angle that hides its natural shape. The goal should be to present the flower clearly rather than making it look unusual.
Using the Rule of Thirds
The rule of thirds is a simple composition method that can make photos feel more balanced. Imagine that the frame is divided into nine equal boxes using two horizontal lines and two vertical lines.
Instead of always placing the cannabis subject in the exact center of the image, you can place it near one of these lines or where the lines cross. This can create a more natural-looking composition.
For example, a cannabis plant may be placed slightly to the left or right side of the frame. The open space on the other side can help balance the image. This method is especially useful when the photo includes part of the growing area or background.
Many cameras and phones have a grid setting that can display these lines on the screen. Turning on the grid can make it easier to practice the rule of thirds.
However, the rule of thirds is not a strict rule. Some cannabis photos work better with centered composition, especially when the subject has a strong and even shape.
Using Centered Composition
Centered composition means placing the main subject close to the middle of the frame. This approach can work well for symmetrical plants, single buds, and product-style images.
A centered photo often feels simple and controlled. It can be useful when the main purpose of the photo is to document the appearance of a flower or plant rather than create a complex scene.
When using centered composition, check the space around the subject. Try to keep the spacing even when possible. If one side has much more empty space than the other, the image may look unbalanced.
Centered composition can also work well with plain backgrounds. A simple black, white, or neutral background allows the subject to stand out without other objects competing for attention.
Using Negative Space
Negative space is the empty area around the main subject. This space may seem unimportant, but it can have a major effect on the image.
Leaving some empty space around a cannabis plant or bud can make the photo easier to look at. It prevents the subject from feeling trapped inside the frame. Negative space also helps separate the subject from other parts of the image.
For example, a single bud placed against a plain background with space around it can look clearer than a bud surrounded by tools, leaves, containers, or other objects.
Negative space can also be useful if the image will later be used for a website, article, or graphic. Empty areas can provide room for cropping or other design needs.
Using Leading Lines
Leading lines are shapes or lines that guide the viewer’s eyes toward the main subject. In cannabis photography, stems, branches, leaf edges, tables, or other simple elements may act as leading lines.
For example, a branch can guide the viewer’s eye toward a flower at the end of the stem. A row of plants may also create lines that lead toward one main plant.
Leading lines should support the subject rather than distract from it. Strong lines that point away from the cannabis plant can pull attention out of the frame. Before taking the photo, look at the background and check where visible lines are leading.
Changing your camera position slightly may help create a cleaner composition.
Filling the Frame
Filling the frame means moving closer or using a longer focal length so the cannabis subject takes up most of the image. This technique is useful when you want to show detail.
A frame filled with a bud can make the flower’s texture, color, pistils, and trichomes easier to see. It also removes unnecessary background details.
However, avoid cropping the subject in an awkward way. If part of a leaf or flower is cut off near the edge, it may look accidental. Decide whether you want the full subject in the frame or a close detail shot before taking the photo.
When working close to the subject, focus becomes more important. Make sure the most important part of the bud is sharp.
Keeping Images Visually Clear
A strong cannabis photograph should make it easy to tell what the main subject is. Too many objects in the frame can create visual confusion.
Before taking the photo, look around the subject and remove anything that is not needed. This may include empty containers, cables, gardening tools, labels, or other items that pull attention away from the plant.
The background should support the subject rather than compete with it. Plain or softly blurred backgrounds often work well because they keep attention on the cannabis plant or bud.
Reflections can also cause problems. Shiny surfaces, glass, plastic, or metal may create bright spots that draw the eye away from the subject. Changing the camera angle or moving the light may reduce these reflections.
Also check the edges of the frame. Small objects near the edge may seem minor while taking the photo, but they can become distracting later.
Choosing the right angle and composition can make weed photography much clearer and more useful. Whole cannabis plants can be photographed from straight-on, side, or top-down positions depending on which parts of the plant you want to show. Individual buds can be photographed from three-quarter, side, or top-down angles to reveal shape, color, and texture.
Composition methods such as the rule of thirds, centered framing, negative space, leading lines, and filling the frame can help control where the viewer looks. No single method is best for every photo. The most useful approach is the one that keeps the cannabis subject clear and easy to understand.
How to Take Macro Photos of Cannabis Buds and Trichomes
Macro photography is one of the best ways to show the fine details found on cannabis flowers. A normal photo may show the shape, color, and size of a bud. A macro photo goes much closer. It can reveal trichomes, tiny hairs, leaf edges, and surface textures that may be hard to see with the naked eye.
Cannabis buds can be difficult to photograph at close range because the subject has many small layers. Trichomes may reflect light, while parts of the flower may sit at different distances from the camera. Even a tiny camera movement can make the image look soft or blurry. For this reason, macro weed photography requires careful control of focus, lighting, and stability.
A good macro image does not depend on expensive gear alone. Clear results come from using the right setup, keeping the camera steady, choosing a clear focal point, and controlling the light around the flower.
What Macro Photography Means
Macro photography is a type of close-up photography that records very small subjects in great detail. In true macro photography, the subject can be captured at or near a 1:1 magnification ratio. This means the subject is projected onto the camera sensor at roughly its real-life size.
Close-up photography and macro photography are often confused. A close-up image may simply fill the frame with a cannabis bud. A true macro image goes much closer and can show individual trichomes, tiny plant hairs, and other small surface details.
A dedicated macro lens is often the easiest tool for this type of work. Macro lenses are designed to focus at very short distances while keeping fine details sharp. Some photographers also use extension tubes or close-up lens attachments. Smartphones may have built-in macro modes or add-on macro lenses, although these can provide less control than a dedicated camera setup.
Magnification is important because it determines how much detail appears in the final image. At lower magnification, the viewer may see the full shape of a bud. At higher magnification, the image may focus only on a small group of trichomes.
Higher magnification also makes photography harder. The depth of field becomes very thin, and even slight movement becomes more noticeable. This is why macro photography often requires more patience than normal plant photography.
Trichomes are popular macro subjects because they have clear shapes and reflective surfaces. They can appear as tiny stalks with rounded heads. When photographed correctly, they can add texture and visual detail to a cannabis image.
Setting Up the Shot
A stable setup is one of the most important parts of macro photography. At close range, small movements can create major blur. Holding the camera by hand may work in bright conditions, but a tripod usually gives more consistent results.
Place the camera on a solid tripod and make sure all adjustment knobs are tight. The floor or table should also be stable. Avoid placing the setup near a fan, open window, or other source of movement.
The flower should also remain still. If the subject moves while the photo is being taken, the trichomes may appear soft even when the camera is stable. A loose bud can be placed on a clean surface or held securely in a simple support. A flower that is still attached to a plant should be protected from air movement.
Next, position the light. Soft, controlled light usually works well for cannabis macro photography because trichomes can reflect strong light. A harsh flash or bright bare lamp may create white spots that hide surface detail. A diffuser can soften the light and spread it across the bud.
The direction of the light also matters. Light coming from the side can reveal texture because it creates small shadows around the surface of the flower. Light from the front may produce a flatter look. Light from behind can highlight the edges of trichomes but may require careful exposure control.
Move the light rather than moving the subject too much. Small changes in light angle can greatly affect how the trichomes appear.
It is also important to choose the right area of the bud. Look for a section with visible trichomes, clear texture, and an interesting mix of shapes. A good macro image does not always need to show the whole flower. A small section can be enough if the details are sharp and easy to see.
Getting Accurate Focus
Focus is often the hardest part of macro photography. At high magnification, only a very thin section of the subject may appear sharp. A trichome near the front of the bud may be clear while another trichome a few millimeters behind it looks blurry.
Manual focus can be useful because it gives the photographer direct control over the exact area that should appear sharp. Autofocus may sometimes move back and forth because the camera sees many small details at different distances.
If the camera has live view, enlarge the image on the screen before taking the photo. This makes it easier to see whether the trichome heads or other fine details are truly in focus.
Choose one main focal point. This could be a group of trichomes, the edge of a sugar leaf, or a detailed section of the flower. Trying to make every part of the bud sharp in one image may not be possible at high magnification.
One useful method is to set the lens near the desired focus distance and then move the camera slightly forward or backward. Small changes in camera position can be easier than turning the focus ring when working very close to the subject.
Focus should also be checked after each photo. Zoom in on the image and look at the smallest visible details. If they appear soft, adjust the focus and try again.
Preventing Blur
Blur in macro photography can come from camera movement, subject movement, or incorrect focus. Each problem needs a different solution.
A tripod reduces movement from the photographer’s hands. However, pressing the shutter button can still move the camera slightly. A remote shutter release can help because it allows the photo to be taken without touching the camera.
A self-timer is another simple option. Setting a two-second or longer delay gives the camera time to become still after the shutter button is pressed.
Some cameras also have electronic shutter settings or mirror lock-up features. These can reduce small vibrations inside the camera. The exact settings depend on the camera model.
Shutter speed should also be considered. If the camera is on a tripod and the subject is completely still, a slower shutter speed can work well. This allows more light to enter without raising the ISO too much. If the flower is moving, a faster shutter speed may be needed.
Movement from the environment can be easy to miss. Air conditioning, fans, footsteps, or a weak table can all create motion at high magnification. Before taking the photo, allow the setup to become completely still.
Image stabilization may help when shooting by hand, but its effect can vary during tripod use. Some lenses and cameras recommend turning stabilization off when mounted on a tripod. Checking the equipment instructions can help avoid unwanted movement.
Taking several photos of the same composition is also useful. Small changes in focus or vibration may affect one image but not another. Having several frames makes it easier to choose the sharpest result later.
Taking macro photos of cannabis buds and trichomes requires a careful and stable setup. Macro photography works at very close distances, which means small movements and focus errors become much easier to see. A macro lens or close-up setup can reveal trichomes, plant hairs, leaf edges, and fine flower textures that may not appear clearly in a normal photo.
For sharper results, keep both the camera and the subject still. Use a tripod, remote shutter, or self-timer to reduce camera movement. Soft, controlled lighting can help show texture without creating strong glare on reflective trichomes. Choose one clear area of the flower as the main focal point and use manual focus or enlarged live view when possible.
How to Get More of a Cannabis Macro Photo in Focus
Macro photography can show very small details that are hard to see with the naked eye. When photographing cannabis buds, macro shots can reveal trichomes, tiny hairs, surface texture, and changes in color. However, taking a sharp macro photo is not always easy. One of the biggest challenges is depth of field.
At very close distances, only a small part of the subject may appear sharp. The front of a bud may be in focus while the back looks soft or blurry. This is normal in macro photography. The closer the camera gets to the subject, the smaller the sharp area becomes.
To improve focus, photographers need to understand how depth of field works. They also need to know how aperture, camera distance, focus stacking, and tools such as focusing rails can help.
Understanding Depth of Field
Depth of field is the area in a photo that appears acceptably sharp. In regular photography, this area may extend several feet in front of and behind the focus point. In macro photography, the sharp area can become extremely thin.
This happens because the camera is very close to the subject. As magnification increases, depth of field becomes smaller. A tiny movement can shift the focus from one part of the cannabis flower to another.
For example, a camera may focus clearly on the trichomes at the front of a bud. However, trichomes only a few millimeters behind them may already look soft. This can happen even when the camera and lens are working correctly.
The photographer can increase depth of field by changing the aperture. Moving slightly farther away from the subject can also help. However, doing this may reduce the amount of fine detail visible in the final image.
Camera position is also important. If the main surface of the bud is angled toward the camera, different parts of the subject may sit at different distances from the lens. This makes it harder to keep everything sharp. Positioning the camera so the important details are on a similar focus plane can improve the result.
Choosing an Aperture
Aperture controls how much light enters the lens. It also affects depth of field. A wide aperture, such as f/2.8 or f/4, creates a shallow depth of field. A smaller aperture, such as f/8 or f/11, usually keeps more of the subject in focus.
For cannabis macro photography, a smaller aperture can be useful when the goal is to show more trichomes or more of the bud surface clearly. However, photographers should not always choose the smallest aperture available.
Very small apertures, such as f/16 or f/22, can create diffraction. Diffraction happens when light bends as it passes through a very small opening in the lens. This can reduce overall sharpness.
A good starting range for many macro lenses is around f/5.6 to f/11. The exact setting depends on the lens, camera, lighting, and magnification level.
Smaller apertures also allow less light into the camera. This may require a slower shutter speed or higher ISO. A slower shutter speed can cause blur if the camera moves. A higher ISO can create more image noise.
Using a tripod can help solve this problem. It allows the photographer to use a slower shutter speed without holding the camera by hand. Additional lighting can also help maintain a lower ISO while keeping the image bright enough.
Understanding Focus Stacking
Focus stacking is a technique used when one photo cannot keep enough of the subject sharp. Instead of taking one image, the photographer takes several images with the focus point placed at different distances.
The first photo may focus on the front of the cannabis bud. The next photo may focus slightly farther back. More photos are taken until the important parts of the subject have been covered.
These images are then combined with editing software. The software uses the sharpest areas from each photo to create one final image with greater depth of field.
For example, one image may show sharp trichomes at the front of the bud. Another may show sharp details in the middle. A third may capture the rear section clearly. When combined, the final photograph can show much more detail than any single image.
The camera should remain in the same position throughout the process. The subject should also stay still. Even small movements can make the images difficult to combine.
A tripod is therefore very important for focus stacking. A remote shutter release or camera timer can also reduce movement caused by pressing the shutter button.
Lighting should remain the same during every exposure. Changes in brightness or direction can make the final stacked image look uneven.
Focus stacking can involve only a few photographs or many images. The number needed depends on the magnification, aperture, size of the subject, and amount of depth required.
Using a Focusing Rail
A focusing rail is a tool that can make macro photography more precise. It attaches between the tripod and camera. The rail allows the photographer to move the camera forward or backward in very small steps.
This can be useful for focus stacking because changing the lens focus may slightly change the size or framing of the subject. Moving the entire camera instead can keep the lens setting more consistent.
The photographer begins by focusing on the closest important part of the cannabis bud. After taking the first photo, the camera is moved forward by a small amount. Another photo is taken. This process continues until the focus has moved through the entire area that needs to appear sharp.
The amount of movement between shots should be small enough to create overlap between the focused areas. If the steps are too large, some sections may remain blurry when the images are combined.
A focusing rail can also make it easier to fine-tune normal macro shots. Instead of moving the tripod or adjusting the lens repeatedly, the photographer can shift the camera by very small amounts.
Motorized focusing rails are available for advanced macro photography, but a manual rail can work well for many situations. The most important goal is controlled and repeatable movement.
Keeping the Camera and Subject Stable
Sharp macro photography depends heavily on stability. At high magnification, movement that seems very small can create obvious blur.
A solid tripod should be placed on a stable surface. If possible, the camera strap should not hang freely because it can move and cause vibration. The photographer should also avoid touching the table or surface holding the subject during the exposure.
A timer or remote shutter release can reduce vibration from pressing the shutter button. Cameras with electronic shutter or electronic front-curtain shutter options may also help reduce internal movement.
The cannabis subject must also remain still. Air from fans, open windows, or air conditioning can move leaves and small flower parts. Even slight movement may cause softness in close-up images.
Good lighting helps as well. More light allows the camera to use a faster shutter speed, which can reduce motion blur.
Getting more of a cannabis macro photo in focus requires control over depth of field, aperture, camera position, and movement. Because macro photography is done at very close distances, only a thin section of the subject may appear sharp in a single image.
Using a smaller aperture can increase depth of field, although extremely small apertures may reduce image detail because of diffraction. A tripod and steady lighting can make it easier to use settings that produce sharp results.
When one photo cannot capture enough detail, focus stacking can be used. This method combines several images taken at different focus distances. A focusing rail can make the process more accurate by moving the camera in small and controlled steps.
What Background Works Best for Weed Photography?
The background plays a major role in weed photography. Even when the cannabis flower is sharp and well lit, a poor background can make the image look messy or hard to understand. A good background helps the viewer focus on the plant, bud, or trichomes instead of objects behind it.
The best background is usually simple. It should support the subject without pulling attention away from it. Color, texture, distance, and lighting all affect how the background appears in the final image. A clean setup can also make editing easier because there are fewer unwanted objects, shadows, and color changes to correct.
Different backgrounds work better for different types of cannabis photos. A bright background can give the image a clean and simple look. A dark background can make trichomes and bright green details stand out. Natural backgrounds can work well when the goal is to show the plant in a growing setting. The right choice depends on the subject and the amount of contrast you want.
Simple Background Choices
White backgrounds are common in product and close-up photography because they create a clean appearance. A white background can work well with dark green buds, purple flowers, and orange pistils. It also reflects some light back toward the subject, which may help reduce deep shadows.
However, white backgrounds need careful exposure. If the background receives too much light, it may become very bright and lose detail. The edges of pale green flowers may also become harder to see if there is not enough contrast. Leaving some space between the subject and the background can help create better separation.
Black backgrounds create a very different effect. They can make bright trichomes, green leaves, orange hairs, and purple tones more noticeable. Dark backgrounds are especially useful for macro images because small reflective details can stand out against the darker area.
A black background may also hide unwanted objects more easily. However, lighting must still be controlled. If the flower is not bright enough, dark parts of the bud may blend into the background. Side lighting or soft angled lighting can help show the shape of the flower.
Gray backgrounds are another useful option. Gray is neutral and does not compete strongly with most cannabis colors. It can also be easier to expose than pure white or pure black. Light gray can produce a bright and clean image, while dark gray can create more contrast without looking as strong as black.
Natural backgrounds may also be used when photographing whole plants. A grow room, garden, greenhouse, or outdoor setting can provide useful context. Still, the area behind the plant should not be too busy. Too many leaves, pots, tools, lights, or other objects can make it difficult to tell where the main subject begins and ends.
Creating Contrast
Contrast helps separate the cannabis subject from its background. When the flower and the background have very similar colors and brightness, the edges of the subject may become difficult to see.
For example, a green cannabis bud placed in front of green leaves may blend into the scene. Even if the flower is sharp, the image may appear crowded. A white, gray, black, or other neutral background can make the outline of the bud easier to see.
Purple cannabis flowers may benefit from light gray, white, or muted backgrounds. These colors help preserve the darker tones of the flower while making its shape clear. A very dark purple bud against a black background may lose some edge detail unless the lighting is carefully placed.
Orange and red pistils can also become more visible when the background does not contain similar warm colors. This is one reason neutral backgrounds are useful. They allow the natural colors of the cannabis flower to remain the main visual feature.
Contrast does not only come from color. Brightness also matters. A light subject on a dark background can stand out even when the colors are similar. The same is true for a darker subject placed against a brighter surface.
Lighting can increase this separation. A soft light placed slightly behind or beside the flower can create a thin highlight around its edge. This makes the subject easier to distinguish from the background.
Controlling Background Blur
A blurred background can help keep attention on the cannabis flower. This effect is often called background separation or shallow depth of field. It works because the main subject remains sharp while objects behind it appear soft and less distracting.
One of the easiest ways to create more background blur is to increase the distance between the cannabis subject and the background. If a bud is placed directly against a wall, the wall may appear quite detailed. Moving the bud farther away can make that same wall look softer.
Aperture also affects background blur. A wider aperture, such as f/2.8 or f/4, can create a shallower depth of field. This can make the background appear more blurred. However, close-up cannabis photography already has a narrow area of sharp focus, so very wide apertures may leave parts of the flower out of focus.
A smaller aperture, such as f/8 or f/11, can keep more of the bud sharp. The background may still appear blurred if it is far enough behind the subject. This is often a useful balance for close-up photography.
Lens choice also matters. Longer focal lengths can make background blur appear stronger when the camera position and subject distance are suitable. A macro lens, for example, can produce clear detail in the flower while allowing the background to become smooth and soft.
Smartphones can also create background blur, but the effect may depend on the camera mode and shooting distance. Some phones use software to create artificial blur. This can work well, but the phone may sometimes blur the edges of leaves, hairs, or parts of the flower by mistake.
Avoiding Distractions
A good cannabis background should be free from objects that compete with the main subject. Before taking the photo, check the entire frame instead of looking only at the bud or plant.
Clutter is one of the most common problems. Grow equipment, cords, labels, containers, scissors, bottles, and other items may appear in the background. These objects can make the photo look less clean. Moving them out of the frame can greatly improve the image without changing the camera settings.
Reflections can also cause problems. Glossy surfaces, mirrors, plastic sheets, and metal equipment may reflect lights or parts of the room. These reflections may create bright spots that pull attention away from the flower.
Strong patterns should also be avoided in most close-up images. Stripes, printed fabric, complex wallpaper, or detailed surfaces can compete with the texture of the cannabis bud. Since cannabis flowers already contain many small details, a plain background usually works better.
Unwanted shadows are another issue. A hard shadow behind the flower may make the image look uneven. Increasing the distance between the subject and background can reduce this effect. Using softer light can also create smoother shadows.
It is also important to check for color casts. A bright red wall, green grow light, or colored surface may reflect unwanted color onto the cannabis flower. Neutral surfaces such as white, gray, or black often make it easier to keep the plant’s natural colors accurate.
The best background for weed photography is usually simple, clean, and easy to control. White backgrounds can create a bright product-style appearance, while black backgrounds can make trichomes and colorful plant details stand out. Gray provides a balanced option, and natural settings can work when they are not too crowded.
Good contrast helps separate the cannabis flower from the area behind it. This can be created through color, brightness, lighting, or distance. Background blur can also improve the image by reducing distractions and keeping attention on the main subject.
How to Edit Weed Photos Without Making Them Look Unnatural
Editing is an important part of weed photography because even a well-shot image may need small changes before it looks finished. A camera does not always record color, brightness, and detail in the same way the human eye sees them. Editing can help correct these differences and make the final image look cleaner and more accurate.
The main goal is to improve the photo without making the cannabis look fake. Heavy editing can create colors that are too bright, trichomes that look overly sharp, or shadows that appear unnatural. A good edit should keep the real texture, color, and shape of the flower while making important details easier to see.
Editing is also useful when preparing photos for websites, blogs, social media, or product pages. The same basic process can be used for whole plants, individual buds, and close-up macro images.
Start With Basic Corrections
Basic corrections should usually come first. These changes create a balanced image before more detailed editing begins.
Exposure controls the overall brightness of the photo. If the image is too dark, raising the exposure can reveal details in the flower and leaves. If it is too bright, lowering the exposure can bring back detail in light areas. Small adjustments are usually better than large ones.
Highlights control the brightest areas of the image. This setting is useful when light reflects strongly from trichomes. Lowering the highlights can help recover detail that might otherwise look completely white.
Shadows affect darker areas. Raising the shadows can reveal texture inside dense buds or under leaves. However, raising them too much can make the image look flat. It can also reveal noise that was hidden in darker parts of the photo.
Contrast controls the difference between bright and dark areas. A small increase can make the flower stand out more clearly. Too much contrast can remove detail from highlights and shadows.
It is often helpful to make these changes slowly and compare the edited image with the original as you work.
Correct the White Balance
White balance affects how colors appear in the photograph. If the setting is wrong, green cannabis may look yellow, blue, or orange.
Different types of light have different color temperatures. Daylight may appear neutral, while some indoor lights can create warm or cool color casts. Mixed lighting can create an even bigger problem because one area of the image may look warm while another looks cool.
Most editing programs allow you to change temperature and tint. Temperature usually shifts the image between blue and yellow. Tint adjusts colors between green and magenta.
A white or gray object in the scene can help you find a more neutral starting point. Some editing programs have an eyedropper tool that lets you select an area that should be neutral.
Correct white balance is especially important in cannabis photography because flower color can vary greatly. Some buds are bright green, while others contain purple, red, orange, or pale tones. Poor white balance can hide these natural differences.
Keep Cannabis Colors Realistic
Color can make a weed photo more appealing, but it is easy to go too far.
Saturation increases the strength of all colors in the image. A large increase can make green leaves look almost neon. Purple flowers may become much darker than they really are, while orange pistils can become too bright.
Vibrance can sometimes be a gentler option because it usually affects weaker colors more than colors that are already strong. Even then, it should be used with care.
The goal should be to show the flower as accurately as possible. If a strain has subtle purple areas, those tones can be made easier to see without changing them into deep violet. If the bud is naturally pale green, editing should not turn it into a strong emerald green.
It can help to look at the original flower or a neutral reference image while editing. This makes it easier to notice when the colors have been pushed too far.
Enhance Texture and Fine Detail
Cannabis flowers contain a large amount of fine texture. Trichomes, pistils, leaf edges, and compact flower structures can all benefit from careful detail adjustments.
Texture controls medium and fine detail. A small increase can help show the surface of the flower without making the entire image look harsh.
Clarity affects contrast around edges and textured areas. It can make a bud appear more defined, but heavy clarity can create dark outlines and an unnatural appearance.
Sharpening can improve the visibility of fine edges. It is useful when showing trichomes or small plant structures. However, sharpening cannot fix a photograph that was badly out of focus. Too much sharpening may create bright or dark halos around edges.
The best approach is to zoom in while adjusting detail. Check the trichomes, pistils, and leaf edges. If these areas begin to look rough or overly crisp, reduce the setting.
Use Noise Reduction Carefully
Image noise often appears as grain or colored specks, especially in photos taken at high ISO settings or in low light.
Noise reduction can smooth these unwanted marks. This can make the image look cleaner, especially in dark backgrounds and shadow areas.
However, too much noise reduction can remove real detail. Fine trichomes may become soft, and flower texture can begin to look smooth or plastic.
A balanced edit usually removes the most distracting noise while keeping important surface detail. Noise reduction should often be used together with careful sharpening instead of relying heavily on either adjustment.
Edit Macro Photos With Extra Care
Macro cannabis photography requires more careful editing because the image shows very small details at high magnification.
Trichomes may reflect light strongly, so bright areas can easily lose detail. Lowering highlights can help make the heads and stalks of individual trichomes easier to see.
Sharpness also matters more in macro photography. Small focus errors are easier to notice at high magnification. Use moderate sharpening instead of trying to force an unsharp image to look clear.
Local editing tools can also be useful. These tools allow you to adjust only one part of the photograph. For example, you may brighten the center of a flower slightly while leaving the background darker.
Care should still be taken with local edits. Brightening one area too much can make it look separate from the rest of the image.
Process Focus-Stacked Images
Some macro cannabis photos are created through focus stacking. This process combines several images taken at different focus distances.
Each photograph contains a different sharp area. Software combines these areas into one image with greater depth of field.
After stacking, inspect the image closely. Look around trichomes, leaf edges, and overlapping plant parts. Stacking software can sometimes create strange edges or blurred patches when it has trouble deciding which image should be used.
Small corrections may be needed after the images are combined. The final stacked image can then be adjusted for exposure, color, contrast, and sharpness just like a normal photograph.
The goal is to create a wider area of natural-looking focus rather than an image that appears artificially sharp everywhere.
Remove Dust and Small Distractions
Small distractions can become very noticeable in close-up photos.
Dust, loose fibers, water spots, or marks on the background may pull attention away from the cannabis. Most editing programs include healing or spot removal tools that can clean up these small problems.
These tools should mainly be used to remove unrelated distractions. Avoid using them to change the natural structure of the flower.
For example, removing a small piece of dust from the background is a simple cleanup. Removing natural leaf tips, changing the number of trichomes, or rebuilding parts of the flower changes the subject rather than simply improving the photograph.
Keeping cleanup limited helps preserve an accurate image.
Crop and Straighten the Image
Cropping is one of the simplest ways to improve composition after the photograph has been taken.
A crop can remove empty space or distracting objects near the edge of the frame. It can also place the main bud or plant in a stronger position.
For a centered product-style image, the flower may look best near the middle. For a more natural composition, placing the subject slightly off-center may work better.
Straightening is also important when the photo includes tables, containers, shelves, or other visible lines. A tilted background can make the image feel unbalanced.
The final crop should also match where the photo will be used. A wide image may work well as a blog header, while a vertical crop may be better for some social media platforms. Square images are also common for online galleries.
Avoid cropping too tightly unless the goal is to show very small details. Leaving some space around the subject can make the photo easier to view.
Export the Final Image Correctly
Once editing is complete, the photo should be exported in a format that matches its intended use.
JPEG is widely used for websites and social media because it creates smaller files. High-quality JPEG settings can preserve good detail while keeping file size manageable.
Other formats may be useful when maximum quality or transparency is needed, but large image files can slow down websites.
Image dimensions also matter. There is little benefit in uploading an extremely large photo if it will only appear at a much smaller size on a webpage.
After resizing, check the image again at normal viewing size. Fine detail can change during resizing and compression. A small amount of output sharpening may help maintain clarity.
Editing weed photography should improve the image while keeping the cannabis natural and believable. Start with basic exposure, highlight, shadow, contrast, and white balance corrections. These changes create a strong base for the rest of the editing process.
Color should remain realistic. Avoid pushing saturation so far that green, purple, or orange tones no longer match the actual flower. Texture, clarity, sharpening, and noise reduction should also be used in moderation. These tools can reveal trichomes and flower structure, but too much adjustment can make the image look harsh or artificial.
Macro photos may need extra work because small details and focusing problems are easier to see. Focus-stacked images should also be checked for errors around fine edges. Small distractions such as dust can be removed, but natural features of the cannabis should remain unchanged.
Common Weed Photography Problems and How to Fix Them
Even with good equipment, weed photography can be difficult. Cannabis flowers contain many small details, including trichomes, hairs, leaves, and uneven surfaces. These details can make a photo look impressive, but they can also make camera problems more noticeable. A small focusing mistake, poor lighting, or incorrect camera setting can quickly lower image quality.
The good news is that most weed photography problems have simple causes. Once you know what is causing the issue, you can usually correct it by changing the light, camera position, focus, or exposure settings. Learning how to recognize these common problems can help you produce clearer and more natural-looking images.
Blurry Photos
Blurry photos are one of the most common problems in weed photography. Blur can happen because the camera moves while the image is being taken. This is especially common when shooting close-up or macro photos. At high magnification, even a very small movement can make fine details appear soft.
A tripod can help keep the camera stable. If you are using a smartphone, place it on a phone tripod or another stable support. Using a timer or remote shutter can also help because pressing the shutter button can move the camera slightly.
Shutter speed can also cause blur. A slow shutter speed allows the camera to collect more light, but it also increases the chance of recording movement. If you are holding the camera by hand, you may need to use a faster shutter speed. When the camera is mounted on a tripod, slower shutter speeds become easier to use.
Incorrect focus is another cause of blurry photos. Cannabis buds contain many layers, so autofocus may lock onto a leaf or background area instead of the part you want to show. For close-up photography, manual focus can give you more control. Zooming into the live-view screen can also help you check whether the trichomes or other important details are truly sharp.
Harsh Reflections on Trichomes
Trichomes can reflect a large amount of light. They have shiny surfaces that may create bright white spots when exposed to strong direct lighting. If these highlights become too bright, the camera may lose detail in those areas.
Direct flash is a common cause of harsh reflections. A flash pointed straight at the flower can create bright spots and dark shadows at the same time. Moving the light away from the camera or bouncing it from a nearby surface can create softer results.
Diffusion can also help. A diffuser spreads light across a larger area, making it less harsh. Softboxes, diffusion fabric, or other suitable light modifiers can reduce strong reflections while still showing the texture of the flower.
You should also check the exposure before taking the final image. If the highlights are too bright, lower the exposure slightly. It is often easier to brighten a slightly dark photo during editing than to recover detail from an area that has been completely overexposed.
Incorrect Cannabis Colors
Color is important in cannabis photography because flowers may contain different shades of green, purple, orange, red, and white. Poor lighting or incorrect camera settings can make these colors look unnatural.
White balance is one of the main causes of incorrect color. Every light source has a different color temperature. Some lights appear warm and yellow, while others appear cool and blue. If the white balance does not match the light source, the entire image may have an unwanted color cast.
Mixed lighting can make the problem worse. For example, daylight coming through a window may mix with warm indoor bulbs. One side of the flower may appear blue while the other appears yellow. Using one main type of light can make color correction much easier.
Editing can also cause unrealistic colors. Strong saturation may make green leaves look too bright or purple flowers look unnatural. Color changes should be made carefully. Compare the edited image with the original subject when possible. The goal should be to show the natural appearance of the plant rather than create colors that were not present.
Grainy or Noisy Images
Digital noise appears as small rough or grainy marks across a photograph. It is often more visible in shadows and darker areas. High ISO settings are one of the main causes.
ISO controls how sensitive the camera is to light. Increasing ISO can help when shooting in dark conditions, but higher values can reduce image quality. Fine details such as trichomes may begin to look rough instead of sharp.
Whenever possible, add more light instead of using a very high ISO. A tripod can also help because it allows you to use a slower shutter speed while keeping the camera stable. This means the camera can collect more light without needing to raise ISO as much.
Underexposure can also create noise. If a photo is very dark and you brighten it heavily during editing, noise in the shadows may become more visible. Getting a good exposure while taking the photo usually produces better results than trying to fix a very dark image later.
Noise reduction tools can help during editing, but they should be used carefully. Too much noise reduction can smooth away small details and make the flower look soft or artificial.
Not Enough of the Bud Is Sharp
Close-up and macro photography often create a very shallow depth of field. This means only a small part of the subject appears sharp while areas in front of or behind that point become blurred.
Aperture affects depth of field. A wider aperture creates a thinner focus area, while a smaller aperture can bring more of the bud into focus. However, extremely small apertures can reduce overall sharpness because of diffraction. You may need to test several settings to find a good balance.
Camera angle also matters. If the surface of the bud is angled away from the camera, some areas may be much closer to the lens than others. Changing the camera position so more of the subject sits on a similar focus plane can increase the amount that appears sharp.
For very close macro images, focus stacking may provide the best result. This method involves taking several photos while focusing on different parts of the subject. The sharp areas from these images are then combined during editing. The final photo can show much more detail than a single macro shot.
Flat-Looking Photos
A weed photo may be technically sharp but still look flat. This often happens when the lighting does not create enough depth or separation.
Light coming directly from the front can remove many of the small shadows that show the shape and texture of a cannabis flower. Moving the main light slightly to the side can create gentle shadows around the leaves, trichomes, and surface details. These shadows help the viewer understand the three-dimensional shape of the subject.
The background can also affect depth. If the flower and background are similar in color or brightness, the subject may blend into the scene. Using a background with enough contrast can help separate the bud from its surroundings.
Increasing the distance between the subject and background may also help. A greater distance can make the background appear softer, especially when using a wider aperture. This draws more attention to the flower.
Editing can improve contrast slightly, but lighting should create most of the depth in the original image. Heavy contrast adjustments can remove detail from highlights and shadows. It is better to build a balanced image during the photo session and make smaller corrections afterward.
Many weed photography problems come from a few basic issues: movement, poor focus, harsh lighting, incorrect exposure, or unsuitable camera settings. Blurry images can often be improved by stabilizing the camera and checking focus carefully. Harsh reflections can be reduced by using softer, diffused light. Accurate white balance helps preserve natural cannabis colors, while lower ISO settings can reduce unwanted digital noise.
Macro photography may require extra attention because depth of field becomes very narrow at close distances. Adjusting the aperture, camera angle, or using focus stacking can help keep more of the bud sharp. Finally, thoughtful light placement and background choice can prevent images from looking flat.
Conclusion: Creating Clear and Detailed Weed Photography
Weed photography combines basic photography skills with careful attention to small details. Cannabis plants and buds have many textures, colors, shapes, and reflective surfaces. These features can look very different depending on the light, camera angle, focus, and editing choices. A strong photo does not depend on expensive equipment alone. Good results usually come from using stable equipment, controlled lighting, careful focus, and a clear plan before taking the shot.
Stability is one of the most important parts of weed photography. A small amount of camera movement can make fine details look soft or blurry. This problem becomes even more noticeable when taking close-up or macro photos. A tripod can help keep the camera still. A phone stand can provide the same benefit when using a smartphone. A timer or remote shutter can also reduce movement caused by pressing the shutter button. These simple tools can make a large difference in image sharpness.
Lighting also has a major effect on the final image. Cannabis buds often have shiny trichomes, small hairs, and uneven surfaces. Harsh light can create bright spots that hide these details. Soft and diffused light usually gives the photographer more control. Window light can work well when it is indirect. LED lights, softboxes, and diffusers can also help create even lighting. The goal is to reveal the shape and texture of the subject without creating strong glare or deep shadows.
Different angles can show different parts of a cannabis plant or bud. A straight-on photo may show the overall size and shape. A side angle can reveal the structure of the flower. A top-down image can show the pattern of the leaves or the shape of a bud from above. A three-quarter angle often provides a mix of depth and detail. Photographers can take several shots from different positions and compare them later. The best angle is usually the one that shows the important details without making the image feel crowded.
Macro photography is useful when the goal is to show very small features. Trichomes, pistils, leaf edges, and surface textures can become much easier to see in a close-up image. However, macro photography also makes focusing more difficult. The area that appears sharp may be very small. Even a slight movement of the camera or subject can change the focus point. Manual focus, a tripod, and a stable work area can help solve this problem.
Depth of field is another important part of macro photography. At close distances, only a thin part of the subject may be in focus. A smaller aperture can increase the depth of field, but it may also require more light or a slower shutter speed. Photographers may need to test several settings to find the right balance. When one photo cannot keep enough of the bud sharp, focus stacking may be useful. This method combines several photos taken at different focus points. The final image can show more detail from front to back.
Camera settings should be chosen based on the available light and the type of image being taken. Aperture controls how much of the subject appears sharp. Shutter speed affects motion blur. ISO controls the camera’s sensitivity to light, but very high ISO settings can add unwanted grain. White balance affects how colors appear. Setting these controls carefully can help create an image that looks clean and natural.
Accurate color is especially important in weed photography. Cannabis can include many shades of green, purple, orange, red, white, and brown. Poor white balance can change these colors and make the plant look different from how it appeared in real life. Mixed lighting can also cause problems. For example, daylight and warm indoor lights may create different color tones in the same photo. Using one main light source and checking white balance before shooting can improve color accuracy.
The background should support the subject rather than compete with it. Simple white, gray, black, or neutral backgrounds often work well. A plain background makes it easier to see the shape of the plant or bud. The photographer can also create separation by placing the subject farther away from the background. This can produce a softer, blurred background while keeping attention on the cannabis.
Editing is the final stage of the process. Basic changes to exposure, white balance, contrast, highlights, and shadows can improve the image. Sharpening can make fine details easier to see, while noise reduction can reduce grain. However, strong editing can make colors and textures look unnatural. Heavy saturation may turn green leaves into bright artificial colors. Too much sharpening can create rough edges or halos. Editing should improve what the camera captured instead of completely changing the appearance of the subject.
A repeatable workflow can make weed photography easier and more consistent. The photographer can begin by preparing the subject and cleaning the shooting area. The next steps may include choosing a simple background, setting up the light, stabilizing the camera, checking focus, and taking several test shots. After reviewing the images, small changes can be made to the light, angle, or camera settings. This process can then be repeated until the important details are clear.
Good weed photography is built on a few basic principles. Keep the camera steady. Use soft and controlled light. Pay attention to focus. Choose angles that show the shape and texture of the subject. Use macro techniques when very small details need to be shown. Keep backgrounds simple, and edit with care. With a consistent approach, it is possible to create clear, detailed, and natural-looking images of cannabis plants, buds, and trichomes using either a dedicated camera or a modern smartphone.
Research Citation
Andre, C. M., Hausman, J.-F., & Guerriero, G. (2016). Cannabis sativa: The plant of the thousand and one molecules. Frontiers in Plant Science, 7, 19. https://doi.org/10.3389/fpls.2016.00019 DOI
Brecko, J., Mathys, A., Dekoninck, W., Leponce, M., VandenSpiegel, D., & Semal, P. (2014). Focus stacking: Comparing commercial top-end set-ups with a semi-automatic low budget approach. A possible solution for mass digitization of type specimens. ZooKeys, 464, 1–23. https://doi.org/10.3897/zookeys.464.8615 PubMed
Chopin, J., Kumar, P., & Miklavcic, S. J. (2018). Land-based crop phenotyping by image analysis: Consistent canopy characterization from inconsistent field illumination. Plant Methods, 14, 39. https://doi.org/10.1186/s13007-018-0308-5 Springer Link
Dayanandan, P., & Kaufman, P. B. (1976). Trichomes of Cannabis sativa L. (Cannabaceae). American Journal of Botany, 63(5), 578–591. https://doi.org/10.1002/j.1537-2197.1976.tb11846.x Botanical Society of America
Happyana, N., Agnolet, S., Muntendam, R., Van Dam, A., Schneider, B., & Kayser, O. (2013). Analysis of cannabinoids in laser-microdissected trichomes of medicinal Cannabis sativa using LCMS and cryogenic NMR. Phytochemistry, 87, 51–59. https://doi.org/10.1016/j.phytochem.2012.11.001 Groningen Research Portal
Huang, X., Chen, W., Zhao, Y., Chen, J., Ouyang, Y., Li, M., Gu, Y., Wu, Q., Cai, S., Guo, F., Zhu, P., Ao, D., You, S., Vasseur, L., & Liu, Y. (2024). Deep learning-based quantification and transcriptomic profiling reveal a methyl jasmonate-mediated glandular trichome formation pathway in Cannabis sativa. The Plant Journal, 118(4), 1155–1173. https://doi.org/10.1111/tpj.16663 PubMed
Lorensen, M. D. B. B., Hayat, S. Y., Wellner, N., Bjarnholt, N., & Janfelt, C. (2023). Leaves of Cannabis sativa and their trichomes studied by DESI and MALDI mass spectrometry imaging for their contents of cannabinoids and flavonoids. Phytochemical Analysis, 34(3), 269–279. https://doi.org/10.1002/pca.3202 Københavns Universitets Forskningsportal
Punja, Z. K., Sutton, D. B., & Kim, T. (2023). Glandular trichome development, morphology, and maturation are influenced by plant age and genotype in high THC-containing cannabis (Cannabis sativa L.) inflorescences. Journal of Cannabis Research, 5, 12. https://doi.org/10.1186/s42238-023-00178-9 DOI
Sunoj, S., Igathinathane, C., Saliendra, N., Hendrickson, J., & Archer, D. (2018). Color calibration of digital images for agriculture and other applications. ISPRS Journal of Photogrammetry and Remote Sensing, 146, 221–234. https://doi.org/10.1016/j.isprsjprs.2018.09.015 Illinois Experts
Sutton, D. B., Punja, Z. K., & Hamarneh, G. (2023). Characterization of trichome phenotypes to assess maturation and flower development in Cannabis sativa L. (cannabis) by automatic trichome gland analysis. Smart Agricultural Technology, 3, 100111. https://doi.org/10.1016/j.atech.2022.100111 ScienceDirect
Questions and Answers
Q1: What is weed photography?
Weed photography is the practice of photographing cannabis plants, flowers, buds, trichomes, and related products. It often uses close-up or macro photography to capture small details such as resin glands, colors, and plant structure.
Q2: What camera is best for weed photography?
A DSLR or mirrorless camera with manual controls works well for weed photography. Modern smartphones can also produce high-quality cannabis photos when paired with good lighting, steady positioning, and careful focus.
Q3: What lens is best for photographing cannabis buds?
A macro lens is one of the best choices for cannabis bud photography because it can capture very small details. Lenses around 60mm to 105mm are commonly used for close-up shots of trichomes, pistils, and flower texture.
Q4: What lighting is best for weed photography?
Soft, diffused lighting usually works best because it reduces harsh shadows and bright reflections. Natural window light, softboxes, LED panels, and diffusers can help show the true colors and texture of cannabis buds.
Q5: How do you take close-up pictures of cannabis trichomes?
Use a macro lens or macro attachment, stabilize the camera with a tripod, and focus carefully on the trichomes. A small aperture can increase depth of field, while controlled lighting can make the resin glands easier to see.
Q6: What background should you use for weed photography?
Simple backgrounds such as black, white, gray, or other neutral colors can help the cannabis stand out. The background should not contain distracting patterns or objects that compete with the main subject.
Q7: How do you make cannabis photos look sharp?
Use a tripod or stable surface, select an appropriate shutter speed, focus precisely, and provide enough light. For very close macro shots, focus stacking can also be used to combine several images taken at different focus points.
Q8: What camera settings are good for weed photography?
The best settings depend on the lighting and type of shot. A low ISO can reduce digital noise, a moderate or small aperture can improve depth of field, and a suitable shutter speed can prevent blur. Manual settings give photographers more control over the final image.
Q9: How should weed photos be edited?
Basic editing can include adjusting exposure, white balance, contrast, sharpness, and cropping. Editing should avoid excessive saturation or artificial effects if the goal is to show the cannabis accurately.
Q10: Can you take professional weed photos with a phone?
Yes. Many modern smartphones have strong cameras and close-focus features that can produce detailed cannabis photos. Good lighting, a clean background, steady positioning, and careful editing are often more important than using expensive equipment.