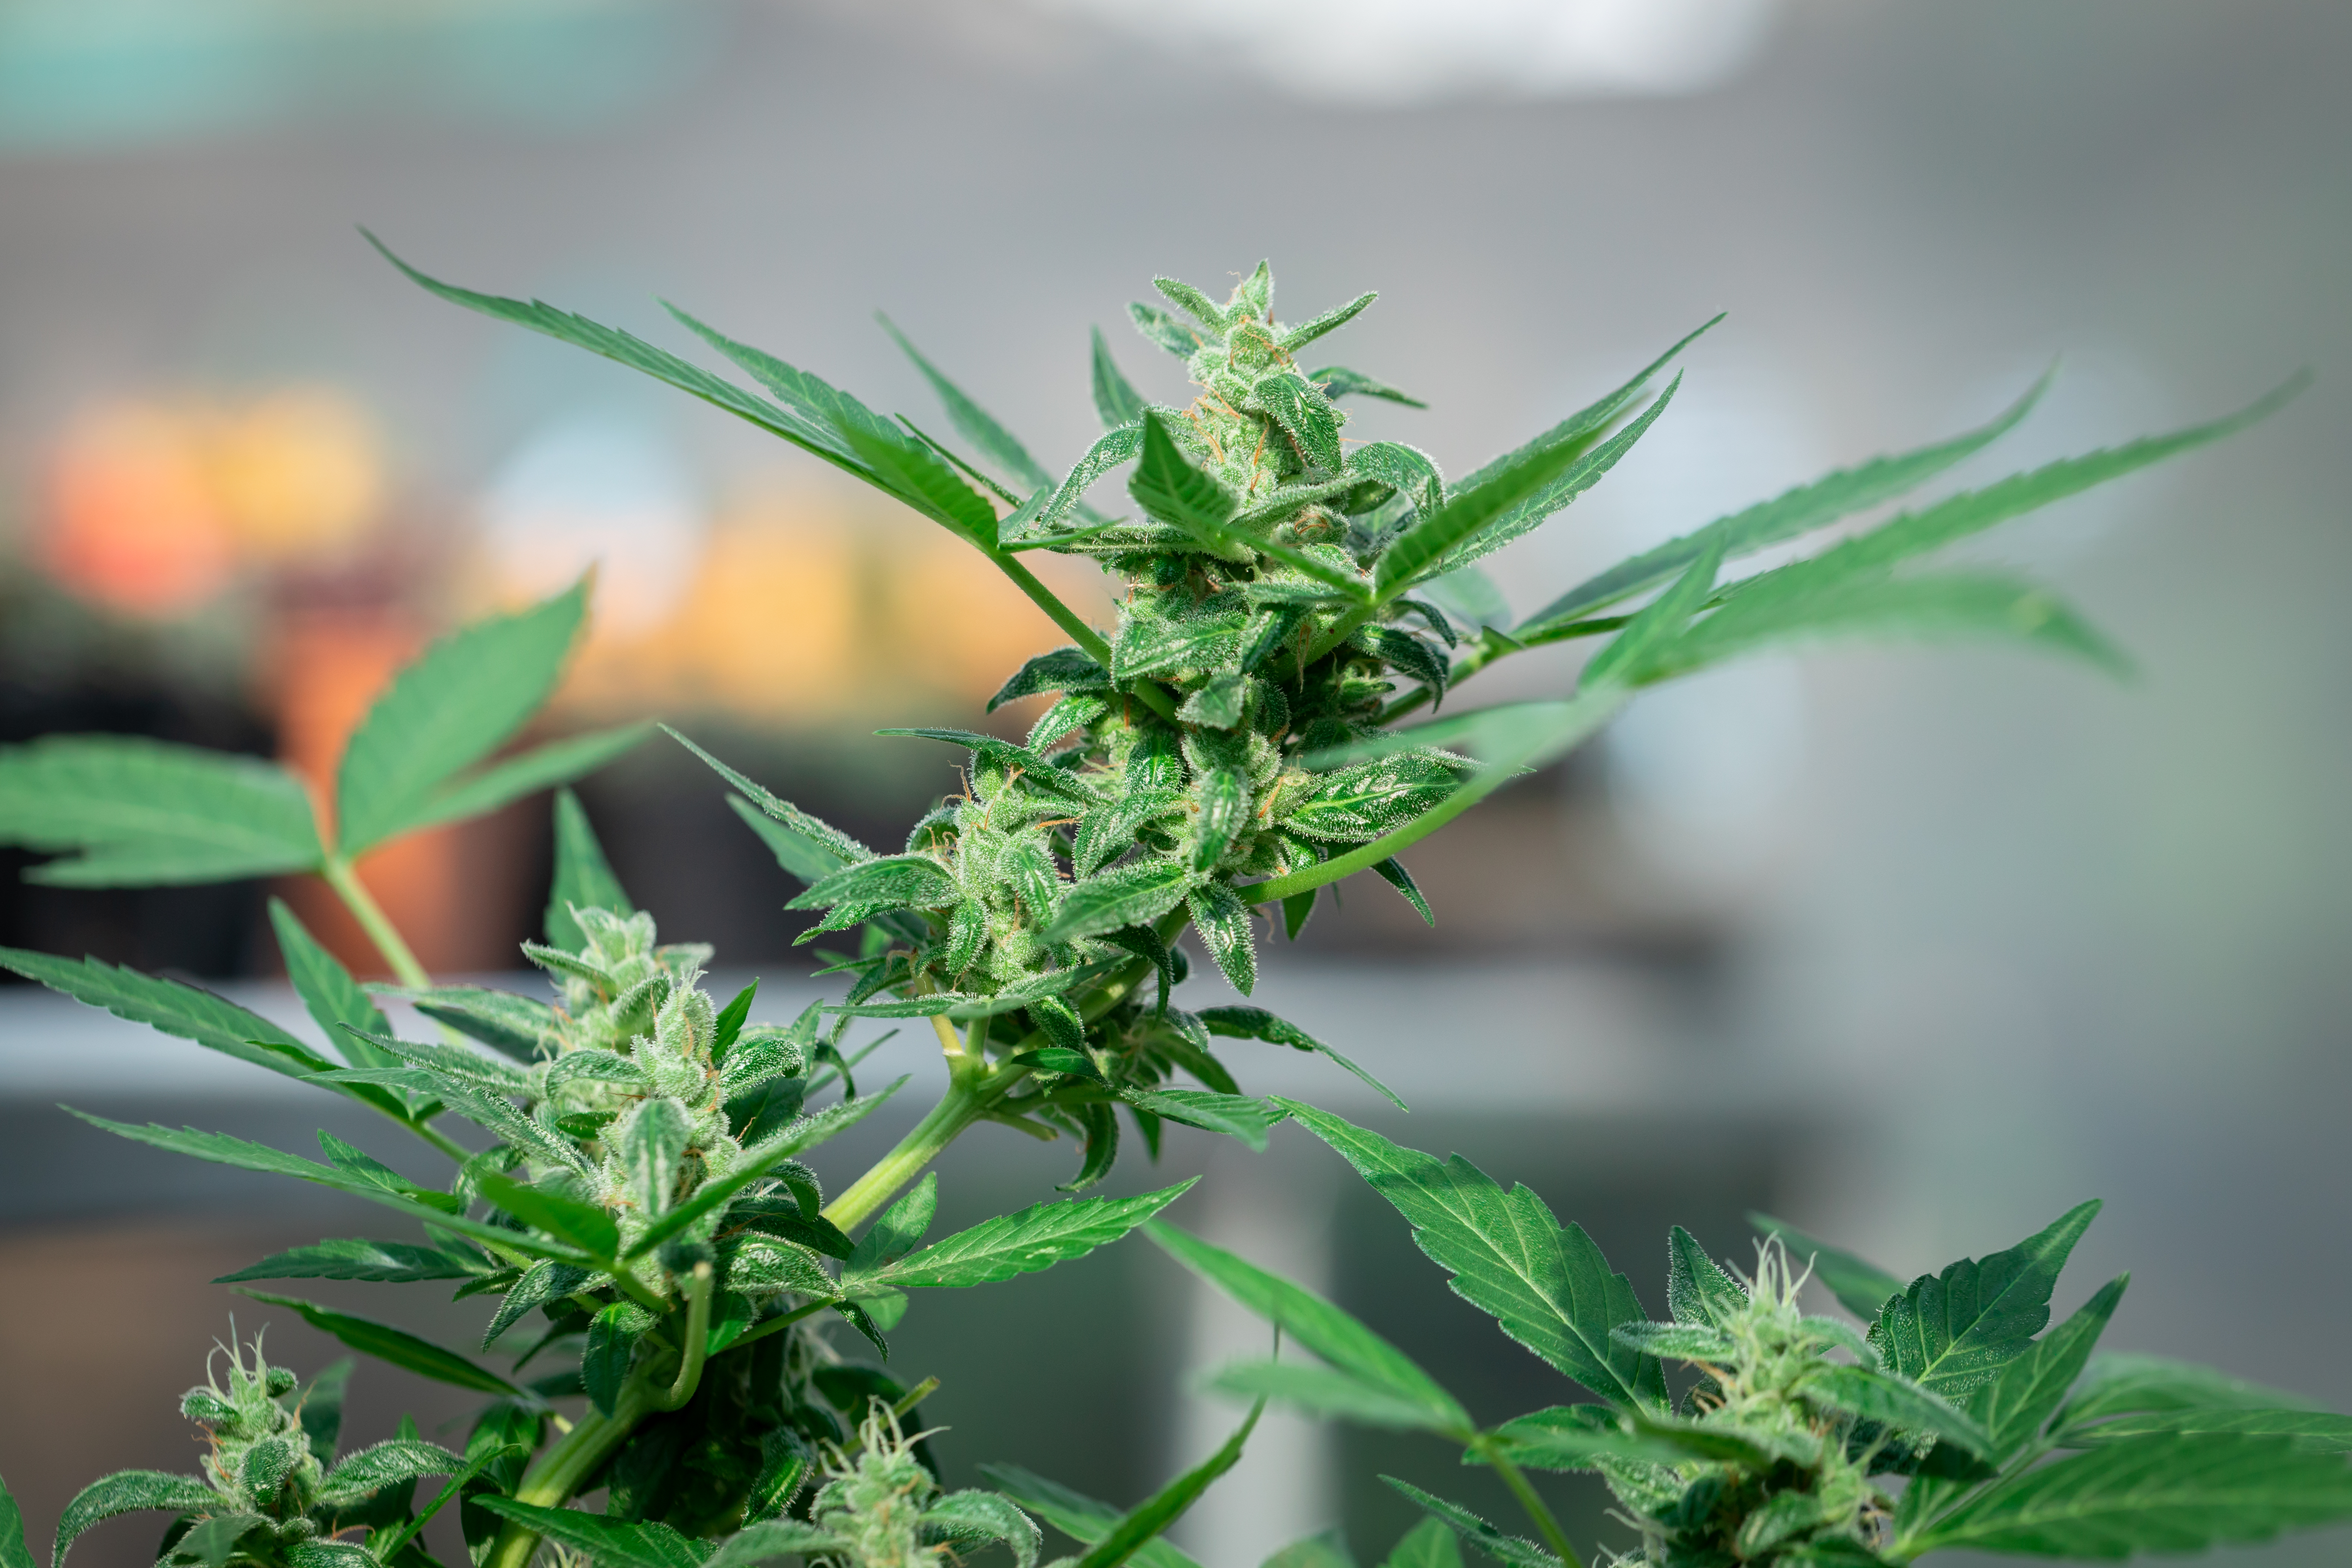


Week 4 of flowering is an important stage in the cannabis growth cycle. At this point, the plant is moving away from early flower formation and entering a stronger period of bud development. The plant may still grow taller, but much of its energy is now being used to form flowers. Small bud sites become easier to see, white pistils become more noticeable, and the overall shape of the plant begins to look more mature.
For many growers, week 4 is the time when the flowering stage starts to feel more serious. During the first two or three weeks, the plant often stretches quickly and forms early flower sites. By week 4, this fast upward growth may begin to slow. The branches may stop reaching as much, and the spaces between new nodes may become shorter. This does not happen at the same speed in every plant. Some cultivars may keep stretching for a longer time, while others may focus on bud growth sooner.
Week 4 is also when separate flower sites may begin to form clearer clusters. These clusters are still far from their final size, but they often look more organized than they did during the first weeks of flowering. The buds may appear soft, small, and covered with fresh white pistils. They may not look dense yet, and this is often normal. Much of the final swelling usually happens later in the flowering cycle.
The exact look of a cannabis plant during week 4 depends on several factors. Genetics play a major role. Some cultivars produce long and narrow flowers, while others form shorter and thicker buds. Some plants finish flowering quickly, while others need many more weeks. Plant health, light exposure, root condition, and the general growing environment may also affect how fast flowers develop.
This means that week 4 should not be judged by one picture or one fixed schedule. Two healthy plants may look very different even when they are at the same point in flowering. One plant may already have many visible trichomes, while another may only be starting to produce them. One may have strong flower clusters, while another may still have smaller bud sites. These differences do not always mean that something is wrong.
During this stage, growers often ask if their buds are large enough, if stretching should have stopped, or if yellow leaves are normal. They may also wonder whether they should change watering, feeding, airflow, or plant support. These are common concerns because the flowers are becoming more visible, but they are still not fully formed. It is easy to compare a plant with online photos and assume that it is behind. However, plant development should be measured over time rather than judged from a single day.
Care during week 4 should focus on keeping conditions stable. Sudden changes may place stress on the plant at a time when flowers are becoming more active. Watering habits should remain consistent, and the growing medium should have enough time to dry at a healthy rate. The root area should not stay soaked for long periods, but the plant should also not be allowed to wilt often. Balanced care is usually more helpful than making large adjustments.
Air movement also becomes more important during week 4. As flower sites become thicker, moisture may stay trapped between leaves and branches. A crowded canopy may create damp areas with weak airflow. This may raise the risk of mold and other plant health problems. At the same time, airflow should not be so strong that leaves and flowers are pushed around all day. Gentle and steady movement is usually the goal.
The plant may also begin to produce a stronger smell during this stage. This is linked to the growing flowers and the production of aromatic compounds. Some plants may smell very strong by week 4, while others may have only a mild scent. A stronger smell does not always mean the buds are more mature or more potent. It is only one sign that flower development is moving forward.
Early trichomes may also start to appear on the small leaves around the flowers. These tiny resin glands may look like frost under bright light. Their number often increases as flowering continues. However, visible trichomes in week 4 do not mean the plant is ready for harvest. The flowers still need time to gain size, structure, and maturity.
Week 4 is best understood as a transition point. The plant is no longer in the earliest part of flowering, but it is also not close to the end. The main task during this stage is to support steady growth while watching for problems. Healthy progress may include stronger flower clusters, slower stretching, fresh white pistils, early resin, and a more noticeable aroma.
The following sections explain what cannabis may look like during week 4, how much bud development is normal, and what changes growers often notice. They also cover watering, plant nutrition, airflow, environmental control, pruning concerns, pests, mold, and signs of stress. Understanding these points can make it easier to judge plant progress without making sudden or unnecessary changes.
What Should Cannabis Look Like in Week 4 of Flowering?
Week 4 of flowering is an important stage in the cannabis life cycle. The plant is moving away from rapid vertical growth and placing more energy into flower development. Bud sites become easier to see, white pistils are often more noticeable, and small sugar leaves may begin to form around the flowers. The plant may also develop a stronger smell as resin and terpene production increase.
Cannabis plants do not all look the same during week 4. Genetics, plant health, environmental conditions, and the length of the flowering period can affect development. A fast-flowering cultivar may already have rounded flower clusters, while a longer-flowering cultivar may still have smaller and less compact buds. Growers should judge progress by looking at the whole plant instead of focusing only on bud size.
Expected Plant Structure
During the first few weeks after the flowering stage begins, cannabis plants often experience a period of rapid vertical growth called the flowering stretch. The main stems and side branches may grow quickly as the plant creates more space for future flowers. By week 4, this stretching period often begins to slow down.
A plant that stretched during the first three weeks may now have a taller and wider shape. The distance between the nodes may be greater than it was during the vegetative stage. Nodes are the points where branches, leaves, and flower sites grow from the stem. Some plants develop long spaces between nodes, while others remain short and compact.
The branches may also begin to feel firmer and stronger during week 4. This added strength helps support the flowers as they gain weight later in the flowering stage. However, some branches may still be thin or flexible, especially if the plant stretched quickly. These branches may need support later when the buds become heavier.
The upper canopy should appear active and healthy. New flower growth should be visible near the tips of the branches. Lower areas of the plant may receive less light and may develop more slowly. This is common, especially when the upper leaves create a thick canopy.
Some cannabis plants may continue stretching during week 4. This is more common in cultivars with longer flowering periods. Environmental conditions may also affect the length of the stretch. A plant that continues growing taller is not always unhealthy. The important point is whether it is also producing visible flowers and maintaining healthy leaves.
Visible Flower Formation
Flower development becomes much clearer during week 4. Small groups of flowers form at the nodes and branch tips. These groups may begin joining together to create larger bud sites. The buds are usually not dense or fully developed at this stage, but their basic shape becomes easier to recognize.
White pistils often extend from the developing flowers. Pistils are thin, hair-like structures that are part of the female flower. During week 4, many pistils are usually white, fresh, and pointed outward. They may appear in groups around the bud sites.
The flower clusters may look soft or loose because the calyxes have not finished swelling. Calyxes are small parts of the female flower that help form the structure of the bud. More calyxes may appear and begin stacking close together as flowering continues. This process helps the buds become thicker and more solid later.
Buds may still look small in week 4, especially when compared with mature flowers. This is normal in many cases. A large part of bud swelling usually occurs during the later weeks of flowering. The plant is still building the structure that will support further flower growth.
Growers may also notice small leaves growing from the flower clusters. These are commonly called sugar leaves. They are often narrower than fan leaves and may begin developing a light coating of resin. Sugar leaves become more noticeable as the flowers grow.
Flower sites should generally continue becoming larger over time. Changes may be easier to notice when the plant is observed every few days rather than several times in one day. Taking photographs from the same position can make gradual development easier to track.
Pistil and Leaf Appearance
Pistils are one of the most visible signs of flower development during week 4. Most healthy flowers have many white pistils at this stage. A few pistils may begin turning cream, orange, or brown, but the majority often remain white.
Pistils can change color for several reasons. Natural aging is one cause, but physical contact, heat, dryness, pollination, or plant stress may also cause early darkening. A small number of darker pistils is not always a problem. However, rapid darkening across many flower sites may require closer inspection.
Healthy fan leaves should usually remain green and firm. Fan leaves collect light and help the plant create energy through photosynthesis. They continue playing an important role during flowering, even when the plant is focusing more heavily on bud production.
A small amount of yellowing on older lower leaves may occur as flowering progresses. The plant may move certain nutrients from older leaves to newer growth. However, widespread yellowing during week 4 can point to stress, root problems, nutrient imbalance, or watering issues.
Leaves should not appear constantly limp, twisted, burnt, or heavily spotted. Drooping leaves may be linked to too much or too little water. Very dark green leaves with curled tips can be a sign of excess nutrients. Brown leaf tips may also suggest nutrient stress, heat stress, or salt buildup.
Sugar leaves near the buds may begin showing tiny shiny spots. These spots may be developing trichomes. Trichomes are resin glands that become more visible as the flowers mature. During week 4, the resin layer is often still light, but some cultivars naturally produce more trichomes earlier than others.
The overall plant should appear active and balanced. Flower sites should continue developing, leaves should remain mostly healthy, and the plant should not show a rapid decline. One damaged leaf is usually less important than a pattern affecting many parts of the plant.
During week 4 of flowering, cannabis plants usually begin shifting from rapid stretching toward stronger flower development. The branches may become firmer, the canopy may stop rising as quickly, and flower clusters should become easier to identify. White pistils are often common, small sugar leaves may appear around the buds, and early resin production may become visible.
Buds can still look small, loose, or unfinished during this stage. This does not always mean the plant is developing poorly. Many cultivars complete most of their swelling during the later flowering weeks. Healthy progress is better judged by steady changes in flower size, plant structure, leaf condition, and pistil growth. Careful observation over several days provides a clearer picture than comparing the plant with a single online image.
How Much Should Buds Develop During Week 4?
Week 4 of flowering is an important stage in cannabis flower development. The plant has moved beyond the first signs of flowering, but the buds are still far from mature. During this week, small flower sites often begin joining together. The buds may look fuller than they did during weeks 2 and 3, yet they usually remain light, soft, and narrow.
Growers should not expect large, dense buds at this stage. Most of the final weight develops during the later flowering weeks. Week 4 is mainly a period of building the basic flower structure. The plant produces more calyxes, pistils, sugar leaves, and early resin glands. These parts will continue to expand and become denser as flowering progresses.
The exact rate of development depends on the plant’s genetics, health, environment, and total flowering time. A cultivar that flowers in eight weeks may appear more developed during week 4 than one that takes ten or twelve weeks. This is why growers should evaluate each plant based on its expected growth pattern rather than comparing it with unrelated plants.
Bud Size and Density
Buds during week 4 are usually small to medium in size. They often appear as groups of calyxes covered with white pistils. Flower sites near the top of the plant may begin forming longer bud shapes. Lower sites may remain smaller because they receive less light and have less access to the plant’s energy.
Bud density is also limited during this stage. The flowers may feel loose because the spaces between the calyxes have not filled in yet. This is normal. Cannabis flowers usually gain much of their thickness and weight during the second half of the flowering period.
Some plants produce round flower clusters, while others form long and narrow buds. These differences are often caused by genetics. A naturally loose flower structure does not always mean the plant is unhealthy. Likewise, a compact flower structure does not always mean the final yield will be large.
Environmental conditions can also affect bud development. Plants need stable light, healthy roots, suitable moisture, and balanced nutrition to support steady flower growth. Heat stress, poor airflow, root problems, pests, or major nutrient issues may slow development. However, small buds alone are not enough to prove that a serious problem exists.
The overall plant should be examined. Healthy leaves, active flower growth, upright stems, and fresh white pistils often show that development is continuing. Buds that increase gradually from week to week are usually progressing normally, even if they do not look large during week 4.
Calyx and Pistil Development
Calyxes are small parts that make up much of the cannabis flower. They form around the reproductive areas of the plant and create the main structure of the buds. During week 4, new calyxes often continue appearing at the nodes and branch tips.
As more calyxes develop, they begin stacking closer together. This process gives each flower site a more defined shape. Early in flowering, a site may look like a small group of hairs. By week 4, it may begin to look more like a young bud.
Pistils are the thin, hair-like parts that extend from the calyxes. During week 4, most pistils are often white or pale. They usually point outward and give the buds a soft or fuzzy appearance. Fresh pistil growth is a sign that the flower is still actively developing.
A few pistils may turn orange, brown, or red during this stage. This can happen because of age, physical contact, environmental stress, or normal genetic traits. A small number of dark pistils is usually not a concern. However, a sudden change affecting many pistils may require closer inspection.
Pistil color should not be used alone to measure maturity. The plant can continue producing fresh white pistils for several weeks. Some cultivars also keep producing new pistils late in flowering. Week 4 flowers are normally immature, even when a few pistils have already changed color.
The calyxes are also unlikely to be fully swollen. They may look narrow or pointed instead of round and full. Greater swelling usually happens closer to the final stages of flowering. This later expansion helps increase bud size and density.
Why Buds May Look Small
Small buds are one of the most common concerns during week 4 of flowering. In many cases, the plant is developing normally. Growers may expect rapid changes because the plant has already spent several weeks under a flowering light schedule. However, early flowering includes major internal and structural changes that may not immediately create large flowers.
The first weeks of flowering often focus on stem stretching, branch growth, and the formation of new flower sites. Once stretching slows, more plant energy can support bud expansion. This means noticeable swelling may begin after week 4 rather than before it.
Genetics strongly affect growth speed. Fast-flowering cultivars may develop visible buds sooner. Longer-flowering cultivars may still have small, open flowers during week 4. Both patterns can be normal.
Plant position also affects bud size. Top flowers often grow faster because they receive stronger light. Lower flower sites may stay smaller, especially when shaded by leaves or branches. This does not always mean the whole plant has a problem.
Slow growth becomes more concerning when it appears with other symptoms. These may include severe leaf yellowing, widespread spotting, burnt leaf edges, weak stems, wilting, pest damage, root problems, or flower sites that stop changing for many days. A plant showing several of these signs may be under stress.
Growers should avoid reacting to small buds by making sudden changes. Adding too much fertilizer, changing the watering routine, removing many leaves, or greatly increasing light intensity may create more stress. Plant conditions should be checked carefully before any adjustment is made.
Photos can help track progress. Taking pictures from the same angle every few days makes gradual development easier to notice. Bud growth may seem slow when viewed daily, but the difference often becomes clear when images from different weeks are compared.
During week 4 of flowering, cannabis buds are still building their basic structure. Flower sites may become larger and more defined, but the buds are usually not dense or fully swollen. Calyxes continue stacking, fresh pistils remain visible, and early resin production may begin.
Bud size can vary greatly because of genetics, flowering length, plant health, and growing conditions. Small buds during week 4 are often normal, especially for cultivars with longer flowering periods. The plant should be judged by its overall health and steady progress rather than bud size alone.
Most flower swelling and weight gain occur later in the flowering stage. Careful observation, stable conditions, and patience are more helpful than sudden changes. A healthy plant that continues producing calyxes and fresh pistils is usually moving in the right direction.
What Happens to Trichomes and Resin During Week 4?
Week 4 of flowering is often when cannabis flowers begin to look and smell more developed. Bud sites become easier to see, small sugar leaves form around the flowers, and the plant may begin producing more visible resin. One of the most important changes during this stage is the development of trichomes.
Trichomes are tiny resin glands that grow on the flowers and nearby leaves. They contain many of the compounds that give cannabis its smell, flavor, and other traits. During week 4, these glands may still be small and clear, but their presence often becomes easier to notice. This does not mean that the flowers are mature. It simply shows that the plant has entered a more active stage of flower and resin development.
The amount of resin seen during week 4 can vary greatly. Some cultivars produce visible trichomes early, while others develop heavier resin later. Growing conditions, plant health, genetics, and flowering speed can all affect what the plant looks like. Growers should focus on steady progress instead of comparing one plant with another.
Early Trichome Development
Trichomes often begin forming during the first weeks of flowering, but they usually become more noticeable around week 4. At first, they may look like very small clear dots on the sugar leaves and outer parts of the flower. Under magnification, some trichomes may appear as tiny stalks with rounded heads.
Sugar leaves are the small leaves that grow from the developing buds. They are called sugar leaves because trichomes can make them look as if they have been lightly covered with sugar. During week 4, this coating may still be thin. The flowers are continuing to build their structure, and many more trichomes may form during the later weeks.
Trichomes serve several natural purposes for the plant. Their sticky surface may help protect the flowers from some insects and environmental stress. The strong smell produced by the resin may also help discourage certain animals. For the plant, resin production is part of normal flower development rather than a sign that the flowering cycle is complete.
The location and amount of early resin can differ across the plant. Flowers near strong light may appear to produce more visible trichomes than lower buds. However, too much heat or light can also damage plant tissue. A heavy coating on one part of the plant does not always mean that all buds are developing at the same speed.
Genetics have a major effect on resin production. Some cultivars naturally develop thick trichome coverage, while others may look less frosty even when healthy. Resin amount alone should not be used to judge flower quality or maturity. The overall health and development of the plant should also be considered.
Changes in Aroma
A stronger aroma often develops during week 4 of flowering. As the flowers grow and resin production increases, the plant may release more noticeable scents. These smells come mainly from aromatic compounds called terpenes.
Terpenes are produced in the trichomes. Different combinations of terpenes can create scents that seem fruity, earthy, sweet, spicy, citrus-like, or similar to pine. The exact aroma depends mainly on the cultivar. Even plants of the same type may have small differences in smell because of their growing conditions or individual traits.
The increase in aroma is usually gradual. A plant may have very little smell early in flowering and then become much stronger during weeks 4 and 5. Warmer temperatures may make aromas easier to notice because aromatic compounds can evaporate into the air more quickly. However, high temperatures may also cause some terpenes to break down or disappear faster.
A strong smell does not prove that the flowers are mature or highly potent. Some plants produce powerful aromas early in flowering, while others develop their strongest scent close to harvest. Smell also does not provide a reliable way to measure the amount of cannabinoids in the flowers.
Changes in aroma should still be observed because unusual smells can sometimes signal a problem. Healthy flowers often have a fresh and recognizable plant scent. A musty, sour, rotten, or damp odor may suggest mold, decay, or excess moisture. Any unusual smell should be checked carefully, especially when buds become thicker and hold more moisture inside.
Handling flowers can also release a stronger scent because touching the plant may disturb the trichomes. Too much contact can damage these delicate glands. Flowers should be inspected carefully without squeezing or rubbing them. Gentle observation helps protect the developing resin.
Why Week 4 Is Too Early for Harvest Judgments
Week 4 is usually too early to decide whether cannabis flowers are ready for harvest. Most plants are still actively forming buds, calyxes, pistils, and trichomes during this stage. The flowers may look attractive and smell strong, but they have not usually reached their final size or maturity.
Early trichomes are often clear. As flowering continues, their appearance may change. Many trichomes become cloudy or milky as they mature. Some may later turn amber. These changes normally take place over time, and they should be checked on the flowers rather than only on the nearby leaves.
Sugar leaves may show mature-looking trichomes before the actual buds do. This can lead to an early harvest decision. The trichomes on the flower surface provide a more useful view of maturity than those on the tips of the surrounding leaves.
Pistil color can also be misleading. During week 4, most pistils are often white and extended. A few may begin turning orange or brown because of age, contact, heat, or stress. This does not mean the whole plant is ready. New white pistils may continue appearing as the buds grow.
Flower size is another reason to wait. Much of the swelling and weight gain often happens during the second half of flowering. Calyxes continue to expand, buds become denser, and resin coverage may increase. Harvesting during week 4 would usually stop this development before the flowers reach their full potential.
Flowering times also differ by cultivar. A fast-flowering plant may progress sooner than a long-flowering variety, but week numbers should still be treated as a guide. Plant age, health, light conditions, and stress can change the schedule. Maturity should be judged by several signs together rather than by the calendar alone.
During week 4 of flowering, trichomes and resin often become easier to see on the developing buds and sugar leaves. The plant’s aroma may also grow stronger as more terpenes form inside the resin glands. These changes are normal signs that flower development is moving forward.
What Environmental Conditions Matter During Week 4?
During week 4 of flowering, cannabis plants begin putting more energy into flower growth. Bud sites become easier to see, resin may begin to form, and the smell of the plants may grow stronger. At the same time, the flowers become more sensitive to poor environmental conditions. Heat, moisture, weak airflow, and sudden changes can place stress on the plant.
A stable growing space supports steady flower development. Conditions do not need to be perfect every minute, but they should remain within a safe and consistent range. Large changes can slow growth, weaken the plant, or increase the risk of pests and fungal problems. Careful observation is important during this stage because the buds will continue becoming larger and denser in the following weeks.
Stable Growing Conditions
Consistency is one of the most important parts of plant care during week 4 of flowering. Cannabis plants can adjust to small natural changes, but sudden shifts may cause stress. A sharp rise in heat, a fast drop in humidity, or a major change in lighting can affect how the plant uses water and nutrients.
The growing area should be checked at different times of the day. Conditions may seem normal in the morning but become too warm later when the lights have been running for several hours. Nighttime conditions should also be watched because temperatures may fall quickly after the lights turn off.
Growers should look for patterns instead of reacting to one unusual reading. For example, a brief rise in temperature may not cause serious harm. However, high temperatures that continue each day can dry the growing medium too quickly and increase water loss through the leaves. Long periods of heat may also cause leaves to curl upward or appear thin and stressed.
Cold conditions can also create problems. Low temperatures may slow plant growth and reduce the speed at which the roots take in water and nutrients. A cold growing area combined with wet soil can leave the root zone damp for too long. This may reduce oxygen around the roots and make the plant more likely to show signs of stress.
The goal is to keep the environment steady from one day to the next. Adjustments should be small and gradual when possible. Sudden changes can make it difficult to understand how the plant is responding. Stable conditions also make it easier to identify the true cause of a problem because fewer factors are changing at the same time.
Air Movement and Ventilation
Air movement becomes more important as flowers grow. A flowering plant has many leaves, branches, and bud sites that can block air from moving through the canopy. When air becomes trapped between leaves, moisture can collect in small areas. These damp pockets may increase the risk of mold and other fungal problems.
Gentle air movement helps reduce trapped moisture. It also supports stronger stems and allows fresh air to move around the leaves. The leaves should move slightly, but they should not be pushed hard in one direction. Strong wind can dry the leaves too quickly and may cause wind stress. Signs of wind stress can include curled leaf edges, dry patches, or leaves that feel thin and brittle.
Fans should not blow directly at one part of the plant for long periods. Air should move across the growing area instead of hitting a single branch with full force. The position of the fans may need to change as the plant grows taller or as the canopy becomes thicker.
Ventilation is also important because it removes warm and humid air from the growing area. Fresh air helps prevent heat from building up around the lights and plants. Poor ventilation can cause the temperature and humidity to rise even when fans are moving air inside the space.
The lower and middle parts of the canopy should receive some airflow. Dense leaves can block air from reaching these areas. However, this does not mean that large amounts of healthy foliage should be removed. A better first step is to improve fan placement, increase space between branches, and make sure air can enter and leave the growing area.
Growers should inspect the plants after adjusting airflow. Leaves that remain wet, crowded, or pressed together may need more space. Flower sites should also be checked for areas where moisture could become trapped.
Humidity and Flower Health
Humidity describes the amount of moisture in the air. It becomes more important during flowering because developing buds can hold moisture between their small leaves and flower parts. As buds become thicker, the inside of the flower may stay damp even when the outer surface looks dry.
High humidity can make it harder for moisture to leave the plant and growing area. When warm, damp air remains around the flowers, mold spores may have a better chance to grow. The risk becomes greater when high humidity is combined with weak airflow and crowded branches.
Low humidity can also cause stress. Air that is too dry may increase water loss through the leaves. The plant may need water more often, and the leaf edges may become dry or curled. Very dry conditions can also make it harder to keep the root zone evenly moist.
The goal is to avoid extreme humidity levels and sudden changes. Humidity may rise after watering because moisture evaporates from the growing medium. It may also increase when the lights turn off and the temperature falls. Cooler air cannot hold as much moisture, so the humidity reading may rise during the dark period.
Growers should check humidity during both the light and dark periods. A reading taken only once may not show what is happening throughout the day. It is also helpful to check areas inside the canopy because the air between leaves may be more humid than the air above the plant.
Warning signs of excess moisture include leaves that stay damp, water collecting on surfaces, a musty smell, or soft and discolored areas on flower sites. Small leaves near a bud that suddenly turn brown may also require closer inspection. These signs do not always confirm mold, but they should not be ignored.
Humidity problems should be corrected by improving airflow, ventilation, and general moisture control. The growing space should not be sealed with warm, wet air trapped inside. Water spills should be cleaned, and standing water should not remain in trays or containers.
Week 4 of flowering is a stage when stable environmental conditions become increasingly important. Developing flowers need a consistent space with controlled heat, balanced moisture, and steady airflow. Sudden changes can stress the plant and make it harder to maintain healthy growth.
Gentle air movement helps prevent damp pockets inside the canopy, while proper ventilation removes warm and humid air from the growing area. Humidity should be watched during both the light and dark periods because it can change as temperatures rise and fall. Growers should also inspect flowers and leaves for signs of trapped moisture, stress, or poor airflow.
How Should Watering Change During Week 4?
Watering during week 4 of flowering requires careful attention because the plant is moving into a more active stage of bud development. The plant may still use a large amount of water, but its needs can begin to change as vertical growth slows. Some plants drink more because they have a larger root system and more leaves. Others may use water more slowly if the temperature drops, humidity rises, or growth becomes less active.
There is no single watering schedule that works for every cannabis plant. Water use depends on plant size, container size, growing medium, airflow, temperature, humidity, and root health. A large plant in a small fabric pot may dry out quickly. A smaller plant in a large plastic container may stay wet for much longer. This is why growers should check the growing medium before watering instead of following a fixed calendar.
Proper watering helps roots take in oxygen and nutrients. It also supports leaf function, stem strength, and flower development. Too much or too little water can place stress on the plant. During week 4, this stress may slow growth and affect the condition of developing buds.
Changes in Water Demand
Water demand may change during week 4 because the plant is no longer focused mainly on stretching. During the first weeks of flowering, cannabis plants often grow taller very quickly. This rapid growth can increase water use. Once stretching begins to slow, the plant may direct more energy toward building flowers. However, this does not always mean that it will need less water.
A healthy flowering plant may still drink heavily because it has more leaf area and a larger root system than it did during vegetative growth. Leaves release moisture into the air through a process called transpiration. Larger plants with many healthy leaves may lose water faster, especially under strong lighting or warm conditions.
Temperature has a major effect on watering needs. Warm air and strong light can cause the growing medium to dry more quickly. Cooler air may slow water use. Humidity also plays a role. Low humidity can increase moisture loss from leaves, while high humidity can slow it down.
Container type can also affect drying speed. Fabric pots allow more air to reach the root zone and often dry faster than plastic containers. Small pots usually need water more often than large pots. Growing media with good drainage, such as mixes containing perlite, may also dry faster than heavy or compact soil.
The best method is to observe the plant and check the growing medium. The top layer may feel dry while the lower part is still wet. Lifting the container can help show how much moisture remains. A freshly watered pot feels much heavier than a dry one. Learning the normal weight of the container can make watering decisions easier.
Watering should be based on current conditions. A plant that needed water every two days last week may need it more or less often this week. Changes in weather, airflow, plant size, or lighting can affect the drying rate.
Signs of Too Much Water
Too much water is one of the most common problems during flowering. Overwatering usually happens when the growing medium is watered again before it has had enough time to dry. The problem is not always the amount of water given at one time. It is often caused by watering too frequently.
Roots need both moisture and oxygen. When the growing medium stays wet for too long, the spaces around the roots fill with water. This reduces the amount of oxygen available. Roots that do not receive enough oxygen may become weak and less able to absorb nutrients.
An overwatered plant may have drooping leaves, but the leaves often look thick or firm instead of dry. The growing medium may remain wet for several days. Growth may slow, and the plant may appear tired even though it has enough water. Leaves may also become yellow if root problems continue.
Poor drainage can make overwatering worse. Containers should have open drainage holes so extra water can escape. Heavy or compact soil may hold too much moisture and prevent air from reaching the roots. Water that collects at the bottom of a tray should not be left around the container for long periods.
A strong or unpleasant smell from the growing medium may point to poor root conditions. Healthy roots usually need a clean and well-aerated environment. Wet, stagnant media can support harmful organisms and root disease.
When overwatering is suspected, the grower should allow the medium more time to dry before watering again. It is important not to make several sudden changes at once. The plant may need time to recover as oxygen returns to the root zone.
Signs of Too Little Water
Underwatering occurs when the plant does not receive enough moisture to support its normal functions. A dry plant may develop limp, thin, or weak-looking leaves. The leaves may hang downward, and the stems may lose firmness. The growing medium may pull away from the sides of the container when it becomes extremely dry.
A thirsty plant may improve soon after proper watering, but repeated severe drying can create ongoing stress. Flowering plants need steady access to water to move nutrients through their tissues. When the root zone becomes too dry, nutrient uptake can slow. This may affect leaves, stems, and developing flowers.
Dry conditions can also damage fine roots. These small roots help absorb water and nutrients. When they die from repeated drought stress, the plant may take longer to recover. Sudden wilting may also weaken branches and reduce the plant’s ability to support heavier buds later in flowering.
Water should be applied slowly and evenly. Very dry soil may repel water at first, causing it to run down the sides of the container. Applying a small amount, waiting briefly, and then continuing can help the medium absorb moisture more evenly.
It is also important to avoid overcorrecting. A dry plant should be watered properly, but flooding the container again and again can quickly turn an underwatering problem into an overwatering problem. The goal is to return the root zone to a balanced moisture level.
Watering during week 4 of flowering should be based on the condition of the plant and growing medium, not on a strict schedule. Water demand may rise or fall depending on plant size, container type, temperature, humidity, airflow, and root health. Healthy roots need moisture, oxygen, and good drainage.
Overwatering can cause drooping, slow growth, yellowing, and poor root-zone oxygen. Underwatering can lead to limp leaves, dry soil, weak stems, and reduced nutrient movement. Careful observation is the best way to avoid both problems. Checking container weight, soil moisture, drainage, and leaf condition can help growers make better watering decisions. Stable and balanced watering supports healthy plant growth and steady bud development during week 4 of flowering.
What Nutrient Changes Occur in Week 4 of Flowering?
Week 4 of flowering is an important stage in cannabis growth. The plant is no longer focused mainly on producing new stems and leaves. More of its energy is now being used to form flowers, support bud sites, and maintain healthy roots and leaves. Because of this shift, the plant’s nutrient needs may begin to change.
This does not mean the plant suddenly stops needing the nutrients used during vegetative growth. Cannabis still needs a balanced supply of essential elements throughout flowering. The main goal during week 4 is to keep the plant stable and avoid sudden changes that may cause stress. Healthy flower development depends on proper nutrition, but adding more nutrients than the plant can use may lead to damage.
Shifting Plant Needs
During vegetative growth, cannabis uses a large amount of nitrogen to produce green leaves, stems, and branches. Once flowering begins, the plant starts using more phosphorus and potassium to support flower formation, energy transfer, water movement, and overall plant strength. By week 4, this shift is usually easier to see because the buds are becoming more defined and the stretch period may be slowing down.
Nitrogen is still needed during this stage. It supports chlorophyll production and helps the plant continue photosynthesis. Photosynthesis allows the leaves to turn light into energy, which is then used for flower growth. Removing too much nitrogen too early may cause leaves to turn yellow before the plant is ready. When many healthy leaves are lost, the plant may have less energy available for continued development.
Phosphorus plays a role in energy movement, root health, and flower production. Potassium helps control water movement, supports enzyme activity, and improves the plant’s ability to handle stress. Calcium, magnesium, sulfur, and other micronutrients also remain important. These nutrients support cell structure, chlorophyll production, and many basic plant functions.
A flowering plant needs balance rather than extreme amounts of one nutrient. Products labeled for flowering may contain different nutrient ratios, but stronger feeding does not always lead to faster growth. Plant size, genetics, root health, growing medium, water quality, and environmental conditions all affect how much nutrition a plant can use.
Changes should be made slowly. A sudden increase in feeding strength may shock the roots or create a buildup of unused minerals. A gradual approach makes it easier to watch the plant’s response and correct problems before they become serious.
Recognizing Possible Nutrient Problems
Nutrient problems often appear first on the leaves, but leaf symptoms can be difficult to identify. Several different issues may cause similar changes. Yellow leaves, brown spots, burnt edges, pale growth, and curled tips may be linked to nutrient shortages, excess feeding, watering problems, root stress, or unsuitable pH.
A true nutrient deficiency happens when the plant does not receive enough of an essential nutrient or cannot absorb it properly. The location of the symptoms can offer clues. Some nutrient problems begin on older leaves near the lower part of the plant. Others appear first on new leaves near the top. The color, shape, and spread of the damage should all be considered.
A small amount of yellowing on older lower leaves may occur as flowering continues, especially later in the cycle. However, rapid yellowing across the entire plant during week 4 may suggest a larger issue. Pale leaves may indicate low nitrogen, poor root function, or a problem with nutrient absorption. Brown spots may be linked to calcium problems, leaf damage, pests, or irregular watering. Yellowing between green leaf veins may suggest magnesium stress, but it can also be caused by root-zone problems.
Leaf tip damage is another common warning sign. Brown or dry tips often appear when nutrient levels are too strong. This is sometimes called nutrient burn. Mild tip damage may not destroy the crop, but spreading damage can reduce leaf function and weaken the plant.
The whole plant should be checked before a cause is chosen. Look at the lower, middle, and upper leaves. Check whether the damage is spreading quickly or staying in one area. Consider recent changes in watering, feeding, temperature, and light. A problem that starts soon after a major feeding change may be connected to that change.
Root-zone pH also affects nutrient absorption. Nutrients may be present in the growing medium but unavailable to the roots when the pH is outside a suitable range. This condition is often called nutrient lockout. Adding more nutrients during lockout may make the problem worse because the plant still cannot use them.
Avoiding Overfeeding
Overfeeding is one of the most common mistakes during flowering. Growers may assume that larger amounts of nutrients will produce larger buds. Cannabis plants can only absorb and use a limited amount of nutrition. When the root zone contains more minerals than the plant needs, salts may collect in the growing medium and interfere with water uptake.
Early signs of overfeeding often include dark green leaves, dry brown tips, downward-curving leaf ends, and slow growth. Leaves may feel thick or stiff. As the problem becomes worse, the edges may burn, roots may become stressed, and flower development may slow.
Too much nitrogen during flowering may cause very dark leaves and excessive leaf growth. The plant may continue producing soft green tissue instead of focusing fully on flower development. High nitrogen levels may also delay normal leaf fading later in flowering.
Frequent feeding changes can make diagnosis difficult. Adding one product, then another, may create a mixture that is stronger than expected. Different products may contain some of the same nutrients. This can lead to accidental overfeeding even when each product is used in a small amount.
The plant’s condition should guide any adjustment. A healthy plant with steady growth may not need extra nutrients. It is often safer to maintain a stable routine than to make large changes based only on bud size. Buds are still developing during week 4, and much of their final swelling may happen later.
Water quality should also be considered. Some water sources already contain minerals such as calcium, magnesium, or dissolved salts. These minerals add to the total nutrient level around the roots. The type of growing medium also affects feeding. Soil may store nutrients for a longer time, while other media may require more frequent but carefully controlled feeding.
Week 4 of flowering marks a clear shift toward bud development, but cannabis plants still need balanced nutrition. Nitrogen remains important for healthy leaves and photosynthesis, while phosphorus, potassium, calcium, magnesium, and other nutrients support flowers, roots, water movement, and plant strength.
Nutrient problems should be judged by looking at the entire plant and reviewing recent changes. Yellowing, spots, burnt tips, and curled leaves may have several possible causes. Feeding more nutrients without identifying the real issue may increase plant stress.
A steady and careful approach is best during this stage. Avoid sudden increases, repeated product changes, and excessive feeding. Healthy plants usually respond better to stable conditions than to aggressive nutrient use. Careful observation during week 4 can help protect leaf health and support continued flower development.
Should Plants Be Pruned or Defoliated During Week 4?
Week 4 of flowering is a sensitive stage for cannabis plants. Buds are forming, flower sites are becoming larger, and the plant is shifting more of its energy toward reproduction. At this point, pruning and defoliation should be handled with care. Removing a small amount of damaged or crowded growth may help airflow and light reach important areas. However, removing too many leaves or branches can slow the plant down and reduce its ability to support developing flowers.
The main goal during week 4 is not to reshape the entire plant. The goal is to keep the canopy healthy, open enough for air to move, and strong enough to carry heavier buds later in flowering. Any cutting or leaf removal should have a clear reason. Healthy leaves should not be removed simply because they are large or because they block a small amount of light.
Evaluating the Existing Canopy
The canopy is the upper layer of leaves, branches, and flowers that receives most of the light. A healthy canopy should allow light to reach several flower sites while still keeping enough leaves for strong photosynthesis. Photosynthesis is the process that allows the plant to use light to make energy. This energy supports flower growth, root health, and normal plant functions.
A very dense canopy may cause problems during week 4. Large leaves can overlap, branches may press against each other, and air may become trapped between flower sites. Poor airflow can create warm and humid pockets inside the plant. These areas may increase the risk of mold, mildew, and pest activity as the buds become thicker.
Before removing any foliage, the entire plant should be inspected. Leaves that are yellow, badly damaged, dead, or touching the growing medium may be suitable for removal. Leaves that are folded tightly against flower clusters may also need attention if they block airflow. However, healthy green leaves still play an important role, even when they appear large.
It is also useful to look at how light passes through the canopy. Some lower flower sites may receive little light because they are deeply shaded. Removing one or two carefully selected leaves may improve light exposure. Still, removing many leaves to expose every flower site is usually unnecessary. Lower flowers naturally receive less light than flowers at the top of the plant.
Leaf position may sometimes be changed without cutting. A large leaf can be gently moved or tucked behind a branch. This can open a flower site while keeping the leaf available for energy production. Leaf tucking often causes less stress than full removal.
Risks of Heavy Defoliation
Heavy defoliation means removing a large number of leaves over a short period. This practice can place major stress on a cannabis plant during flowering. Leaves are not only sources of energy. They also store nutrients and help control water movement through the plant.
When too many leaves are removed, the plant may need time to recover. Energy that could have supported flower growth may instead be used to repair damaged tissue and adjust to the sudden loss of foliage. This can slow bud development, especially if the plant is already dealing with heat, pests, poor watering, nutrient stress, or weak roots.
Heavy leaf removal may also expose flowers and stems to stronger light than they received before. A flower site that was shaded may suddenly receive intense light and heat. This quick change can lead to stress, bleaching, or dry plant tissue. The remaining leaves may also lose water faster because the canopy structure has changed.
Fan leaves are especially important during flowering. These are the larger leaves attached to the main branches. They collect light and help support the whole plant. Some fan leaves may naturally turn yellow as flowering continues, but widespread yellowing in week 4 may point to a problem with roots, watering, nutrition, or the growing environment.
Healthy fan leaves should not be removed only because they are large. A better approach is to remove only what is clearly necessary. A leaf may be removed if it is dead, badly damaged, heavily infected, or creating a serious airflow problem. Small changes spread over time are usually less stressful than one major defoliation session.
Large pruning cuts should also be avoided during week 4 unless a branch is broken, diseased, or clearly unable to recover. Cutting healthy branches at this stage removes established flower sites and creates wounds that the plant must heal.
Supporting Heavy Branches
As flowers continue to grow, branches may begin to bend under their weight. This may not be a major issue in early week 4, but it is a good time to check whether support will be needed later. Early support can prevent branches from snapping during the final weeks of flowering.
Support should hold branches in a natural position without crushing stems or pressing against flowers. Soft plant ties, stakes, netting, or support frames may be used to keep branches upright. Any tie placed around a branch should remain loose enough to allow the stem to grow thicker.
Thin wire, rough string, or tight plastic ties can cut into the stem. This may damage plant tissue and limit the movement of water and nutrients. Soft materials are safer because they reduce pressure on the branch surface.
Branches should be moved slowly. Stems can become less flexible during flowering, especially near large flower clusters. Sudden bending may split a branch or damage the connection between the branch and the main stem. A damaged branch may sometimes survive, but repair takes energy and can create an entry point for disease.
Support systems should also improve space between branches. When heavy branches lean against each other, flowers may remain pressed together. This can reduce airflow and trap moisture. Keeping branches separated helps light and air reach more parts of the canopy.
Support materials should be checked often. As the plant grows, ties may become too tight, and stakes may shift. Nets can also press against flower sites if branches are not placed carefully. Small adjustments can prevent damage and help the plant maintain an even shape.
Pruning and defoliation during week 4 of flowering should be limited and careful. A few damaged leaves or crowded areas may be cleaned up to improve airflow and light access. However, healthy fan leaves should usually remain because they provide energy for developing flowers.
Heavy defoliation can cause stress, slow growth, and expose flowers to sudden changes in light and heat. Major branch removal should also be avoided unless there is a clear health or safety reason. Leaf tucking and small adjustments are often better than cutting.
Branch support becomes more important as flower weight increases. Soft ties, stakes, or netting can help prevent broken stems and keep flowers separated. The best approach in week 4 is to protect healthy growth, reduce serious crowding, and avoid sudden changes that could interrupt bud development.
What Problems Should Growers Watch for in Week 4?
Week 4 of flowering is an important time for checking plant health. Flowers are becoming thicker, leaves are packed more closely together, and the plant may produce a stronger smell. These changes are normal, but they can also make some problems harder to notice.
Pests may hide under leaves or inside dense growth. Moisture can remain trapped between flowers. Plant stress may also become more serious because the plant is using much of its energy to form flowers. A small issue can spread if it is not noticed early.
Regular inspection is useful during this stage. The whole plant should be checked, including the lower leaves, branch joints, stems, and flower sites. It is also important to look for patterns. One damaged leaf may not show a major problem, but damage that spreads across several leaves often needs closer attention.
Pest Activity
Pests can affect leaves, stems, and developing flowers. Some pests are very small and may not be easy to see without close inspection. Their damage may appear before the insects themselves become visible.
Tiny pale dots on leaves can be an early warning sign. These marks may appear when pests feed on plant tissue. A leaf may slowly lose its healthy green color and develop a dry or speckled look. Fine webbing between leaves or stems can also suggest pest activity.
Other pests may leave sticky material on leaves. Some may create winding lines, small holes, or rough patches. Dark dots on the underside of leaves may be insects, waste, or damaged tissue. Leaves may also curl, twist, or become weak when pests continue feeding.
The undersides of leaves should receive special attention because many pests avoid open light. Branch joints and crowded areas should also be checked. These places can provide shelter and may allow a pest problem to grow before it becomes obvious.
It is important to avoid assuming that every spot is caused by insects. Nutrient stress, water problems, physical damage, and disease can produce similar signs. The entire plant should be examined before reaching a conclusion.
A problem is more concerning when new damage appears each day. Increasing webbing, spreading leaf marks, visible insects, and weakening growth may show that pest activity is becoming more serious. Plants with heavy pest damage may require help from a qualified local horticulture professional, especially where laws control which pest treatments may be used.
Mold and Fungal Warning Signs
Developing flowers can hold moisture, especially when plant growth is thick. Poor air movement may allow damp areas to remain hidden between leaves and flower parts. These conditions may increase the risk of mold or fungal growth.
A musty or sour smell can be one warning sign. Healthy plant material usually has a fresh or natural plant scent. An unusual damp odor may suggest that tissue is beginning to break down.
Color changes can also provide clues. Gray, white, brown, or black patches may require closer inspection. A soft or wet-looking area inside a flower is not considered normal. Leaves near the affected area may turn brown, dry suddenly, or pull away from the stem with little effort.
Some fungal problems appear as a white, dusty layer on leaves. This layer may look like flour or powder. It should not be confused with normal resin, which usually appears as tiny shiny glands rather than a flat powdery coating.
Mold may begin inside dense flowers, where it is difficult to see. An outer leaf may suddenly die even while nearby leaves remain green. This can sometimes indicate damaged tissue deeper in the flower.
Suspected mold should be taken seriously. Moldy plant material should not be handled more than necessary or used for consumption. Disturbing it may release spores into the air. People with asthma, allergies, or weak immune systems may face greater health risks from exposure.
The growing area should also be checked for water leaks, condensation, damp surfaces, and blocked air paths. However, strong air should not blow directly against the plant for long periods because this may dry or damage leaves. The goal is a stable environment without trapped moisture.
Plant Stress and Pollination Concerns
Flowering plants may show stress through changes in their leaves, stems, or flowers. Stress may come from heat, cold, damaged roots, irregular watering, harsh light, physical injury, or sudden environmental changes.
Drooping leaves can have several possible causes. A dry root area may cause leaves to hang down and feel thin. Constantly wet conditions may also cause drooping, but the leaves may feel heavy or firm. This is why the root area and recent watering pattern should be considered before making changes.
Severe heat may cause leaf edges to curl upward. Leaves closest to strong light may become pale, dry, or damaged. Cold conditions may slow growth and cause color changes. A sudden drop in flower development may also show that the plant is under stress.
Broken branches and bent stems should be checked because developing flowers add weight. Weak branches may split where they connect to the main stem. Support should not press tightly against stems because this can restrict growth or damage plant tissue.
Flowering plants should also be inspected for unusual reproductive growth. Cannabis plants may produce male structures when genetics or stress affect flower development. These structures may release pollen, which can lead to seed formation.
Pollination changes how the plant uses its energy. After pollination, the plant begins placing more resources into seed development. Flowers may stop developing in the expected way, and seeds may become visible later.
Pollen can move through air, clothing, tools, and contact between plants. Careful inspection helps identify unusual flower structures before pollen spreads. However, people should avoid handling or cultivating cannabis where local laws do not permit it.
Week 4 is a key time for watching pests, mold, plant stress, and possible pollination. Pale dots, webbing, sticky residue, unusual leaf damage, or visible insects may point to a pest issue. Musty smells, soft flower tissue, sudden leaf death, and gray or white growth may suggest mold or fungus.
Stress may appear as drooping, curling, fading, broken stems, or slowed flower development. Unusual reproductive structures may also require attention because they can release pollen and lead to seed production.
How Can Growers Tell Whether Week 4 Progress Is Normal?
Week 4 of flowering can look very different from one cannabis plant to another. Some plants may already have clear bud clusters, strong smells, and visible resin. Other plants may still have smaller flowers and many white pistils. This difference does not always mean that something is wrong. Genetics, plant size, growing conditions, and the length of the flowering cycle can all affect how a plant looks at this stage.
The best way to judge progress is to look at the whole plant over time. One photo or one day of growth does not give enough information. Growers should watch for steady changes in flower size, plant structure, leaf condition, and overall health. A plant that continues to develop each week is often progressing normally, even if it does not look the same as another plant.
Comparing New Growth Over Time
Changes during flowering are easier to notice when the plant is observed over several days. Daily growth may seem slow because flower development happens in small steps. Buds may become slightly wider, pistils may increase, and flower sites may begin joining together. These changes can be hard to see when the plant is checked many times a day.
Taking clear photos every few days can help. Photos should be taken from the same angle and under similar lighting. This makes it easier to compare bud shape, plant height, and leaf condition. A photo record can show whether flower clusters are growing, whether stretching is slowing, and whether any leaf problems are spreading.
Written notes can also be useful. Notes may include the date, plant height, watering pattern, visible leaf changes, and the condition of the flowers. This record can help separate normal development from a problem. For example, one yellow leaf near the bottom of the plant may not be serious. However, notes may show that yellowing is spreading higher each day. That pattern deserves more attention.
Growers should compare the plant with its own earlier condition. Comparing it with random photos online may cause confusion. Online images may show different cultivars, stronger lighting, older plants, or a different flowering week. Some images may also be taken under special lighting that makes the flowers appear larger or more covered in resin.
The strongest sign of normal progress is continued development. Flower sites should slowly become more defined. Pistils should continue growing from the flowers. Buds may begin stacking along branches. The plant should also remain firm and able to hold its leaves. Minor changes are common, but the plant should not appear weaker each day.
Normal Variation Between Cultivars
Cannabis cultivars do not all flower at the same speed. Some cultivars may finish flowering in a shorter period, while others need several extra weeks. A fast-flowering cultivar may have thick bud clusters by week 4. A longer-flowering cultivar may still have narrow flowers with many fresh pistils.
Flower shape can also vary. Some plants form dense, rounded buds early. Others create longer and more open flower structures. Open flowers are not always a sign of poor development. Their shape may be linked to genetics. Plant structure, temperature, light exposure, and airflow may also affect bud density.
Pistil growth differs between plants as well. Many healthy plants have mostly white pistils during week 4. Some may show a few darker or curled pistils. A small number of dark pistils can be normal, especially if they were touched, damaged, or exposed to strong airflow. A sudden change across many flower sites may require closer inspection.
Aroma is another trait that varies. Some plants produce a strong smell early in flowering. Others develop a stronger scent later. Weak smell during week 4 does not automatically mean weak flowers. Terpene production depends on genetics and the stage of development.
Resin coverage can also appear at different times. Some cultivars develop visible trichomes on sugar leaves early. Other plants may not look very frosty until later flowering. Trichomes that appear in week 4 are still developing. Their presence does not mean that the flowers are mature.
Broad labels such as indica, sativa, hybrid, or autoflower do not always predict exact week 4 growth. Plants within the same category may still have different flowering speeds and structures. Breeder flowering estimates can provide a general guide, but they should not be treated as an exact schedule. The real flowering time may change based on the growing environment and the individual plant.
When a Problem Needs Attention
Normal variation should not be confused with serious plant stress. Growers should look for patterns that become worse quickly. Rapid yellowing, spreading brown spots, severe drooping, and stopped flower growth may signal a problem. A plant that loses strength each day needs closer inspection.
Widespread leaf discoloration is more concerning than one damaged leaf. Lower leaves may sometimes fade as the plant moves through flowering, but sudden yellowing across the whole plant may point to root stress, watering problems, or poor nutrient balance. Dark green leaves with burnt tips may suggest excessive feeding. Pale leaves with weak growth may have several possible causes and should not be diagnosed from color alone.
Severe wilting also needs attention. Leaves that droop for a short time before watering may recover. Leaves that remain limp after the growing medium has been checked may signal root damage, poor drainage, heat stress, or another issue. The condition of the stems, soil, and roots should be considered together.
Flower damage is especially important during week 4 because buds are becoming thicker. Brown, gray, soft, or dying areas inside a flower may be a warning sign of mold or decay. A musty smell is also unusual. Normal cannabis flowers may have a strong scent, but they should not smell damp or rotten.
Pests may cause small spots, webbing, curled leaves, sticky residue, or visible insects. The undersides of leaves and the spaces around flower sites should be checked. A small pest problem can become severe during flowering because dense growth offers places to hide.
Stopped development may also be a concern. A plant may have a few slow days after stress, but flowers should not remain unchanged for a long period. Light problems, root issues, severe nutrient stress, or environmental changes may slow growth. Before making corrections, growers should review recent changes to watering, feeding, temperature, and light.
Sudden action can make the problem worse. Adding more nutrients, removing many leaves, or changing several conditions at once can place extra stress on the plant. It is safer to identify the most likely cause and make one careful adjustment at a time.
Week 4 progress should be judged by steady change, not by one photo or a fixed image of what a plant should look like. Healthy plants may differ in bud size, pistil growth, aroma, resin coverage, and flowering speed. These differences are often linked to genetics and growing conditions.
Regular photos and notes can make progress easier to track. Growers should compare each plant with its earlier growth instead of comparing it with unrelated plants. Normal progress usually includes continued flower formation, healthy stems, active pistil growth, and stable leaf condition.
Problems need attention when changes spread quickly or affect the whole plant. Severe wilting, damaged flowers, stopped development, widespread discoloration, mold signs, or pest activity should be inspected carefully. Patient observation and small, informed changes are safer than sudden corrections. Week 4 is still part of active flower development, so plants need time, stability, and close monitoring as they move into the later flowering stage.
Conclusion: Understanding Week 4 of Flowering
Week 4 of flowering is an important stage in the cannabis growth cycle. During this time, the plant is moving away from rapid stem and leaf growth and placing more energy into flower production. Bud sites become easier to see, white pistils are often more noticeable, and small flower clusters begin to take a clearer shape. The plant may also produce a stronger smell as resin and aromatic compounds start to develop. These changes show that flowering is moving forward, but the buds are still far from fully mature.
Many growers become concerned when buds still look small during week 4. In most cases, this is normal. The flowers are still building their basic structure. Calyxes are forming, pistils are spreading, and separate flower sites may begin to join together. Much of the final swelling and weight gain usually happens later in the flowering period. Bud size at this stage can also vary based on genetics, plant health, environment, and the total length of the flowering cycle. A cultivar that needs ten weeks to finish may look less developed in week 4 than one that finishes in seven or eight weeks.
Stretching may also begin to slow during this stage. Many plants grow quickly during the first two or three weeks after flowering begins. By week 4, branches may stop gaining height as fast as before. The plant then directs more of its energy toward flowers. However, some cultivars continue stretching for a longer time. A plant that is still growing upward is not always a sign of a problem. The overall pattern matters more than one single change.
Stable conditions are especially important as flowers become larger. Sudden changes in temperature, moisture, lighting, or airflow may place stress on the plant. Consistent care allows it to continue developing without using extra energy to recover from avoidable problems. Air should move gently around the canopy so that moisture does not remain trapped between leaves and flower sites. Dense areas should be checked often because limited airflow may increase the risk of mold and fungal growth.
Watering should be based on the needs of the plant and the condition of the growing medium. A fixed schedule may not work well because water use can change from day to day. Plant size, container size, room conditions, and root health all affect how quickly the medium dries. Constantly wet soil or another growing medium may limit oxygen around the roots. A medium that becomes extremely dry may also cause stress. The goal is to avoid repeated extremes and keep the root area in a steady condition.
Balanced nutrition also remains important in week 4. Flowering plants may need different nutrient ratios than they used during vegetative growth, but they still need a complete supply of essential elements. Adding too much fertilizer does not guarantee larger buds. Excess nutrients may cause burnt leaf tips, dark green leaves, curling, or slowed growth. Too little nutrition may lead to pale leaves, spots, or early yellowing. Since many plant problems look similar, growers should examine the full plant before making a major change.
Healthy fan leaves still play an important role at this stage. They collect light and help produce the energy needed for flower growth. Heavy defoliation may reduce the plant’s ability to support developing buds. Removing a small number of damaged or unhealthy leaves may be reasonable, but aggressive pruning can create extra stress. Branches may also need gentle support as flowers gain weight. Supports should hold branches in place without cutting into stems or crushing developing buds.
Routine inspection is one of the most useful habits during week 4. Leaves, stems, and flowers should be checked for pests, unusual spots, webbing, damaged tissue, or signs of excess moisture. Small problems are easier to address before they spread across the plant. Growers should also watch for rapid yellowing, severe drooping, stalled flower development, or unusual growth around the buds. One damaged leaf may not be serious, but a pattern that spreads quickly deserves closer attention.
Trichomes and resin may start becoming more visible during week 4, especially on sugar leaves and near flower surfaces. The smell may also become stronger. These signs do not mean the plant is ready for harvest. The flowers still need more time to gain size, density, and maturity. White pistils, early resin, and a strong aroma are normal signs of development, not final harvest signals.
Progress should be judged over several days rather than from one quick look. Photos and simple notes can make it easier to track changes in bud size, leaf color, branch support, and overall plant health. It is also better to compare a plant with its own earlier growth than with unrelated pictures online. Different cultivars can have very different flower shapes, colors, resin levels, and growth rates.
Week 4 is mainly a time for patience, careful observation, and steady care. The plant is building the foundation for the later flowering stage. Buds may still appear small, but important development is happening inside and around each flower site. Stable conditions, balanced nutrition, proper watering, gentle airflow, and regular inspection can help support healthy progress. Avoiding sudden changes is often more useful than trying to force faster growth. A healthy plant that continues to develop at a steady rate is usually on the right path toward stronger and more mature flowers.
Research Citations
Ahrens, A., Westmoreland, F. M., & Bugbee, B. (2024). Moving away from 12:12: The effect of photoperiod on biomass yield and cannabinoids in medicinal cannabis. Plants, 13(3), 433. https://doi.org/10.3390/plants13030433
Dang, M. C. L., Muthu Arachchige, N., & Campbell, L. G. (2022). Optimizing photoperiod switch to maximize floral biomass and cannabinoid yield in Cannabis sativa L.: A meta-analytic quantile regression approach. Frontiers in Plant Science, 12, 797425. https://doi.org/10.3389/fpls.2021.797425
Hesami, M., Pepe, M., & Jones, A. M. P. (2023). Morphological characterization of Cannabis sativa L. throughout its complete life cycle. Plants, 12(20), 3646. https://doi.org/10.3390/plants12203646
Konvalina, P., Capouchová, I., Hlásná Čepková, P., Procházka, P., & Škeříková, M. (2024). Effect of light intensity and two different nutrient solutions on the yield of flowers and cannabinoids in Cannabis sativa L. grown in a controlled environment. Agronomy, 14(12), 2960. https://doi.org/10.3390/agronomy14122960
Morello, V., Krug, B. A., Palmer, C. L., & Shukla, M. R. (2022). Light quality impacts vertical growth rate, phytochemical yield, and cannabinoid production efficiency in Cannabis sativa. Plants, 11(21), 2982. https://doi.org/10.3390/plants11212982
Naim-Feil, E., Breen, E. J., Pembleton, L. W., Spooner, L. E., Spangenberg, G. C., & Cogan, N. O. I. (2022). Empirical evaluation of inflorescences’ morphological attributes for yield optimization of medicinal cannabis cultivars. Frontiers in Plant Science, 13, 858519. https://doi.org/10.3389/fpls.2022.858519
Punja, Z. K., & Holmes, J. E. (2020). Hermaphroditism in marijuana (Cannabis sativa L.) inflorescences: Impact on floral morphology, seed formation, progeny sex ratios, and genetic variation. Frontiers in Plant Science, 11, 718. https://doi.org/10.3389/fpls.2020.00718
Rodriguez-Morrison, V., Llewellyn, D., & Zheng, Y. (2021). Cannabis inflorescence yield and cannabinoid concentration are not increased with exposure to short-wavelength ultraviolet-B radiation. Frontiers in Plant Science, 12, 725078. https://doi.org/10.3389/fpls.2021.725078
Spitzer-Rimon, B., Duchin, S., Bernstein, N., & Kamenetsky, R. (2019). Architecture and florogenesis in female Cannabis sativa plants. Frontiers in Plant Science, 10, 350. https://doi.org/10.3389/fpls.2019.00350
Zhang, M., Anderson, S. L., Brym, Z. T., & Pearson, B. J. (2021). Photoperiodic flowering response of essential oil, grain, and fiber hemp accessions. Frontiers in Plant Science, 12, 694153. https://doi.org/10.3389/fpls.2021.694153
Questions and Answers
Q1: What happens during week 4 of flowering?
During week 4, cannabis plants focus more energy on bud development. Bud sites become larger, pistils remain visible, and resin production may begin to increase.
Q2: How big should buds be in week 4 of flowering?
Bud size varies by strain, lighting, plant health, and growing conditions. Most buds are still developing and have not reached their final size or density.
Q3: Do cannabis plants still stretch in week 4 of flowering?
Most plants have finished or nearly finished their main flowering stretch by week 4. Some strains may continue to gain a small amount of height.
Q4: What should cannabis buds look like in week 4?
Buds usually appear as clusters of white pistils surrounded by small sugar leaves. The flowers may look fuller, but they are normally still soft and airy.
Q5: How often should cannabis plants be watered during week 4?
Plants should be watered when the growing medium has partly dried. Watering frequency depends on pot size, temperature, humidity, plant size, and the type of growing medium.
Q6: What nutrients do cannabis plants need in week 4 of flowering?
Plants need flowering nutrients with enough phosphorus and potassium, along with moderate nitrogen and essential micronutrients. Overfeeding should be avoided because it can damage the roots and leaves.
Q7: What temperature is best during week 4 of flowering?
A daytime temperature of about 68°F to 80°F, or 20°C to 27°C, is often suitable. Night temperatures can be slightly lower, but sudden changes should be avoided.
Q8: What humidity level is best in week 4 of flowering?
Relative humidity is often kept around 40% to 50% during this stage. Lower humidity and good airflow can reduce the risk of mold as buds become thicker.
Q9: Should leaves be removed during week 4 of flowering?
Only damaged, yellow, or heavily shaded leaves should be removed when necessary. Heavy defoliation may stress the plant and slow bud development.
Q10: Why are leaves turning yellow during week 4 of flowering?
Yellow leaves may result from nutrient problems, incorrect pH, overwatering, underwatering, root stress, or natural aging. The location and pattern of yellowing can help identify the cause.